
Side Dishes
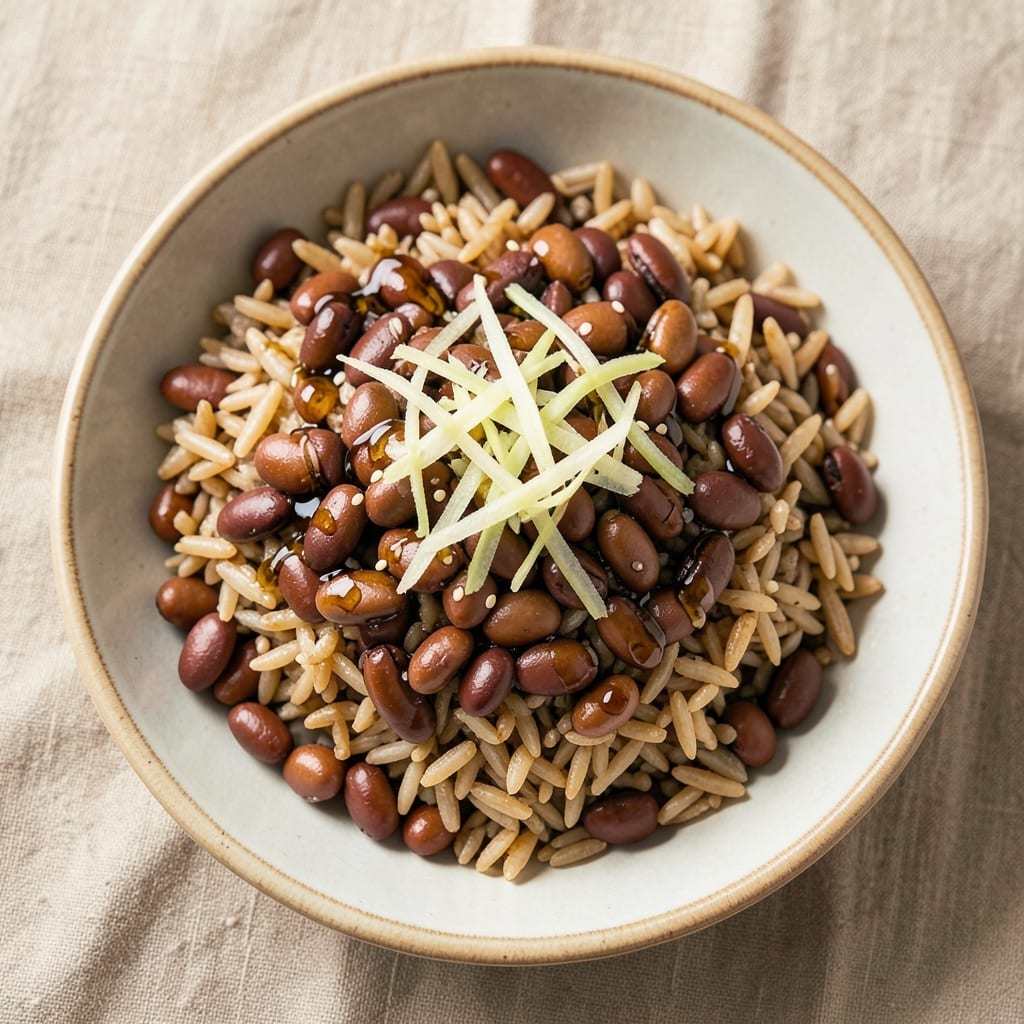
This adzuki beans and brown rice recipe delivers a perfectly balanced bowl of sweet-savory goodness that's packed with plant-based protein. The combination of earthy brown rice and naturally sweet adzuki beans creates a satisfying meal that's both comforting and nutritious. What makes this recipe special is its versatility—it works as a standalone dish or pairs beautifully with grilled proteins and fresh vegetables.
The foundation of this recipe lies in properly cooking both components separately before combining them. Brown rice requires a longer cooking time to achieve that ideal chewy texture, while adzuki beans soften beautifully with just the right amount of simmering. The key technique is balancing the flavors—just a touch of soy sauce and sesame oil enhances their natural sweetness without overpowering.
When everything comes together, you'll have a harmonious bowl where each bite delivers tender rice and creamy beans with subtle umami notes. The texture contrast alone makes this dish irresistible—chewy rice against the soft, slightly sticky beans creates a satisfying mouthfeel. For extra depth, consider adding a drizzle of miso glaze or sprinkle of toasted sesame seeds before serving.
This recipe serves as an excellent base for meal prep or a quick weeknight dinner. The ingredients are simple yet transformative, creating a dish that's both traditional and adaptable to modern tastes. Whether you're following a plant-based diet or simply looking for a wholesome meal, this combination delivers exceptional flavor and nutrition in every bite.
Ingredients for adzuki beans and brown rice
Earthy brown rice and sweet adzuki beans create a protein-rich bowl that's both comforting and nutritious.
| Ingredient | Amount | Notes |
|---|---|---|
| Adzuki Beans (Dried) 🌱 | 1 cup | Rinsed thoroughly before cooking |
| Long-Grain Brown Rice 🍚 | 1 cup | Uncooked, rinsed well |
| Water 💧 | 3 cups | Filtered preferred for flavor |
| Low-Sodium Soy Sauce 🍶 | 1 ½ tbsp | For umami depth |
| Sesame Oil (Toasted) 🫒 | 1 tbsp | For nutty aroma |
| Fresh Ginger (Peeled) 🧅 | 1 tbsp | Finely grated |
| Garlic Cloves 🧄 | 2 cloves | Minced for aromatic base |
| White Miso Paste 🍶 | 1 tbsp | For fermented richness |
| Toasted Sesame Seeds 🌿 | 1 tbsp | For garnish |
| Rice Vinegar 🍶 | 1 tsp | For subtle acidity |
| Diamond Crystal Kosher Salt 🧂 | ½ tsp | Adjust to taste |
| Vegetable Oil 🫒 | 1 tsp | For sautéing |
| Green Onion 🧅 | 2 whole | Sliced for garnish |
The adzuki beans are the heart of this dish—look for dried beans at specialty stores like Whole Foods or Asian markets for the best texture. San Joaquin brand is a reliable choice, but any high-quality dried adzuki works. Rinse them twice before cooking to remove any debris. For the brown rice, Lundberg Farms or Uncle Ben's are solid options, but any long-grain variety will work. The key is toasting the rice lightly in oil before adding water—this enhances the nutty flavor. Sesame oil should be toasted, not regular—it's worth the extra for that authentic aroma.
No sesame oil? Toasted peanut oil works in a pinch, though the flavor will differ slightly. Short on miso? White miso paste is essential here, but you can substitute soy sauce plus a pinch of sugar if needed. The ginger and garlic can be swapped for powdered versions at half the amount, though fresh is preferred. For extra depth, add a dash of chili flakes or sriracha to taste. The green onions and sesame seeds are purely for garnish—skip them if you're prepping ahead, as they're added at the end.
Cooked beans and rice keep beautifully in the fridge for up to 5 days in airtight containers. For longer storage, freeze portions for 3 months—just thaw overnight in the fridge. Reheat gently with a splash of water to maintain texture. Double the batch and portion into meal prep containers for easy lunches. The flavors actually improve after the first day as everything melds together. Store sesame oil in a cool, dark place to preserve its potency for up to 12 months after opening.
Why You'll Love This Recipe
- No-Fuss Simmer: I swear by this recipe because it’s basically set-and-forget. Soak the dried adzuki beans overnight, toss them with brown rice and water, then let them cook together in one pot—no chopping, no fussing. The beans soften while the rice absorbs the flavor, and honestly? That’s my kind of effortless dinner.
- Umami Magic: The combo of toasted sesame oil and low-sodium soy sauce transforms this into something ridiculously flavorful. The beans stay tender but hold their shape, and that nutty, slightly sweet edge from the soy? It’s like a little burst of Japanese comfort food in every bite.
- Meal Prep MVP: Between us, this is my go-to for busy weeks. Cook a big batch on Sunday—it reheats beautifully—and suddenly you’ve got lunch or dinner covered for days. My kids grab it for school lunches, and I eat it cold or warm. (Yes, even on a Tuesday night.)
- Budget-Friendly Staple: Dried beans and brown rice are about as affordable as it gets, and this recipe stretches them into a satisfying meal. I’ve made it for date nights, potlucks, and lazy Sundays—no one questions the ingredients, but they always ask for seconds. That’s the win.
Step-by-step instructions for adzuki beans and brown rice bowl
This method delivers perfectly balanced texture and flavor through precise timing and technique.
Prepare the Beans and Rice for Cooking
Rinse the 1 cup of dried adzuki beans thoroughly under cold water until the water runs clear. Soak them in a bowl of fresh water for at least 4 hours or overnight—this dramatically reduces cooking time and prevents them from splitting open during cooking. For the 1 cup of long-grain brown rice, rinse it separately under cold water until the water remains clear, then drain well.
Place both the soaked beans and rinsed rice in separate pots. For the beans, add 3 cups of fresh water and bring to a boil. Immediately reduce heat to low and simmer for 45 minutes, then add another 1 cup of water. The beans are ready when they're tender but still hold their shape—this should take about 1 hour 15 minutes total. For the rice, use the same 3 cups of water ratio and simmer uncovered for 35-40 minutes until tender but still slightly firm to the bite.
Build the Sweet-Savory Sauce Base
Heat 1 teaspoon of vegetable oil in a small saucepan over medium heat. Add the 2 minced garlic cloves and 1 tablespoon of finely grated fresh ginger, cooking for 30 seconds until fragrant but not browned. Add the 1 tablespoon of white miso paste and stir constantly for 1 minute until it dissolves completely into the oil.
Pour in the 1.5 tablespoons of low-sodium soy sauce and 1 teaspoon of rice vinegar, then reduce heat to low. Stir in the 1 tablespoon of toasted sesame oil and let the mixture simmer gently for 3 minutes until the flavors meld together. Remove from heat and set aside—this sauce will develop more depth as it cools slightly.
Create the Aromatic Garnish and Final Assembly
Slice the 2 whole green onions into thin rounds, separating the white and green portions. In a small bowl, combine the white portions with 1 tablespoon of toasted sesame seeds and set aside. For the garnish, finely chop just the green portions of the onions and keep them separate.
Drain both the cooked beans and rice, then combine them in a large serving bowl. Pour the prepared sauce over the top and gently toss until everything is evenly coated. The beans should absorb the sauce while maintaining their texture, and the rice should pick up the sweet-savory notes without becoming mushy.
Finish with Fresh Elements and Garnish
Taste the mixture and adjust seasoning with the 0.5 teaspoon of diamond crystal kosher salt if needed. The dish should balance sweetness from the beans, umami from the miso and soy sauce, and a subtle acidity from the rice vinegar.
To serve, divide the bean and rice mixture among bowls. Top each serving with the reserved green onion and sesame seed mixture, then sprinkle with the finely chopped green onion portions. The contrast between the warm, hearty base and fresh garnish creates a perfect balance of textures and temperatures.
Pro Tips For Making Adzuki Beans And Brown Rice
- SOAK BEANS OVERNIGHT: Dried adzuki beans cook faster and stay tender if soaked 8–12 hours first. I used to rush this and end up with split skins—don’t skip it, even if you’re short on time.
- COOK RICE IN SOY SAUCE: Add 1–2 tablespoons of low-sodium soy sauce to the brown rice water while cooking—it infuses flavor without overpowering. I tried adding it later and it never tasted the same.
- DON’T OVERCOOK BEANS: Adzuki beans turn mushy fast once tender. Test one at 30 minutes, then cook 5–10 more minutes max. I’ve ruined batches by ignoring this—check early and often.
- FINISH WITH SESAME OIL: Drizzle toasted sesame oil over the finished dish right before serving. It adds aroma and richness without needing to heat it. (Yes, even a few drops make a difference.)
Regional styles of these flavors
Japanese Sweet Bean Tradition
This dish finds its roots in Japan's ankake tradition, where adzuki beans are simmered with sugar to create a sweet-savory paste. While we're using dried beans here, the same principle applies—the natural sweetness of adzuki beans shines when paired with umami-rich ingredients like miso and soy sauce. In Japan, this combination is often served during New Year celebrations as a symbol of prosperity and good fortune. 🌱
Korean Kimchi-Inspired Twist
For a Korean-inspired variation, add 1 tablespoon of gochujang (Korean chili paste) to the sauce base and top with quick-pickled radishes. The spicy-sweet contrast creates a bold, tangy profile that's perfect for those who love heat. I like using Mae Mun brand gochujang for its balanced sweetness and depth. This version works beautifully as a meal-prep staple due to its long shelf life.
Thai-Inspired Coconut Version
Transform this dish into a Thai-inspired bowl by swapping the soy sauce for 1 tablespoon of coconut aminos and adding ½ cup of light coconut milk to the sauce. Stir in 1 teaspoon of fish sauce (or soy sauce for vegan) and 1 teaspoon of palm sugar for a tropical twist. Garnish with toasted coconut flakes and lime wedges—this version pairs perfectly with grilled tofu or shrimp. 🥥
Mexican-Inspired Spiced Bowl
Give it a Mexican flair by sautéing the garlic and ginger with 1 teaspoon of ground cumin and ½ teaspoon of smoked paprika before adding the miso. Swap the rice vinegar for 1 teaspoon of lime juice and add ½ teaspoon of chili powder to the sauce. Top with avocado slices and cilantro for a bright, zesty dish that's perfect for lunch or dinner. This version is a game-changer for spice lovers!
Western-Inspired Herb Version
For a Western twist, skip the miso and instead add 1 teaspoon of dried thyme and ½ teaspoon of rosemary to the sauce. Use white wine vinegar instead of rice vinegar and finish with fresh parsley and lemon zest. This version has a herbaceous, Mediterranean vibe that pairs wonderfully with roasted vegetables or grilled chicken. It's a great way to introduce this dish to those who prefer familiar flavors.
Nutrition facts
Frequently asked questions
Why soak the adzuki beans before cooking?
Soaking reduces cooking time by 30-40% and prevents beans from splitting open, which keeps them tender and intact. For best results, soak for at least 4 hours or overnight in plenty of water. Drain and rinse before cooking to remove any excess starch that could make the beans gummy.
Can I use canned adzuki beans instead of dried?
Yes, but with adjustments! Use 1 (15 oz) can of drained beans and reduce the cooking time by 45 minutes. Add the beans directly to the simmering pot with 1 cup of water and cook for just 10 minutes to warm through. For better texture, rinse canned beans before using to remove excess sodium.
How do I fix mushy brown rice?
Mushy rice happens when overcooked. If your rice is too soft, try this: Spread it on a baking sheet and bake at 350°F for 10-15 minutes to dry it out slightly. For future batches, use 1 cup water to 1 cup rice and cook uncovered for 35-40 minutes—the rice should be tender but still slightly firm.
What's the best way to store leftovers?
Store in an airtight container in the fridge for up to 5 days. For longer storage, freeze portions for 3 months. To reheat, add a splash of water and microwave on low power to preserve texture. The flavors actually improve after the first day as everything melds together!
Can I make this gluten-free?
Replace the soy sauce with tamari or coconut aminos and ensure your miso paste is gluten-free. Check labels on all ingredients—many brands offer gluten-free alternatives. The dish maintains its delicious flavor while becoming completely safe for gluten-sensitive diets.