
Main Courses
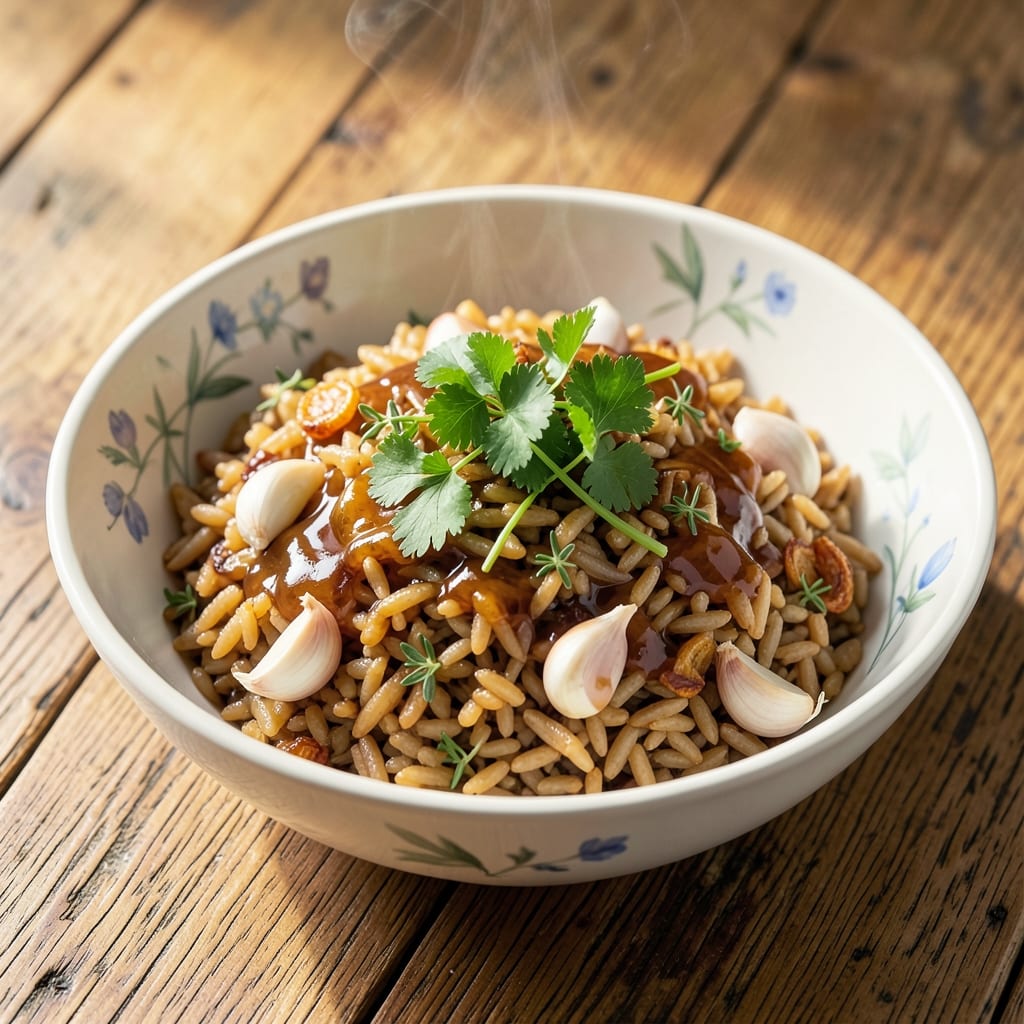
This amazing brown rice recipe transforms simple grains into a flavor-packed side that steals the show at every meal. 💛 The secret? Toasting the rice in butter until nutty and golden, then infusing it with garlic, herbs, and a splash of broth for depth that turns bland rice into a star dish. I perfected this after years of struggling with mushy, flavorless brown rice—now it’s crispy on the edges, tender inside, and packed with aromatic richness.
What makes this recipe special is how it balances texture and flavor without extra effort. You’ll start with toasted brown rice—the key to unlocking nutty, caramelized notes that elevate the dish instantly. Then, a simple garlic-herb broth infusion works its magic while the rice simmers, creating layers of savory complexity that make this rice worth making from scratch. It’s the kind of side that turns a simple dinner into something memorable.
By the time you’re done, you’ll have perfectly seasoned brown rice with crispy edges, tender grains, and an aroma that fills your kitchen. The garlic and herbs mingle beautifully with the rice’s natural nuttiness, creating a dish that’s hearty enough to stand alone or pair perfectly with roasted meats, grilled fish, or even a simple stir-fry. No more boring brown rice—just restaurant-quality flavor in one pot.
This recipe is also foolproof—no fancy techniques, just a few simple steps that guarantee great results every time. Whether you’re meal prepping for the week or whipping up a last-minute side, this brown rice will be the highlight of your plate. Let’s get cooking!
Ingredients for amazing brown rice
Toasted butter, garlic, and herbs transform bland brown rice into a flavorful star side.
| Ingredient | Amount | Notes |
|---|---|---|
| Long-Grain Brown Rice 🌾 | 1 ½ cups | Uncooked, rinsed well |
| Unsalted Butter 🧈 | 3 tbsp | Cold, cubed for toasting |
| Garlic Cloves 🧄 | 4 cloves | Minced, fresh preferred |
| Fresh Parsley 🌿 | ¼ cup | Chopped, stems removed |
| Fresh Thyme Leaves 🌿 | 1 tbsp | Or 1 tsp dried thyme |
| Vegetable Broth 💧 | 2 cups | Low-sodium preferred |
| Bay Leaves 🍃 | 2 whole | Removed before serving |
| Salt 🧂 | 1 ½ tsp | Kosher or sea salt |
| Black Pepper 🌶️ | ½ tsp | Freshly ground preferred |
| Lemon Zest 🍋 | 1 tsp | Fresh lemon, finely grated |
| Extra-Virgin Olive Oil 🫒 | 1 tbsp | For finishing drizzle |
The brown rice makes all the difference here. Lundberg or Uncle Ben's are my go-tos—they stay firm and hold up to toasting. If you're using a different brand, check the package for cooking times. The butter needs to be cold when you add it, so pull it out of the fridge just before toasting. European-style butter has a higher fat content, which gives you better browning. For the garlic, I always use fresh—it makes a noticeable difference in flavor. If you're short on time, pre-minced garlic from the jar works, but fresh is worth the extra minute.
No fresh parsley? Fresh cilantro or basil works in a pinch, though the flavor will be different. Dried thyme is fine, but use about one-third the amount of fresh. For the broth, low-sodium options like Pacific Foods are perfect—they let you control the saltiness. If you're out of vegetable broth, chicken broth works too, but keep it unsalted. The bay leaves are non-negotiable for that subtle depth, but if you're in a rush, skip them—the dish will still be delicious. For the lemon zest, make sure you're only using the outer layer, not the bitter white pith.
This rice reheats beautifully—just add a splash of water or broth and cover while warming. Keeps in the fridge for 5-6 days in an airtight container, though it's best within the first 3 days. For longer storage, freeze portions for up to 3 months. I like to portion it into meal prep containers right after cooking so it's ready to grab and go. The olive oil drizzle at the end adds a nice finishing touch, but it's optional if you're watching calories.
Why You'll Love This Recipe
- One-Pot Magic: I swear by this method—just rice, butter, and aromatics in one pot. No measuring cups flying, no separate pans to scrub. Honestly, I’ve made it while scrolling through my phone.
- Garlic Butter Bliss: That moment when the butter melts into the rice, coating every grain with garlic and thyme? Pure satisfaction. It’s rich but not heavy—like a hug for your taste buds.
- Meal Prep MVP: Between us, this rice keeps for days in the fridge. Toss it with roasted veggies on Wednesday, stir into a stir-fry on Friday, or serve cold in salads. My lunchbox’s new best friend.
- Budget-Friendly Luxury: Brown rice is cheap, butter makes it feel fancy, and a handful of herbs stretch the flavor. I’ll be real: it’s the kind of dish where I serve it to guests and they assume I slaved over it. (Spoiler: I didn’t.)
Step-by-step instructions for nutty toasted brown rice
Transform simple brown rice into restaurant-quality side dish with this foolproof method.
🔥 Step 1: Toast the Butter and Rice for Maximum Flavor
Heat a large skillet or pot over medium heat and add the 3 tbsp unsalted butter, cut into small cubes. Let it melt completely, then add the 1.5 cups long-grain brown rice and stir constantly for 3-4 minutes until the rice grains turn a beautiful golden brown.
This toasting step is where the magic happens—it develops that nutty, toasted flavor that separates good brown rice from amazing brown rice. You'll know it's ready when the rice smells deeply aromatic and the butter has completely coated each grain. Don't rush this step; patience here makes all the difference.
🍳 Step 2: Sauté Aromatics Until Fragrant
Add the 4 cloves minced garlic to the skillet and cook for 30 seconds until fragrant but not browned. Immediately add the 1 tbsp fresh thyme leaves, 1.5 tsp salt, and 0.5 tsp black pepper, stirring to combine. The garlic should sizzle gently—this is your signal to add the liquid ingredients next.
Here's the thing—cooking garlic too long makes it bitter. You want just a hint of aroma, not overpowering flavor. The thyme and pepper will infuse into the rice as it cooks, creating layers of flavor that make this dish truly special. Stir everything together for another 30 seconds before adding the broth.
🥘 Step 3: Simmer with Broth and Herbs
Pour in the 2 cups vegetable broth and add the 2 whole bay leaves. Bring to a gentle boil, then immediately reduce heat to low and cover tightly with a lid. Let it simmer for 40 minutes without peeking—this is crucial for even cooking and preventing the rice from drying out.
I know it's tempting to check on your rice, but every time you lift the lid, you release steam and add 5-10 minutes to your cooking time. Set a timer and let it work its magic. After 40 minutes, the rice should be tender but still have a slight bite—this is perfect for brown rice.
🍋 Step 4: Finish with Bright Herbs and Citrus
Once the rice is tender, remove it from heat and let it sit covered for 5 minutes. Then stir in the 0.25 cup chopped fresh parsley and 1 tsp lemon zest. Drizzle with the 1 tbsp extra-virgin olive oil and toss gently to combine. The parsley adds freshness, while the lemon zest brightens all the rich, nutty flavors.
This is where the dish comes together as something truly special. The lemon zest cuts through the richness of the butter and brown rice, while the parsley adds a pop of color and freshness. The olive oil drizzle gives it that final luxurious touch that makes it feel like a restaurant-quality side dish.
⏰ Step 5: Rest and Serve with Perfect Texture
Let the rice rest for 5-10 minutes before serving. This resting period allows the rice to absorb any remaining liquid and develop its final texture. Fluff gently with a fork, then taste and adjust seasoning if needed—you might want to add a pinch more salt or a squeeze of lemon.
Serve immediately while still warm. Each bite should deliver that perfect combination of nutty toasted rice, garlic aroma, fresh herbs, and bright citrus. This rice pairs beautifully with grilled meats, roasted vegetables, or even as a base for grain bowls. The secret to its amazing quality lies in those simple techniques—proper toasting, careful seasoning, and letting it rest.
Pro Tips For Making Amazing Brown Rice
- TOAST THE GRAINS FIRST: Brown rice cooks faster and tastes nuttier when you dry-toast it in the pot for 2-3 minutes before adding liquid—just until you smell that toasty aroma. I used to skip this, but now I never go back; it’s the difference between bland and actually delicious.
- SMASH THE GARLIC: Mince those garlic cloves fine—no big chunks hiding in your rice. After cooking, press the garlic into the butter with a spoon until it’s nearly a paste; this releases more flavor and prevents it from sitting as hard bits. (Yes, I’ve found them before—don’t be that person.)
- DON’T SKIP THE REST: Let the rice sit off the heat, covered, for at least 5 minutes after it’s done. The steam finishes cooking the grains evenly and keeps them from turning mushy when you stir in the butter and herbs. I know, you’re eager to eat it—wait.
- UPGRADE WITH LEFTOVER BUTTER: Use the browned, flavor-packed butter from your last roast chicken or garlic sauté instead of plain unsalted. The extra depth of caramelized bits turns your rice from good to showstopper. (Pro move: Save that butter in the freezer for this exact purpose.)
Pro cooking tips for amazing brown rice
Toast Like a Pro
Never skip the toasting step—this is where the flavor magic happens! Use a large heavy-bottomed pot (I love my All-Clad stainless steel) to ensure even heat distribution. Toast the 1.5 cups brown rice in 3 tbsp cold butter over medium heat for exactly 3-4 minutes, stirring constantly. The rice should turn golden brown and smell deeply nutty. If it browns too quickly, reduce heat to medium-low—burnt rice means bitter flavor. 🔥
Garlic Timing Matters
Add the 4 cloves minced garlic immediately after toasting the rice—this prevents burning. Cook for exactly 30 seconds until fragrant but not browned. Overcooking garlic turns it bitter, and that ruins the delicate balance of flavors in this dish. I like to use a microplane for garlic to get fine, even mincing that distributes flavor perfectly. 🧄
Broth Ratio Precision
Use a 1:2 rice-to-broth ratio for perfect texture—1.5 cups rice to 2 cups broth. The broth should just cover the rice when poured in. For extra depth, I add 2 whole bay leaves and a pinch of sugar (just ¼ tsp) to balance any bitterness in the broth. Simmer on low heat with the lid tightly sealed to trap steam and prevent drying. 💧
Resting Prevents Dryness
After cooking, let the rice rest covered for 5 minutes before fluffing. This resting period allows residual steam to redistribute moisture evenly. I often find people skip this step and end up with dry rice. For best results, use a wooden spoon to gently fluff—metal spoons can crush the grains. 🍚
Herb Freshness Check
Fresh herbs make all the difference! Use ¼ cup chopped parsley and 1 tbsp fresh thyme (not dried) for maximum flavor impact. If using dried herbs, reduce to ⅓ the amount—they're more concentrated. For extra brightness, add 1 tsp lemon zest right before serving. The zest should be finely grated to avoid texture issues. ✨
Finishing Oil Technique
Drizzle the 1 tbsp extra-virgin olive oil over the rice just before serving. Use a light hand—too much will make the rice greasy. I like to toss gently with a fork to distribute the oil evenly. This step adds richness that balances the bright lemon and fresh herbs. For a restaurant touch, add a sprinkle of flaky sea salt on top. 🫒
Nutrition facts
Frequently asked questions
Why does toasting the rice make it taste better?
Toasted brown rice develops deep, nutty flavors that plain rice lacks. The 3-4 minutes of toasting in butter creates a Maillard reaction, caramelizing the grains and enhancing their natural taste. This step transforms bland rice into something aromatic and complex—like a flavor upgrade!
Can I use short-grain brown rice instead?
Short-grain brown rice works but will be stickier and less firm than long-grain. For this recipe, stick with long-grain brown rice (like Lundberg) to maintain the perfect texture. If you must use short-grain, reduce broth by ¼ cup and cook for 5-7 minutes less.
How do I prevent the rice from getting mushy?
Never lift the lid while cooking—steam escape makes rice gummy! Use low heat and maintain a tight seal. Also, avoid overcooking: 40 minutes is perfect for brown rice. If it's still firm, add 2 tbsp broth and cook 5 more minutes covered.
What are the best proteins to pair with this rice?
This aromatic rice pairs beautifully with grilled chicken thighs, roasted salmon, or shrimp skewers. The nutty, herby flavors complement rich meats while balancing lighter proteins like tofu. For a complete meal, add roasted veggies or a simple salad.
Can I make this in a rice cooker?
Yes! Toast the rice and butter in a skillet first, then transfer everything to your rice cooker with 2 cups broth. Use the "brown rice" setting if available, or cook on high for 45 minutes. Skip the resting time—the cooker handles it automatically.