
Soups & Stews
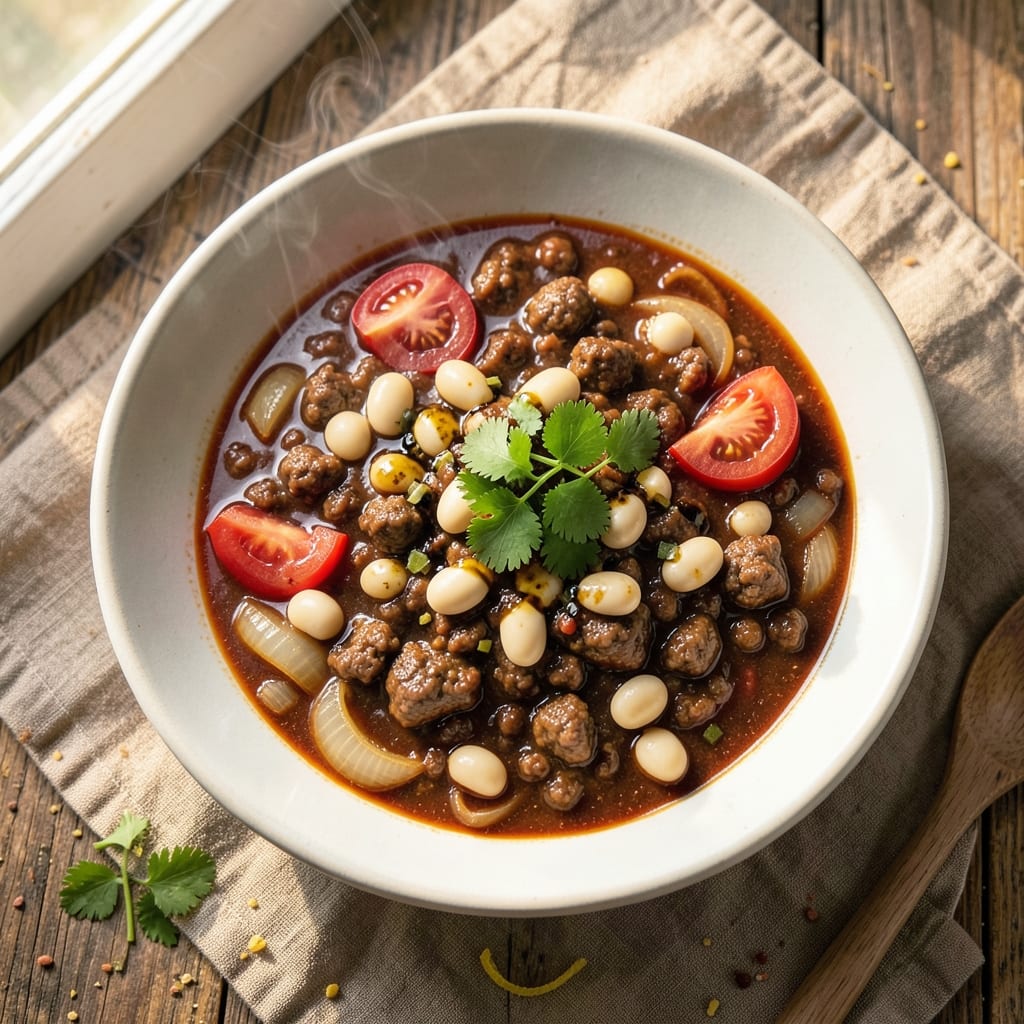
This Aroma rice cooker chili recipe turns weeknight dinners into hearty, one-pot comfort with minimal effort. The rice cooker’s built-in pressure function transforms tough cuts of meat and simple ingredients into rich, flavorful chili in just 30 minutes—no stove or oven required. Perfect for busy evenings, this recipe delivers restaurant-quality depth with minimal cleanup.
The secret lies in the rice cooker’s ability to slow-cook beans, ground meat, and spices until tender while developing a deep, aromatic base. A blend of cumin, chili powder, and garlic creates layers of warmth, while tomatoes and broth keep it moist and hearty. Serve with crusty bread or over rice for the ultimate hands-off meal that feels like a hug in a bowl.
Ingredients for aroma rice cooker chili
Simple ingredients that transform into restaurant-quality chili in your rice cooker.
| Ingredient | Amount | Notes |
|---|---|---|
| Ground Beef 🥩 | 1 lb | 80/20 fat ratio preferred |
| Dried Kidney Beans 🌾 | 1 cup | Soaked overnight or canned |
| Chicken Broth 💧 | 2 cups | Low-sodium preferred |
| Diced Tomatoes 🍅 | 14 ½ oz | Canned, fire-roasted preferred |
| Yellow Onion 🧅 | 1 whole | Medium size, diced |
| Garlic Cloves 🧄 | 3 cloves | Minced for depth |
| Chili Powder 🌶️ | 2 tbsp | For authentic heat |
| Ground Cumin 🌿 | 1 tbsp | Toasted for warmth |
| Salt 🧂 | 1 tsp | Kosher or sea salt |
| Black Pepper 🌶️ | ½ tsp | Freshly ground preferred |
| Olive Oil 🫒 | 1 tbsp | For browning meat |
| Bay Leaf 🍃 | 1 whole | Remove before serving |
| Cumin Seeds 🌿 | ½ tsp | Optional for extra aroma |
The ground beef is the foundation—80/20 fat ratio gives the best flavor and texture. Kroger or Costco usually carry the right blend, but any supermarket will have it. For the beans, dried are ideal (soak overnight), but canned kidney beans save time. The fire-roasted diced tomatoes add smoky depth—Muir Glen is a reliable brand. Onions and garlic should be fresh; yellow onions from the grocery store's produce section work best. Toast the cumin seeds in a dry pan for 30 seconds before adding to release their aroma—trust me on this—it makes a difference.
No ground beef? Ground turkey or lentils work in a pinch, though flavor will differ slightly. Swap canned tomatoes for tomato paste (2 tbsp) + 1 cup water if you're out. Fresh cumin seeds unavailable? Ground cumin at the same amount is fine. The bay leaf is non-negotiable—it adds subtle earthiness that jarred chili mixes miss. For extra richness, stir in 1 tbsp of cocoa powder at the end (it deepens the chili flavor without adding sweetness). The olive oil is just for browning—don’t skimp, but don’t overdo it either.
This chili reheats beautifully—actually tastes better the next day as flavors meld. Store in an airtight container for 4-5 days in the fridge or 3 months in the freezer. Portion into single-serving containers for easy lunches. The rice cooker’s pressure function keeps everything moist, so no extra liquid is needed. If you're using dried beans, soak them overnight—this cuts cooking time significantly. For a smoky touch, add 1/4 tsp of smoked paprika when serving.
Why You'll Love This Recipe
- Set-and-Forget Magic: I dump everything in the rice cooker—beef, beans, broth, tomatoes—and walk away. No stirring, no stress, just perfect chili when I get back. The aroma alone makes my kitchen smell like a cozy diner.
- Deep Umami Bomb: That ground beef browns right in the rice cooker, locking in flavor while the kidney beans soak up the juices. The onion caramelizes just enough to make every bite taste richer than takeout chili.
- Weeknight Workhorse: It feeds my family of four (or two hungry teens) without breaking the bank. Double the batch, freeze half—now I’ve got a backup meal for lazy Mondays or unexpected guests.
- Budget-Friendly Powerhouse: Dried beans and chicken broth stretch this recipe into four servings for pennies. I’ve made it for game nights, sick-day dinners, and even potlucks—always the first to disappear.
Step-by-step instructions for rice cooker chili
This one-pot method transforms simple ingredients into hearty chili with minimal effort.
Sauté the Aromatics and Brown the Beef
Heat the 1 tablespoon olive oil in the rice cooker's inner pot over medium-high heat. Add the 1 whole yellow onion, diced, and cook for 3-4 minutes until softened and translucent. Add the 3 cloves garlic cloves, minced, and the 0.5 teaspoon cumin seeds (if using), cooking for 30 seconds until fragrant.
Push the onions and garlic to one side of the pot and add the 1 pound ground beef. Cook for 5-6 minutes, breaking it apart with a wooden spoon, until it loses its raw color and begins to brown. This step develops deep flavor through the Maillard reaction. If the pot gets too dry, add 1 tablespoon chicken broth to prevent sticking.
Build the Chili Base with Spices and Tomatoes
Reduce heat to medium and stir in the 2 tablespoons chili powder, 1 tablespoon ground cumin, 1 teaspoon salt, and 0.5 teaspoon black pepper. Cook for 1 minute until the spices are toasted and aromatic. Add the 14.5 ounces diced tomatoes (with juices) and stir well to combine.
Let the mixture simmer for 2-3 minutes until the tomatoes begin to break down and the sauce thickens slightly. This step ensures the spices meld with the tomatoes, creating a flavorful base. The tomatoes will release their juices, which helps create the chili's signature texture.
Add Beans and Broth for Simmering
Add the 1 cup dried kidney beans (if using dried) and the 2 cups chicken broth to the pot. Stir in the 1 whole bay leaf and bring the mixture to a gentle boil. Once boiling, reduce heat to low and cover the pot with the rice cooker's lid.
Cook for 20-25 minutes on the rice cooker's "soup" or "stew" setting, stirring occasionally to prevent the beans from sticking to the bottom. If using canned beans, add them now and reduce cooking time to 15 minutes. The beans should be tender but not mushy, and the chili should thicken as it simmers.
Adjust Seasoning and Finish Cooking
After cooking, remove the bay leaf and taste the chili. Adjust seasoning with additional salt or chili powder if needed. If the chili is too thick, add 1-2 tablespoons water or broth to reach your desired consistency. The chili should be thick enough to coat the back of a spoon but still spoonable.
Let the chili rest for 5 minutes before serving. This allows the flavors to meld and the chili to thicken slightly. Serve hot with toppings like shredded cheese, sour cream, or fresh cilantro if desired. The rice cooker's even heat ensures a perfectly cooked, flavorful one-pot meal every time.
Pro Tips For Making Aroma Rice Cooker Chili
- Brown the Beef Properly: I learned this the hard way—skipping a good sear means your chili will taste raw and bland. Cook the ground beef until it’s actually brown, not just pink, breaking it apart with a spoon so every piece gets color. That’s where the flavor hides, and rice cookers won’t fix undercooked meat.
- Soak Beans for 2 Hours: Dried kidney beans soak up liquid like sponges, and cutting the soak short means they’ll turn to mush in your chili. Give them at least 2 hours in warm water (no boiling—it toughens them), then drain before adding to the pot. Trust me, your texture will thank you.
- Add Onions First, Last: Sauté the onions until they’re soft and translucent before dumping everything in the rice cooker, but hold off on the tomatoes until the very end. Cooking them too early makes the chili taste canned and watery—save them for the final 10 minutes to keep their brightness.
- Use Extra Broth, Then Reduce: Rice cookers love moisture, so start with 1.5x the broth called for and let it reduce naturally during cooking. If it looks dry midway, add a splash of water—just don’t overdo it, or your chili will turn into soup. (Yes, I’ve done that too.)
Perfect pairings for these flavors
Crusty Bread Pairing
There’s nothing better than serving this rice cooker chili with warm, crusty bread to soak up every last drop of that rich, spiced sauce. I recommend a sourdough loaf from your local bakery—its tangy flavor complements the chili beautifully. For extra convenience, grab a French baguette from Trader Joe’s or a ciabatta roll from Whole Foods. Toast it lightly in the oven or air fryer for 3-5 minutes at 375°F to enhance its crunch. 🥖
Sharp Cheddar Topping
Elevate your chili with a sprinkle of sharp cheddar cheese—its bold, tangy flavor cuts through the richness. I love using Cabot Clothbound Cheddar or Parmigiano-Reggiano for a more sophisticated touch. Shred about ¼ cup and melt it directly on top of the chili in the last 2 minutes of reheating. For a smoky twist, swap in smoked Gouda or pepper jack instead. 🧀
Cool Sour Cream Swirl
A dollop of full-fat sour cream adds a creamy contrast to the spicy chili. I keep a tub of Kroger brand sour cream in my fridge for its tangy richness. Stir in 2 tablespoons at the end or serve it on the side for dipping. For extra flair, mix in ½ teaspoon of lime zest or a pinch of smoked paprika before serving. This balances the heat while adding a refreshing finish. 🥄
Cilantro-Lime Garnish
Brighten the chili with a burst of freshness using cilantro and lime. Finely chop 2 tablespoons of cilantro and zest 1 lime, then mix with a squeeze of lime juice. Sprinkle over the chili just before serving—this adds a citrusy zing that makes the dish feel vibrant and fresh. If you’re not a cilantro fan, green onions or parsley work just as well. 🍋
Spicy Tortilla Chips
For a fun, interactive element, serve your chili with tortilla chips on the side. I love Fritos or Mission brand for their crispy texture. Toss them with ½ teaspoon of chili powder and a pinch of cayenne pepper before serving. This adds a crunchy contrast and lets everyone customize their bowl. It’s especially great for game day or family gatherings! 🌶️
Side Salad Balance
A simple arugula salad with a lemon vinaigrette cleanses your palate between bites of rich chili. Toss 4 cups baby arugula with 2 tablespoons olive oil, 1 tablespoon lemon juice, and a pinch of salt. Add ¼ cup crumbled feta cheese for extra depth. The peppery greens and bright citrus make this the perfect light counterpoint to the hearty chili. 🥗
Nutrition facts
Frequently asked questions
Can I use canned beans instead of dried? Yes! Canned beans save time and work perfectly in this recipe. Use 1 can (15 oz) of drained kidney beans instead of the 1 cup dried. Add them with the broth and reduce the cooking time to 15 minutes—no need to soak. Just
Why does my chili taste bland after cooking?
Bland chili often means the spices weren’t toasted enough or the flavors didn’t meld. Always cook the spices (cumin, chili powder) for 1 minute in the oil before adding tomatoes. Let the chili rest for 5 minutes after cooking—this helps flavors deepen. For extra punch, stir in ½ tsp smoked paprika or a pinch of cayenne at the end.
Can I make this chili in a regular rice cooker without pressure?
Regular rice cookers work great—just extend the cooking time to 30-35 minutes on the "soup" setting. Stir occasionally to prevent sticking, and add ¼ cup extra broth if it gets too thick. The even heat ensures tender beans and fully cooked meat, just like pressure cooking.
What’s the best way to reheat leftovers?
Reheat in the rice cooker on the "soup" setting for 10-12 minutes—this keeps the texture perfect. Avoid microwaving unless necessary (it can make the chili watery). For extra richness, stir in 1 tbsp broth or water before reheating. Leftovers actually taste better the next day as flavors meld!
Can I substitute ground turkey or lentils for beef?
Yes, but expect a different texture! Ground turkey works well (use 1 lb lean), but it’s leaner—add 1 tsp olive oil to prevent drying. For lentils, swap 1 cup dried kidney beans for 1 cup brown lentils (cook for 20 minutes** only). The flavor will be more earthy but just as hearty.