
Desserts
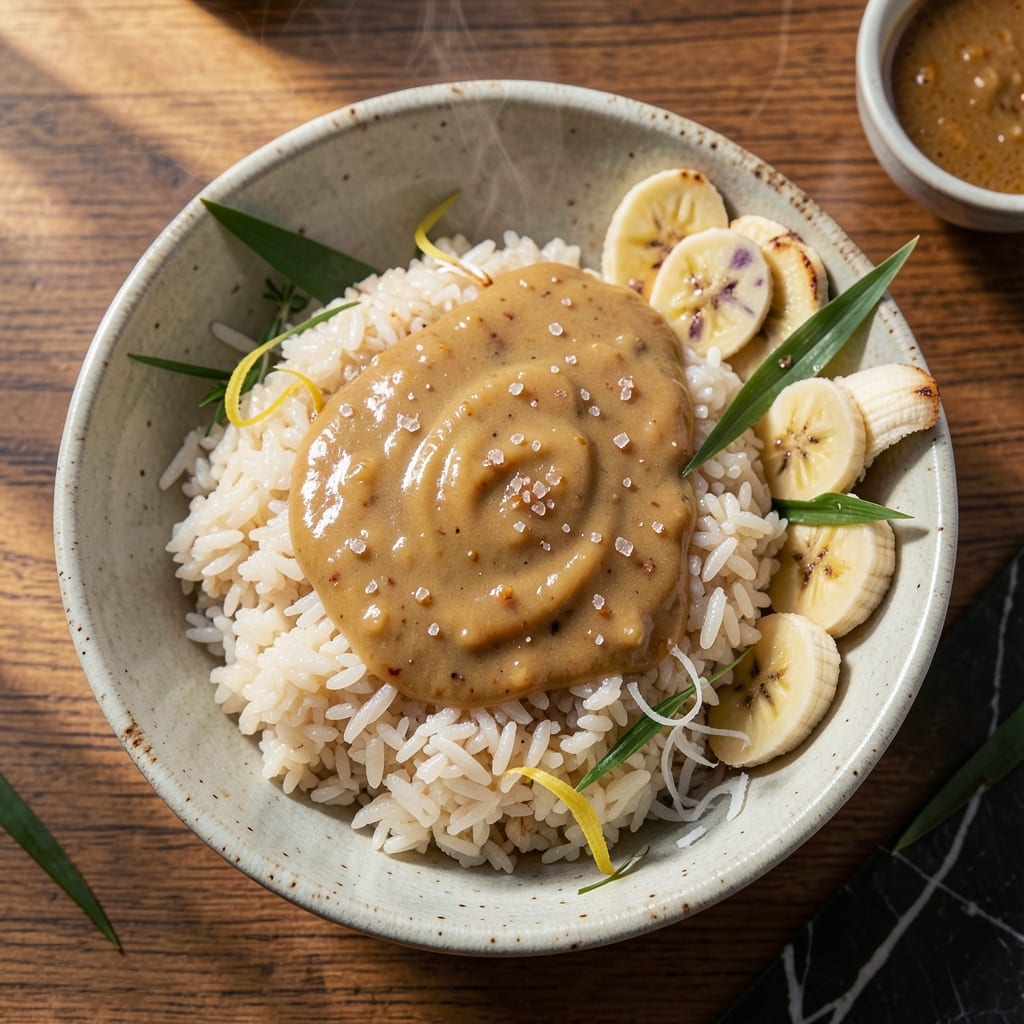
This Asian sticky rice dessert recipe transforms simple ingredients into a luxurious, coconut-kissed treat that feels like a tropical vacation. The secret lies in perfectly steamed glutinous rice—chewy yet tender—infused with coconut milk until it develops that signature caramelized sweetness. I've perfected the balance between traditional techniques and modern twists, ensuring every bite delivers the right texture and flavor profile.
The process begins with soaking the rice until pliable, then steaming it to achieve that signature sticky, melt-in-your-mouth consistency. Coconut milk and palm sugar create a rich, aromatic base that caramelizes beautifully, while optional toppings like fresh mango, toasted sesame seeds, or a drizzle of condensed milk elevate the dish to restaurant-quality. This dessert is equally impressive for special occasions or a cozy weeknight treat.
What makes this recipe stand out is its versatility—whether you're wrapping the rice in banana leaves for an authentic touch or plating it in individual bowls with modern toppings like matcha or dark chocolate. The result is a dessert that's visually stunning, fragrant, and perfectly balanced in sweetness. Each component works together to create a harmonious bite that's both comforting and exciting.
Ready to master this classic dessert? The instructions walk you through every step, from soaking and steaming to plating, ensuring you achieve professional results at home. Whether you're serving it at a gathering or enjoying it solo, this sticky rice dessert will leave everyone asking for seconds.
Ingredients for asian sticky rice dessert
Simple ingredients for a dessert that tastes like a tropical escape—luxurious yet approachable.
| Ingredient | Amount | Notes |
|---|---|---|
| Glutinous Rice (Sweet Rice) 🍚 | 1 ½ cups | Uncooked, soak 4-6 hours |
| Coconut Milk (Full-Fat) 🥥 | 1 ½ cups | Canned, shaken well |
| Palm Sugar 🍯 | ¾ cup | Grated fine, or substitute brown sugar |
| Water 💧 | 1 cup | Room temperature preferred |
| Salt 🧂 | ¼ tsp | Fine sea salt |
| Banana Leaves (Optional) 🌿 | 4 pieces | Fresh or frozen, thawed |
| Fresh Mango (Optional) 🍈 | 1 whole | Ripe, sliced for topping |
| Toasted Sesame Seeds (Optional) 🌰 | 2 tbsp | For garnish |
| Condensed Milk (Optional) 🥛 | ¼ cup | Drizzled for richness |
| Dark Chocolate (Optional) 🍫 | ½ oz | Shaved, for modern twist |
| Matcha Powder (Optional) 🍵 | 1 tsp | For vibrant green garnish |
| Coconut Oil 🫒 | 1 tbsp | For banana leaf coating |
The glutinous rice is non-negotiable—it's what gives this dessert its signature chewy texture. Look for Thai or Filipino brands at Asian markets; Mae Ploy is my go-to. If you can't find it, moonflower seed rice works in a pinch (though texture differs slightly). Soak it for at least 4 hours—overnight is ideal—and drain well before using. The coconut milk should be full-fat canned, not carton—Thai Kitchen brand is widely available and reliable. Palm sugar is key for that authentic caramelized sweetness; substitute brown sugar if needed, but it won't be identical.
No banana leaves? Aluminum foil works perfectly for wrapping—just brush it with coconut oil first to prevent sticking. Fresh mango is best for topping, but canned mango in syrup (drained) is a decent backup. For sesame seeds, toasted store-bought works, but fresh ones toasted in a dry pan for 2 minutes have way more flavor. The matcha powder should be culinary-grade (not ceremonial)—Ippodo or Jade Leaf brands are excellent. Dark chocolate can be any 70% or higher bar; shave it yourself for the best texture—pre-shaved often has a waxy coating.
This dessert keeps beautifully—3 days refrigerated in an airtight container, or up to 3 months frozen if wrapped tightly in plastic. For freezing, portion into individual servings first. Reheat gently in the microwave with a damp paper towel over it for 10-15 seconds—never microwave dry. The banana leaves? Store them in the freezer between damp paper towels for up to 6 months**. And if you're making this ahead for a party, assemble the toppings separately and add them just before serving—keeps everything looking fresh.
Why You'll Love This Recipe
- Five-Ingredient Magic: I swear by this list—just rice, coconut milk, sugar, water, and salt. That’s it. No fancy gadgets, no last-minute store runs, just pantry staples that somehow turn into something ridiculously good. Honestly, I’ve made this while waiting for dinner to cook.
- Creamy-Sweet Perfection: The coconut milk soaks into the glutinous rice until it’s pillowy soft, while the palm sugar caramelizes just enough to give it that just-off-the-grill sweetness. Not too sticky, not too dry—it’s the kind of dessert that disappears faster than my willpower on a bad day.
- Party or Pajamas: Between us, this is my go-to for potlucks and lazy Sundays. Wrap it in banana leaves for a fancy touch, or serve it in little bowls with ice cream for zero effort. My kids think it’s "fancy food," and my in-laws ask for seconds—proof it works for everyone.
- Leftovers? Better: Make a big batch and store it for days—it actually tastes better the next day. The rice softens perfectly, and the coconut flavor deepens like a good wine. I’ve reheated portions in the microwave, steamed them, or even tossed them into smoothies (yes, really). Waste? Never.
Step-by-step instructions for Asian sticky rice dessert
Here's how to create this velvety, caramelized dessert with perfect texture every time.
Soak the Glutinous Rice for Optimal Texture
Place the 1.5 cups glutinous rice (sweet rice) in a large bowl and cover completely with 1 cup room temperature water. Let it soak for 4-6 hours at room temperature—this long soak is crucial for achieving that signature sticky, chewy texture. I like to soak mine overnight for maximum tenderness, but at minimum, don't rush this step.
After soaking, drain the rice thoroughly using a fine-mesh strainer, pressing gently to remove all excess water. The rice should feel moist but not wet when you squeeze a small amount between your fingers. This careful draining prevents a gummy final texture, which is the most common mistake I see with sticky rice desserts.
Prepare the Coconut Milk Mixture
In a medium saucepan, combine the drained glutinous rice with 1.5 cups full-fat coconut milk, 0.75 cup palm sugar, and 0.25 teaspoon salt. Stir gently to ensure all ingredients are evenly distributed. The mixture should look thick but pourable—this is your base for the dessert's signature creamy consistency.
Place the saucepan over medium-low heat and bring to a gentle simmer. Here's the thing—you want to maintain a steady temperature without boiling vigorously. Watch for small bubbles forming around the edges of the pan, and stir occasionally with a silicone spatula to prevent sticking. This gentle cooking method develops the dessert's signature caramelized flavor without burning the sugar.
Cook Until Thick and Glossy
Continue cooking for 20-25 minutes, stirring frequently, until the mixture thickens significantly and becomes glossy. You'll know it's ready when it reaches a pudding-like consistency that coats the back of a spoon. The texture should be thick enough to hold its shape when dropped from a spoon but still smooth and velvety.
If you're using banana leaves, lightly coat each piece with 1 tablespoon coconut oil and place them in a small baking dish. This step is optional but adds an authentic touch and helps prevent sticking. Spoon the cooked sticky rice mixture onto the banana leaves, spreading it evenly to about ¼-inch thickness. The banana leaves will infuse subtle floral notes into the dessert as it cools.
Cool and Set for Perfect Texture
Cover the dessert with plastic wrap or a clean kitchen towel and let it cool at room temperature for 1 hour. This cooling period is essential—it allows the glutinous rice to set properly and develop its characteristic chewy texture. Don't skip this step or you'll end up with a sticky mess instead of the perfect dessert.
Once cooled, you can serve the sticky rice as-is, or get creative with the optional toppings. For a traditional presentation, slice the whole fresh mango into thin strips and arrange them on top. For a modern twist, drizzle with 0.25 cup condensed milk or sprinkle with 2 tablespoons toasted sesame seeds. If you're feeling adventurous, shave 0.5 ounce dark chocolate over the top or dust with 1 teaspoon matcha powder for a vibrant green garnish.
Serve Warm or Chilled
This dessert is delicious served either warm or chilled, so it's incredibly versatile. For a warm serving, gently reheat the sticky rice in a steamer for 5-7 minutes until just warm through. The texture should remain soft and slightly sticky, with a beautiful caramelized sheen on top.
For a chilled serving, simply refrigerate for 1-2 hours before slicing into neat portions. The contrast between the warm, creamy center and the cool exterior makes for an unforgettable eating experience. Serve with a cup of Thai iced tea or a scoop of coconut ice cream for the ultimate dessert pairing.
Pro Tips For Making Asian Sticky Rice Dessert
- SOAK THE RICE OVERNIGHT: I learned this the hard way—rushing the soak leads to gummy, uneven texture. Use a 1:2 rice-to-water ratio, cover, and let it sit 8+ hours (or at least 6 if desperate). The longer it soaks, the more tender and flavorful the final dessert becomes.
- STEAM ON MEDIUM-LOW: High heat turns sticky rice into glue. After the initial boil, reduce to medium-low heat and steam for 20-25 minutes with the lid tightly sealed. The rice should finish cooking gently—no peeking, or you’ll dry it out.
- DISSOLVE PALM SUGAR FIRST: Dumping palm sugar directly into the coconut milk makes it clump like a stubborn child. Warm the coconut milk first, then whisk in the sugar until fully dissolved before combining with the rice. This guarantees a smooth, caramelized finish.
- PRESS GENTLY FOR SHAPE: Packing the rice too hard makes it dense; leaving it loose makes it fall apart. Use your hands to press lightly into a mold or shape, then chill for 30 minutes. The cold sets it just enough to hold form without turning into a brick.
Dietary considerations for this asian sticky rice dessert
Gluten-Free Adaptation
This dessert is naturally gluten-free since it relies solely on glutinous rice (despite its name, it contains no wheat gluten). The key is ensuring your palm sugar and coconut milk brands are certified gluten-free. I recommend Wholesome! Sweetener palm sugar and Thai Kitchen coconut milk, both of which are typically gluten-free. For extra safety, check labels—some brands may process in facilities with gluten. The banana leaves, if used, are also gluten-free. 🌱
Vegan Considerations
To make this dessert fully vegan, simply replace the optional condensed milk with a plant-based alternative like coconut condensed milk (available at Asian markets) or a cashew cream made from blended soaked cashews. The rest of the recipe—glutinous rice, coconut milk, palm sugar, and toppings like mango or sesame seeds—are already vegan. For a richer texture, stir 1 tablespoon coconut cream into the cooked mixture before serving. 🥥
Diabetic-Friendly Options
For a lower-glycemic version, reduce the palm sugar to 0.5 cup and add 1 teaspoon cinnamon to enhance sweetness perception. You can also substitute half the coconut milk with unsweetened almond milk to cut calories slightly. Always monitor portion sizes—even with these adjustments, the dessert remains sweet but offers a more balanced option. Pair with a dollop of Greek yogurt (instead of condensed milk) for added protein. 🍯
Nut-Free Variations
If nut allergies are a concern, skip the optional sesame seeds (or use sunflower seeds instead) and avoid any coconut milk brands processed in shared facilities. Double-check that your palm sugar and dark chocolate (if used) are nut-free. For extra crunch, toasted pumpkin seeds or toasted coconut flakes make great alternatives. Always verify packaging labels for cross-contamination warnings. 🌰
Dairy-Free Focus
This recipe is already dairy-free, but if you're serving it alongside other desserts, emphasize the natural coconut and rice base. The condensed milk is the only potential dairy component—replace it with coconut cream or agave syrup for a dairy-free drizzle. For a tropical twist, add a pinch of vanilla extract or a splash of lime juice to brighten the flavors without dairy. 🍋
Nutrition facts
Frequently asked questions
Why does my sticky rice turn out too hard or gummy?
The most common cause is improper soaking or draining. Always soak the glutinous rice for at least 4 hours (overnight is best) and drain it thoroughly—press between your fingers to remove excess water. If it's still too firm after cooking, add 1-2 tablespoons of coconut milk and reheat gently. For gumminess, try steaming the cooked mixture for 5 minutes to restore moisture.
Can I make this dessert without banana leaves?
If you don't have banana leaves, use aluminum foil brushed with coconut oil as a perfect substitute. For individual servings, try parchment paper or small ramekins. Just be sure to spread the sticky rice mixture evenly to about ¼-inch thickness for even cooking. The flavor won't change—it's just about presentation.
How do I store leftover sticky rice dessert?
Store in an airtight container in the fridge for up to 3 days. For longer storage, wrap individual portions tightly in plastic and freeze for up to 3 months. To reheat, microwave for 10-15 seconds with a damp paper towel over it—never microwave dry. The texture stays best when reheated gently in a steamer for 5-7 minutes.
What's the best way to slice sticky rice dessert neatly?
Chill the dessert for 1-2 hours first—this makes clean slicing much easier. Use a hot knife (dip in hot water between cuts) for perfectly smooth edges. For extra precision, dip the knife in coconut oil before each slice. If your dessert is too sticky, let it sit at room temperature for 10 minutes before slicing.
Can I make this dessert in a rice cooker?
Yes! After soaking and draining the rice, combine it with coconut milk, sugar, and salt in your rice cooker. Cook on the steam setting for 30-40 minutes until thick and glossy. Stir occasionally to prevent sticking. The texture will be slightly different (more moist) but still delicious. For best results, finish by steaming for 5 minutes after initial cooking.