
Side Dishes
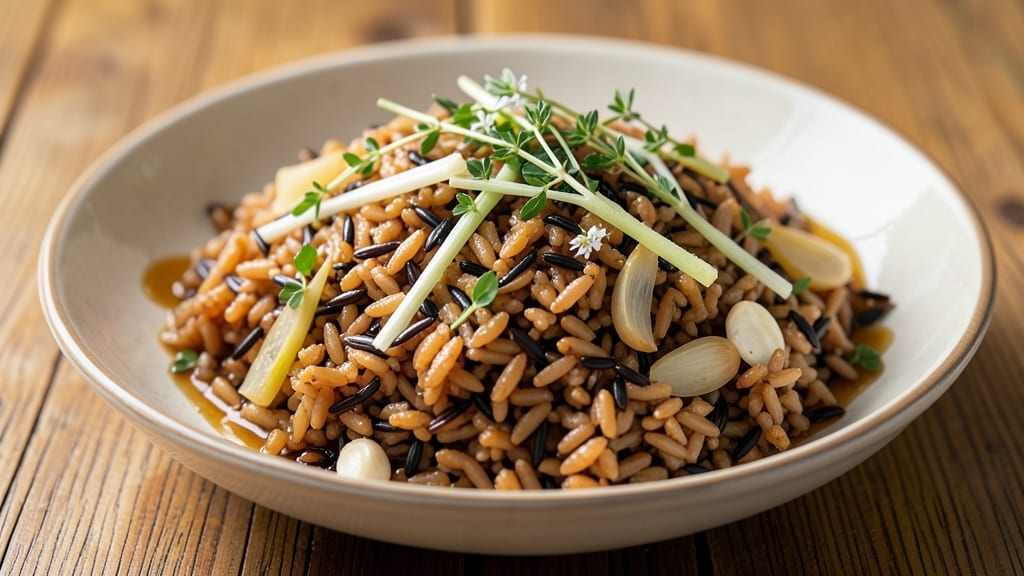
This brown and wild rice pilaf transforms simple grains into a nutty, earthy medley with a toasted celery crunch that elevates any meal. The secret lies in toasting the grains and aromatics to unlock deep, caramelized flavors before simmering in rich broth—no fancy techniques, just layered texture and warmth.
Perfect for holiday tables or weeknight dinners, this pilaf delivers restaurant-quality depth with minimal effort.
The magic begins with a dry toast of the grains and celery, creating a crisp, aromatic base that prevents mushy texture. As the rice absorbs the broth, it develops a satisfying chew while absorbing the savory notes of thyme, garlic, and bay leaf.
The final touch—crispy fried shallots—adds a golden crunch that makes every bite irresistible. This isn’t just a side dish; it’s a flavorful centerpiece.
What you’ll end up with is a visually stunning pilaf where each grain shines—brown rice’s hearty bite balanced by wild rice’s delicate nuttiness, all bound by a fragrant, herby broth. The toasted celery and shallots add layers of texture, while the herbs brighten the dish without overpowering.
It’s the kind of pilaf that disappears faster than you can say "second helping."
Pair it with roasted meats, grilled fish, or even as a vegetarian main with a dollop of yogurt and fresh herbs. The recipe scales effortlessly for crowds, and leftovers reheat beautifully—though you’ll likely finish the pan before that happens. Ready to make a pilaf that steals the show?
Ingredients for brown and wild rice pilaf
Six simple ingredients transform into a restaurant-worthy pilaf with nutty depth and crispy crunch.
| Ingredient | Amount | Notes |
|---|---|---|
| Long-Grain Brown Rice 🌾 | 1 ½ cups | Uncooked, rinsed well |
| Wild Rice Blend 🌾 | ½ cup | Uncooked, rinsed well |
| Celery Stalks 🥬 | 2 whole | Thinly sliced, tough strings removed |
| Shallots 🧅 | 4 whole | Minced finely |
| Garlic Cloves 🧄 | 4 cloves | Minced finely |
| Fresh Thyme Leaves 🌿 | 1 tbsp | Or 1 tsp dried thyme |
| Bay Leaves 🌿 | 2 whole | Dried, removed after cooking |
| Chicken Broth 💧 | 3 cups | Low-sodium preferred |
| Unsalted Butter 🧈 | 2 tbsp | For toasting grains |
| Olive Oil 🫒 | 2 tbsp | For crisping shallots |
| Salt 🧂 | 1 ½ tsp | Kosher or sea salt |
| Black Pepper 🌶️ | ½ tsp | Freshly ground |
| Fresh Parsley 🌿 | ¼ cup | Chopped for garnish |
The rice blend is the heart of this pilaf. Bob's Red Mill or Lundberg are my go-tos for quality grains—both have great organic options. Wild rice isn't actually rice but a grass seed, so it holds its shape beautifully. For the celery, look for bright green, crisp stalks with no brown spots. The shallots should be firm and pale—avoid any that feel soft or sprouting. Toasting the grains and celery in butter first unlocks their natural nuttiness, so don't skip this step. I always grab extra butter (the good stuff) because this is where the magic happens.
No wild rice blend? Substitute with extra brown rice plus 1 tbsp toasted pecans for crunch. Fresh thyme is ideal but dried works at one-third the amount. If you're short on time, pre-minced garlic from the jar is fine, though fresh tastes better. For the broth, low-sodium is key—you'll be adding more salt later. The celery can be pre-sliced if that's what's in your crisper drawer. And if you're feeling fancy, swap the parsley for cilantro or dill for a different herbaceous note. The shallots? Green onions work in a pinch if you're out, but they won't be as rich.
This pilaf reheats beautifully—just add a splash of broth or water to keep it moist. Keeps for 4-5 days in the fridge, though it's usually gone by then. For make-ahead meals, cook it 1 day ahead and let the flavors meld. The crispy shallots can be fried fresh or stored separately in the fridge for 2 days. Double the batch and freeze half for those nights when you're too tired to cook. I always make extra because it disappears so fast—especially when paired with roasted chicken or grilled salmon.
Why You'll Love This Recipe
- One-Pot Magic: I swear by this recipe—just toss everything in one pot (rice, veggies, broth) and let it simmer. No fancy layers, no stressing over separate pans. The brown rice stays chewy while the wild rice gets that perfect bite, all while the shallots and garlic mingle into something next-level.
- Nutty Earthy Crunch: Honestly, the flavor combo is what makes this stand out. The wild rice adds that toasty, almost popcorn-like crunch, while the brown rice keeps it hearty. Sauté the shallots and garlic until they’re golden? That’s where the magic happens—sweet, savory, and just a little sharp from the celery.
- Lunchbox Legend: Between us, this is my go-to for meal prep. Make a big batch on Sunday, and you’ve got flavorful sides for salads, wraps, or even stuffed into baked potatoes. The textures hold up for days, and it reheats like a dream—no soggy rice here.
- Budget Powerhouse: Wild rice blend is pricey, but you only need a little to punch up the flavor. Brown rice stretches meals, and celery/shallots are cheap staples. I’ve fed six people for under $10 with this—plus, leftovers taste just as good the next day. (Yes, even on a Tuesday night.)
Step-by-step instructions for brown and wild rice pilaf
Here's how to create a perfectly nutty, earthy pilaf with crispy celery and aromatic shallots.
Toast the Grains for Maximum Flavor
Heat a large skillet over medium heat and melt the 2 tablespoons unsalted butter until it foams. Add the 1.5 cups long-grain brown rice and 0.5 cup wild rice blend, stirring constantly for 3-4 minutes until the grains are lightly toasted and smell nutty. This step develops their natural flavors and prevents a mushy texture.
Watch closely—the rice should turn a deeper golden color and you'll notice the butter sizzles more vigorously. If it starts to brown too quickly, reduce heat slightly. Remove the skillet from heat and set aside for now. Toasting the grains first is what gives this pilaf its depth of flavor instead of just steamed rice.
Sauté the Aromatics Until Fragrant
In the same skillet (no need to clean it—the fond adds flavor), heat the 2 tablespoons olive oil over medium heat. Add the 4 whole shallots and 4 cloves garlic cloves (both minced finely), cooking for 5-6 minutes until the shallots are golden and translucent. Here's the thing—don't rush this step. You want those shallots to caramelize slightly for maximum sweetness.
Next, add the 2 whole celery stalks (thinly sliced) and cook for another 3-4 minutes until they begin to soften but still maintain a slight crunch. Stir in the 1 tablespoon fresh thyme leaves and 2 whole bay leaves, cooking for 30 seconds until fragrant. The celery should be tender-crisp with just a hint of bite remaining.
Combine All Ingredients and Simmer
Return the toasted rice mixture to the skillet and stir to coat the grains in the aromatic oil. Pour in the 3 cups chicken broth and bring to a gentle boil. Add the 1.5 teaspoons salt and 0.5 teaspoon black pepper, then reduce heat to low and cover with a tight-fitting lid.
Simmer for 35-40 minutes until the liquid is completely absorbed and the rice is tender. Here's how to check for doneness: press down gently on the rice with a fork—it should be soft but still have a slight resistance. If it looks dry before the time is up, add 2-3 tablespoons water and continue cooking. The wild rice takes longer to cook, so don't be tempted to peek at the rice before the full time has elapsed.
Rest and Garnish for Perfect Texture
Once the rice is tender, remove the skillet from heat and let it sit covered for 5 minutes. This resting period allows the steam to redistribute and the grains to plump up further. Remove and discard the bay leaves—they've done their job infusing flavor but shouldn't be eaten.
Fluff the rice gently with a fork, then transfer to a serving dish. Garnish with the 0.25 cup chopped fresh parsley for a pop of color and freshness. Serve immediately while the celery still has that delightful crunch and the grains are at their peak texture. The pilaf should be moist but not soupy, with each bite offering a perfect balance of nutty rice, crisp celery, and aromatic shallots.
Pro Tips For Making Brown And Wild Rice Pilaf
- Toast the Wild Rice: I learned this the hard way—skipping this step leaves wild rice bland and gummy. Dry-toast the wild rice blend in the same pot you’ll cook it in for 3-4 minutes before adding liquid. The nutty aroma deepens, and the grains stay separate.
- Mince Shallots Fine: Wild rice blend has a chewy texture, so your veggies need to play catch-up. Pulse shallots in a food processor until they’re almost paste-like—no big chunks. This ensures every bite has flavor, not just the occasional celery spear.
- Use Two Pots: Brown rice and wild rice cook at different rates, and mixing them mid-cook is a disaster. Toast and parboil each separately, then combine at the end. Your future self will thank you for not ending up with mushy brown rice or undercooked wild rice.
- Season the Water: The liquid for wild rice is flavorless broth, but brown rice needs salt. Split the seasoning: add 1 tsp salt to the brown rice water and ½ tsp to the wild rice broth. This balances the earthy tones without overpowering either grain.
Essential equipment for this recipe
Skillet Essentials
Start with a heavy-bottomed 12-inch skillet like All-Clad or Le Creuset—these distribute heat evenly and prevent scorching. I use my All-Clad for this recipe because it handles both the high heat for toasting and the gentle simmering for rice beautifully.
If you don’t have a heavy skillet, a stainless steel or enamel-coated pan works well too. The key is avoiding nonstick—it can’t handle the high heat needed for proper toasting. 🔥
Lid for Even Cooking
A tight-fitting lid is non-negotiable for this pilaf. I use a clear glass lid (like from OXO) because it lets me check on the rice without losing steam. If your lid doesn’t fit snugly, cover with aluminum foil instead.
The lid traps steam and ensures the rice cooks evenly—no dry spots here! Pro tip: Place a wooden spoon under the lid to prevent warping from heat.
Measuring Tools
Precision matters with rice ratios, so grab a stainless steel measuring cup (not plastic—it won’t hold up to high heat). For mincing shallots and garlic, a microplane or fine grater gives the best texture.
I also keep a small offset spatula (like Mercer Culinary) handy for stirring without scratching the pan. A digital kitchen scale isn’t required, but it’s useful if you’re scaling the recipe up or down.
Broth and Liquid Control
Use a liquid measuring cup with markings for the 3 cups chicken broth—rice absorbs liquid differently than other dishes. For crispy shallots, I recommend a small saucepan (like Farrah Collection) for frying them separately.
If you’re short on time, a deep skillet can double as a frying pan, but watch the heat closely to avoid burning. A fine-mesh strainer comes in handy if you’re straining homemade broth.
Garnish and Finishing Touches
Fresh parsley and crispy shallots need the right tools: a sharp chef’s knife (I love Mac Knife) for chopping parsley and tongs for handling hot shallots. For extra crunch, a paper towel-lined plate helps drain fried shallots quickly.
If you’re making this ahead, store garnishes separately—crispy shallots lose their crunch when reheated, so always add them fresh. ✨
Nutrition facts
Frequently asked questions
Why toast the rice before cooking?
Toasting the grains first unlocks their natural nutty flavors and creates a crisp texture that prevents mushy results. The 3-4 minute dry toast in butter develops deep caramelized notes that simple steaming would miss. This step is what transforms ordinary rice into a flavorful pilaf with satisfying bite.
Can I substitute wild rice for regular rice?
Yes, but the texture will differ. Wild rice has a delicate, nutty flavor and takes longer to cook (45-50 minutes vs 35-40 minutes for brown rice). For a 1:1 swap, add 10 extra minutes to cooking time. If you're short on time, use 100% brown rice and add 1 tbsp toasted pecans for crunch instead.
How do I keep the celery from getting too soft?
Cook the celery just until tender-crisp (3-4 minutes) over medium heat. Remove it from the pan when it still has slight resistance. For extra crunch, add the celery back to the finished pilaf just before serving. If you prefer softer celery, reduce cooking time to 2 minutes and keep it separate until serving.
What's the best way to reheat leftovers?
Add 1-2 tablespoons broth or water per cup of pilaf and cover with a damp paper towel. Microwave for 1-2 minutes on medium heat, stirring halfway. For stovetop reheating, use a skillet over low heat with a splash of broth, stirring constantly until warmed through. The crispy shallots should be added fresh after reheating.
Can I make this pilaf vegetarian?
Simply substitute vegetable broth for chicken broth and add 1 cup diced mushrooms or roasted vegetables to the aromatics. For extra protein, stir in 1 cup cooked chickpeas or lentils during the final simmer. The herbs and toasted grains will still shine as the base flavor.