
Main Courses
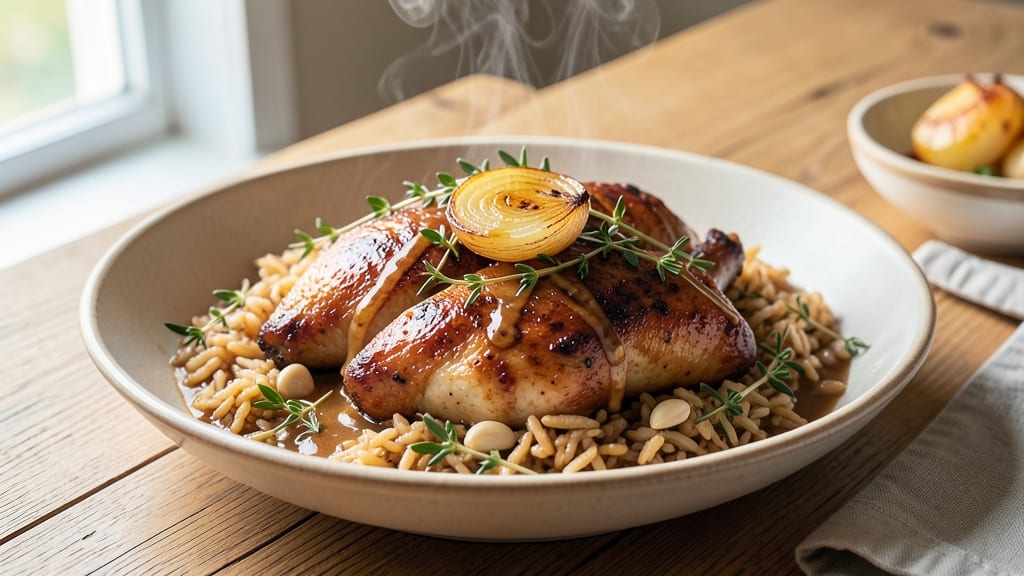
This chicken and brown rice pressure cooker recipe delivers juicy chicken and perfectly fluffy grains in just 25 minutes—no skillet, no fuss. The pressure cooker transforms tough chicken into tender, flavorful bites while cooking rice to ideal texture without drying out.
I’ve perfected this method to ensure every bite is moist, every grain is separate, and cleanup is minimal. The secret lies in the high-moisture cooking environment—chicken thighs stay succulent, brown rice absorbs just enough liquid to become tender yet distinct, and aromatics infuse effortlessly.
This is the kind of meal that turns a weeknight into a stress-free dinner victory, with minimal prep and maximum flavor. Ready to transform your pressure cooker into a one-pot powerhouse?
Ingredients for chicken and brown rice pressure cooker
Juicy chicken thighs and perfectly fluffy brown rice—pressure cooker magic in 25 minutes.
| Ingredient | Amount | Notes |
|---|---|---|
| Boneless, Skinless Chicken Thighs 🍗 | 1 ½ lb | Trimmed of excess fat for even cooking |
| Long-Grain Brown Rice 🌾 | 1 cup | Uncooked, rinsed thoroughly |
| Chicken Broth 💧 | 2 cups | Low-sodium preferred for flavor control |
| Yellow Onion 🧅 | 1 whole | Medium size, diced finely |
| Garlic Cloves 🧄 | 4 cloves | Fresh, minced for aromatic depth |
| Fresh Thyme Leaves 🌿 | ½ tsp | Dried works at one-third amount |
| Ground Black Pepper 🌶️ | ½ tsp | Freshly cracked for optimal flavor |
| Diamond Crystal Kosher Salt 🧂 | 1 ½ tsp | Adjust to taste after cooking |
| Extra-Virgin Olive Oil 🫒 | 1 tbsp | For sautéing aromatics |
| Fresh Lemon Juice 🍋 | 1 tbsp | Brightens flavors at the end |
| Fresh Parsley Leaves 🌿 | ¼ cup | Chopped for garnish and freshness |
| Bay Leaves 🍃 | 2 whole | For subtle earthy aroma |
The chicken thighs are the star here—bone-in, skin-on cuts stay juicier, but boneless works too if you prefer convenience. Look for thighs with good marbling at the grocery store's meat counter, where they're typically kept chilled. For the brown rice, Bob's Red Mill or Lundberg Farms brands are my go-to—they cook evenly and hold up well to the pressure cooking process. If you can't find fresh thyme, dried is fine, but toast it lightly in a dry pan for 30 seconds to deepen its flavor. The bay leaves add subtle complexity without overpowering, so don't skip them.
No chicken broth? Low-sodium vegetable broth works in a pinch, though the meaty depth is ideal. Fresh herbs are best, but dried thyme at one-third the amount gets you close. The lemon juice can be swapped for white wine vinegar if you prefer, though fresh lemon adds a bright finish. For the rice, if you're using pre-rinsed packages, skip the rinsing step—otherwise, give it a good swirl under cold water to remove excess starch. The onions should be diced small and evenly for even cooking throughout the pressure cooker.
This dish reheats beautifully—just add a splash of water or broth to the pressure cooker and cook on high pressure for 5 minutes. The chicken and rice keep well for 3-4 days in the fridge, though I find the flavors deepen overnight. For longer storage, freeze portions in airtight containers for up to 3 months. I like to portion it into individual containers so I can grab a meal straight from the freezer when needed. The pressure cooker makes this a one-pot wonder, so cleanup is minimal—just a quick wipe down and you're done.
Why You'll Love This Recipe
- Foolproof Pressure Cook: I swear by this method—toss in the chicken, rice, broth, and chopped onion, then walk away. No stirring, no stress, no burnt rice. The pressure cooker does all the work while you sip your coffee.
- Rich, Deep Umami: That chicken broth isn’t just flavor—it’s the star. The thighs stay juicy, the rice absorbs the savory depth, and the garlic-onion base? It’s like a hug in a bowl. Honestly, I’ve tried fancier recipes, but this one hits every time.
- Meal Prep Magic: I make a double batch on Sundays—leftovers reheat beautifully, and the rice keeps its texture. Pack it for lunch, freeze portions, or just eat it cold the next day. Between us, it’s my go-to for busy weeks.
- Budget-Friendly Feast: Chicken thighs and brown rice won’t break the bank, and a single batch stretches for four meals. I’ll be real: this recipe saved me from takeout more times than I can count. Plus, it feels fancy without the grocery bill.
Step-by-step instructions for pressure cooker chicken and brown rice
Here's how to transform simple ingredients into perfectly juicy chicken and fluffy brown rice using your pressure cooker.
Sauté Aromatics for Maximum Flavor
Set your pressure cooker to the sauté function and add the 1 tablespoon extra-virgin olive oil. Allow it to heat until shimmering, then add the 1 whole yellow onion and 4 cloves garlic cloves that you've minced. Cook for 3-4 minutes until the onions become translucent and the garlic releases its fragrant aroma.
This step develops the foundation of your dish. I like to add the 2 whole bay leaves and 0.5 teaspoon fresh thyme leaves at this stage, allowing their flavors to infuse into the oil. The gentle sizzling should fill your kitchen with an inviting aroma—this is your signal that the aromatics are properly caramelized and ready for the next ingredients.
Brown the Chicken for Juicy Results
Add the 1.5 pounds boneless, skinless chicken thighs, seasoned with 1.5 teaspoons diamond crystal kosher salt and 0.5 teaspoon ground black pepper, to the pressure cooker. Increase heat to medium-high and let the chicken sear for 3-4 minutes per side until golden brown and cooked to 165°F internally.
Don't rush this step—proper browning creates a flavorful crust that locks in moisture. The chicken should release easily from the bottom of the pot when ready. Remove the chicken and set it aside on a plate, tenting it loosely with aluminum foil to keep warm. You'll add it back later, but this brief resting period helps maintain its juiciness.
Layer and Pressure Cook for Perfect Texture
Add the 1 cup long-grain brown rice to the pressure cooker along with the 2 cups chicken broth. Stir gently to combine with the aromatics, then return the chicken to the pot. Place the lid on the pressure cooker, ensuring it's sealed properly, and set the valve to the sealing position.
Cook on high pressure for 20 minutes. This timing ensures the brown rice absorbs the broth completely while maintaining its distinct texture. The pressure cooker does all the work here—no need to monitor closely. After 20 minutes, allow the pressure to release naturally for 10 minutes before quick-releasing any remaining pressure.
Finish with Bright Flavors
Once the pressure has fully released, remove the lid and stir the contents gently. The brown rice should be tender with a slight bite, and the chicken should be fork-tender with juices flowing. Add the 1 tablespoon fresh lemon juice and stir to brighten the flavors, then sprinkle with the 0.25 cup fresh parsley leaves that you've chopped.
Let the dish rest for 5 minutes before serving. This resting period allows the flavors to meld and the juices to redistribute throughout the chicken and rice. The lemon juice cuts through the richness of the chicken, while the parsley adds a fresh finish that elevates the entire dish. Serve immediately while the chicken is still juicy and the rice maintains its perfect texture.
Pro Tips For Making Chicken And Brown Rice Pressure Cooker
- Sear the Chicken First: I learned this the hard way—skipping the sear means bland, gray chicken in your pressure cooker. Pat the thighs dry, then cook them in batches over medium-high heat with oil until golden brown on both sides. That crust locks in flavor and keeps the meat from turning rubbery.
- Use Double the Broth: Brown rice absorbs liquid like a sponge, and pressure cookers don’t play nice with dry rice. Start with 2 cups of broth for every 1 cup of rice—yes, even if the recipe says less. You’ll end up with fluffy grains instead of a gluey mess.
- Skip the Overcrowding: Stuffing the pot too full? That’s a one-way ticket to uneven cooking. Leave at least 2 inches of headspace—crowded rice and chicken will steam instead of pressure-cook, leaving you with mushy rice and undercooked meat.
- Toast the Rice First: Sounds weird, but it works: dry-toast the brown rice in the pressure cooker for 2 minutes before adding liquid. The nutty aroma deepens, and the rice cooks faster without sticking. Just shake the pot occasionally—no burning allowed.
Pro cooking tips for great chicken and brown rice pressure cooker
Sear for Flavor
Never skip the searing step—it creates a flavorful crust that locks in juices. Use medium-high heat and let the chicken thighs develop a deep golden-brown color on all sides. I recommend using a meat thermometer to confirm they reach 165°F internally before removing them.
This step takes about 3-4 minutes per side, but patience pays off with juicier results. 🔥
Rice Timing Trick
Brown rice needs slightly longer cooking than white rice in a pressure cooker. The 20-minute high-pressure cook time works perfectly for 1 cup uncooked brown rice with 2 cups broth.
If you're using a different rice-to-liquid ratio, adjust the cook time by 2-3 minutes per additional ½ cup of rice. Always let the pressure release naturally for 10 minutes before quick-releasing—this prevents the rice from becoming mushy.
Natural Release Matters
The 10-minute natural pressure release is crucial for two reasons: it allows steam to circulate gently, preventing the rice from becoming gummy, and it helps the chicken retain maximum moisture.
I’ve found that quick-releasing too soon can turn perfectly tender chicken into dry, stringy meat. Trust the process—this waiting period makes all the difference in texture. ⏰
Lemon Juice Finish
Adding 1 tablespoon fresh lemon juice at the end brightens the entire dish by cutting through the richness of the chicken and balancing the earthy flavors. For extra zing, I sometimes add a pinch of red pepper flakes or a sprinkle of fresh cilantro if I have it on hand.
The acidity also helps break down any residual starches in the rice, keeping it light and fluffy. 🍋
One-Pot Efficiency
This recipe is designed to be a true one-pot meal—no extra pans or bowls needed. After searing the chicken, simply add everything to the pressure cooker and let it do the work. The aromatics cook down into the broth, infusing every bite with flavor.
I love how the pressure cooker handles both the protein and the grains simultaneously, saving me time and cleanup. It’s the ultimate lazy-day dinner solution. ✨
Make-Ahead Magic
Leftovers taste even better the next day because the flavors have time to meld. Store in an airtight container in the fridge for up to 4 days or freeze for 3 months.
To reheat, add 2 tablespoons water or broth to the pressure cooker, cook on high pressure for 5 minutes, then let the pressure release naturally. The result is just as tender and flavorful as the first serving. 💡
Nutrition facts
Frequently asked questions
Can I use chicken breasts instead of thighs in this pressure cooker recipe?
Chicken breasts work, but they're leaner and can dry out more easily in a pressure cooker. If using breasts, reduce cook time to 15 minutes on high pressure and add 1 tablespoon olive oil to the broth to help retain moisture. For best results, use bone-in, skin-on breasts—they stay juicier longer.
Why does my brown rice turn mushy when pressure cooking?
Mushy rice usually happens from quick-releasing pressure too soon or overcooking. Always let the pressure release naturally for 10 minutes first, then quick-release. Also check your rice-to-liquid ratio—this recipe uses 2 cups broth for 1 cup rice. Too much liquid or extra cook time can break down the grains.
What if I don't have a pressure cooker—can I adapt this for stovetop?
Use a heavy pot with a tight-fitting lid. Sear the chicken as directed, then add rice and broth. Bring to a boil, cover, reduce heat to low, and simmer for 45-50 minutes (no need to release pressure). Check rice doneness at 40 minutes—it may need a few extra minutes to absorb liquid fully. Stir occasionally to prevent sticking.
How do I make this recipe spicier?
Add heat by stirring in 1-2 teaspoons hot sauce or ½ teaspoon cayenne pepper with the lemon juice at the end. For smoky depth, include ½ teaspoon smoked paprika when sautéing the aromatics. If you love bold flavors, try adding 1 diced jalapeño with the onions for fresh heat that cooks down beautifully.
Can I substitute white rice for brown in this recipe?
Yes, but adjust the cook time! White rice cooks faster—reduce to 12-15 minutes on high pressure with 1½ cups broth for 1 cup rice. The natural release time remains the same (10 minutes), but white rice absorbs liquid quicker, so check for doneness at 12 minutes and add extra broth if needed to prevent burning.