
Main Courses
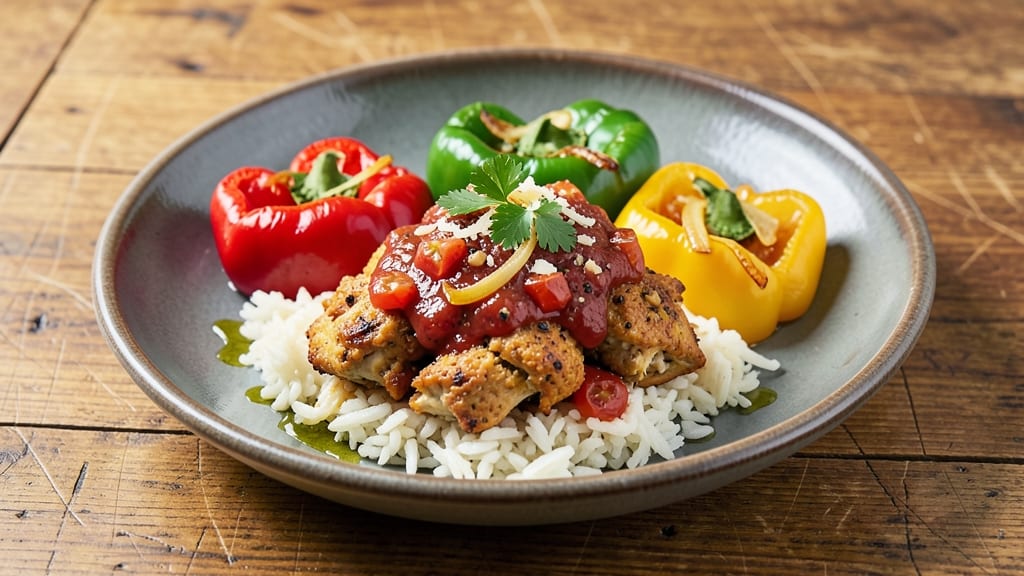
This chicken and rice stuffed peppers recipe transforms simple ingredients into a showstopping one-pan meal that's perfect for family dinners or meal prep. The secret lies in perfectly seasoned chicken, fluffy rice, and a melty cheese crown that seals in all the flavors.
I developed this recipe during a particularly busy week when I needed a dish that was both hearty and hands-off—it never fails to impress.
The beauty of this recipe is its simplicity: ground chicken sautéed with onions and garlic, mixed with cooked rice and your choice of cheese, all nestled into hollowed-out bell peppers. Baking at 375°F for 35 minutes ensures the peppers soften while the filling stays moist and flavorful.
The cheese on top creates those irresistible golden crowns that make the dish look as good as it tastes.
What you'll end up with is a dish that's rich, satisfying, and packed with texture—tender chicken, fluffy rice, and slightly charred peppers with melty cheese. The aromas alone will have everyone gathering around the table, and the leftovers reheat beautifully, making it perfect for busy weeks.
This recipe is the kind of comfort food that feels like a hug in meal form.
Serve with a side salad or garlic bread to soak up any extra juices, and you've got a complete dinner that's ready in under an hour. The best part? It's a one-pan wonder, so cleanup is minimal. Let's get cooking!
Ingredients for chicken and rice stuffed peppers
Ground chicken, fluffy rice, and melty cheese—these simple ingredients transform into a showstopping one-pan dinner.
| Ingredient | Amount | Notes |
|---|---|---|
| Ground Chicken 🍗 | 1 lb | Boneless, skinless preferred |
| Bell Peppers 🌶️ | 4 whole | Large, mixed colors preferred |
| Long-Grain White Rice 🌾 | 1 cup | Uncooked, jasmine or basmati |
| Yellow Onion 🧅 | 1 whole | Medium, finely diced |
| Garlic Cloves 🧄 | 3 cloves | Fresh, minced |
| Canned Diced Tomatoes 🍅 | 1 can | 14.5 oz, San Marzano preferred |
| Shredded Cheddar Cheese 🧀 | 1 ½ cups | Sharp or mild, fresh grated |
| Chicken Broth 💧 | ½ cup | Low-sodium preferred |
| Olive Oil 🫒 | 2 tbsp | Extra-virgin for richness |
| Salt 🧂 | 1 tsp | Kosher or sea salt |
| Ground Black Pepper 🌶️ | ½ tsp | Freshly ground preferred |
| Dried Oregano 🍃 | 1 tsp | Mexican oregano if available |
| Fresh Parsley 🌿 | ¼ cup | Chopped, for garnish |
The bell peppers are the stars here, so pick firm, vibrant ones—no soft spots. Trader Joe's and Whole Foods usually have the best selection. I always grab a mix of colors for visual appeal, but any color works. For the ground chicken, boneless, skinless is best—it cooks faster and stays juicier. If you can't find it, regular ground chicken works too, just expect slightly longer cooking time. The rice? Jasmine or basmati stays fluffy and absorbs flavors better than long-grain white.
No sharp cheddar? Monterey Jack or pepper jack melts just as beautifully. Short on chicken broth? Water plus a bouillon cube works in a pinch. Fresh oregano? Dried at one-third the amount gets you close. The diced tomatoes can be fresh too—just chop them yourself. For the peppers, I like to cut them in half lengthwise and scoop out seeds with a spoon—no need for fancy tools. The olive oil matters here—use something fruity, not the cheap stuff.
Prep ahead by cooking the rice and chopping all veggies in advance—this dish tastes even better the next day. Store leftovers in an airtight container for 4-5 days in the fridge. Freezes beautifully for 3 months—just reheat covered at 350°F until warmed through. I like to portion mine into individual containers so lunches are sorted for the week.
Why You'll Love This Recipe
- One-Pan Magic: I swear by this recipe when I’m too tired to wash a million dishes. The peppers roast right alongside the filling—no extra pots, no fuss—just golden, juicy peppers that practically fall apart when you cut into them.
- Savory Crisp in Every Bite: That caramelized edge on the pepper walls? It’s the real star. The ground chicken browns up with the onions and garlic until it’s got this deep, smoky richness, while the rice inside stays tender—like a hug for your taste buds.
- Weeknight to Potluck Ready: Between us, this is my go-to for busy nights, but it also elevates when I need to impress. Bake a batch on Sunday, and you’ve got lunch for the week—or bring it to a gathering and watch people ask for seconds.
- Budget-Friendly Powerhouse: Ground chicken and long-grain rice stretch miles, and bell peppers? They’re practically free at the farmers' market. I’ve fed four hungry teens and a dog (okay, the dog didn’t eat it) with what costs me less than takeout for two.
Step-by-step instructions for chicken and rice stuffed peppers
Here's how to create a one-pan wonder with perfectly cooked peppers and melty cheese crowns.
🍳 Step 1: Prepare the Peppers and Cook the Filling Base
Preheat your oven to 375°F. Cut the tops off the 4 whole bell peppers and remove seeds and membranes, leaving the stems intact. I like to use a sharp chef's knife for this—it gives you clean cuts and makes the peppers easier to stuff later. Set them aside in a bowl of cold water to keep them fresh while you work.
In a large skillet, heat 2 tablespoons olive oil over medium-high heat. Add the 1 whole yellow onion and cook for 5 minutes until softened and translucent. Add the 3 cloves minced garlic and cook for another 30 seconds until fragrant. This aromatic base forms the flavor foundation for your entire dish.
👨🍳 Step 2: Cook the Chicken and Season the Filling
Push the onions and garlic to one side of the skillet and add the 1 lb ground chicken. Cook until no longer pink, breaking it up with a wooden spoon as it cooks—this ensures even cooking and prevents dry spots. Once fully cooked, add 1 teaspoon dried oregano, 1 teaspoon salt, and ½ teaspoon ground black pepper. Stir well to distribute the seasoning evenly.
Pour in the 1 can diced tomatoes (with juices) and ½ cup chicken broth, scraping up any browned bits from the bottom of the pan. Bring to a gentle simmer and cook for 3 minutes to let the flavors meld. This step builds depth in your filling—don't skip it.
🥘 Step 3: Cook the Rice and Stuff the Peppers
Add the 1 cup uncooked long-grain white rice to the skillet and stir to coat it in the sauce. Cook for 2 minutes to toast the rice slightly—this gives it better texture and prevents mushiness. Remove the skillet from heat and let the mixture cool for 5 minutes while you prepare the peppers.
Drain the peppers thoroughly and carefully stuff each one with the rice mixture, pressing down gently to compact it. Place them upright in a 9x13-inch baking dish. The peppers should stand firmly—if they wobble, add a bit more filling to stabilize them. Sprinkle evenly with the 1.5 cups shredded cheddar cheese, pressing it down lightly so it melts into a golden crown.
🔥 Step 4: Bake Until Cheese is Golden and Peppers are Tender
Cover the baking dish tightly with aluminum foil and bake for 30 minutes. This initial covered baking steams the peppers and rice, ensuring they cook through without drying out. After 30 minutes, remove the foil and bake for another 15-20 minutes until the cheese is bubbly and golden brown and the peppers are tender when pierced with a fork.
Here's the thing—your oven might run hot, so start checking at the 15-minute mark if you prefer a lighter cheese color. The peppers are done when they yield slightly to gentle pressure and the cheese has formed a beautiful, melty crown on top. If the cheese browns too quickly, tent loosely with foil to prevent burning.
🍽️ Step 5: Rest and Garnish for Perfect Presentation
Let the stuffed peppers rest for 5 minutes before serving. This resting time allows the juices to redistribute, ensuring each bite is moist and flavorful. I know it's tempting to dig in immediately, but trust me—this step makes all the difference.
Garnish each pepper with ¼ cup chopped fresh parsley for a pop of color and freshness. Serve immediately with a side of crusty bread or a simple green salad. The combination of tender peppers, perfectly cooked rice, and melty cheese creates a hearty, satisfying meal that's perfect for any occasion.
Pro Tips For Making Chicken And Rice Stuffed Peppers
- Dry the Peppers Well: Stuffing damp peppers is how you end up with soggy bottoms and a sad, watery filling. Pat them inside and out with a paper towel—yes, even if they look dry. I learned this the hard way after my first batch turned into a mushy disaster.
- Cook the Rice Al Dente: Undercooked rice turns to mush when it steams inside the peppers, while overcooked rice dries out. Aim for firm but slightly underdone rice (about 5 minutes less than package instructions), then finish cooking it in the oven with the peppers. Trust me, it makes all the difference.
- Pre-Cook the Chicken: Skipping this step means you’re gambling with pink chicken in the middle of your stuffed peppers. Brown the ground chicken thoroughly in a pan first—break it up into small pieces and cook until it’s no longer pink. This also adds flavor that raw chicken can’t.
- Use a Mixing Bowl for Stuffing: Trying to stuff peppers with a spoon is a recipe for frustration. Mix the cooked rice, chicken, onion, and garlic in a bowl first, then pack it tightly into the peppers. It goes faster, distributes heat evenly, and prevents uneven cooking—no more lopsided peppers.
Storing and reheating this recipe
Refrigerator Storage
Let your stuffed peppers cool completely before storing to prevent condensation buildup. I recommend transferring them to an airtight glass container with a tight-sealing lid—Pyrex or Le Creuset work beautifully.
Store at 40°F or below for up to 4 days, but I've found they taste best within 2-3 days when reheated. The peppers hold their texture remarkably well, though the cheese crown might lose some of its golden sheen. 🌶️
Freezer Prep Tips
For long-term storage, assemble the stuffed peppers as directed but skip the final 15-20 minutes of uncovered baking. Instead, cover the baking dish tightly with heavy-duty aluminum foil and freeze for 2-3 hours before transferring to quart-sized freezer bags.
Remove as much air as possible to prevent freezer burn. These freeze beautifully for 3 months—just thaw overnight in the fridge before reheating. 🧊
Oven Reheating Method
My preferred reheating method is in the oven because it restores that perfect melty cheese crown. Preheat to 350°F, place stuffed peppers on a baking sheet (covered loosely with foil), and heat for 20-25 minutes until heated through.
For extra moisture, add 1-2 tablespoons water to the baking dish before reheating. The peppers should be tender and the cheese bubbly again—just like fresh from the oven. ⏰
Microwave Shortcut
When you're in a hurry, the microwave works surprisingly well. Cover each stuffed pepper with a damp paper towel and heat on 50% power for 3-4 minutes, rotating halfway through. Add 1 tablespoon water to the plate to prevent drying.
The cheese won't be as golden, but the texture remains excellent. This method takes about half the time of oven reheating. 💡
Meal Prep Strategy
I like to prep these for the week by assembling and baking a double batch, then portioning into individual meal prep containers. Store with parchment paper between layers to prevent sticking.
Reheat portions in the microwave for 2-3 minutes or oven for 15 minutes. The rice stays fluffy, the chicken remains juicy, and the cheese melts beautifully—perfect for busy weeknights. 📅
Cheese Crown Revival
If your reheated stuffed peppers lose their golden crown, don't worry! Pop them under the broiler for 1-2 minutes with a sprinkle of shredded cheese to restore that beautiful melt.
This works especially well if you're reheating from frozen. For extra flavor, add a pinch of smoked paprika before broiling—it adds a nice smoky touch that complements the dish. 🔥
Nutrition facts
Frequently asked questions
Can I use ground turkey instead of chicken?
Ground turkey works beautifully and actually stays juicier than chicken. Use the same 1 lb amount, but cook it at medium heat for 2-3 minutes longer to ensure it reaches 165°F safely. The flavor profile remains similar, though turkey has a slightly milder taste.
How do I get the peppers to stay upright while baking?
Pack the filling tightly into each pepper and press down firmly. If they still wobble, stabilize them by placing a small spoonful of uncooked rice at the base before adding the filling. For extra support, you can also lightly press the stuffed peppers into a bed of ½ inch chopped onion in the baking dish. This creates a sturdy foundation that prevents toppling.
What if my peppers are still firm after baking?
Undercooked peppers are usually the result of insufficient baking time or a too-high oven temperature. For next time, extend the baking time by 10-15 minutes or reduce the heat to 350°F. If they're already in the oven, tent them with foil and bake another 10 minutes. To check doneness, pierce with a fork—it should slide in easily with slight resistance.
Can I make this dish ahead of time?
Yes! Assemble the stuffed peppers and bake them as directed, but skip the final 15 minutes of uncovered baking. Store them in an airtight container at room temperature for up to 2 hours or refrigerate for 4 days. Reheat covered at 350°F for 20-25 minutes to restore that perfect melty cheese crown.
What's the best way to add extra flavor to the filling?
For deeper flavor, sauté ½ cup diced mushrooms with the onions or add 1 teaspoon smoked paprika to the chicken mixture. A splash of hot sauce or ½ teaspoon cumin also works wonders. For a creamy twist, stir in ¼ cup sour cream or ½ cup Greek yogurt with the rice. These additions elevate the dish without overpowering the original flavors.