
Main Courses
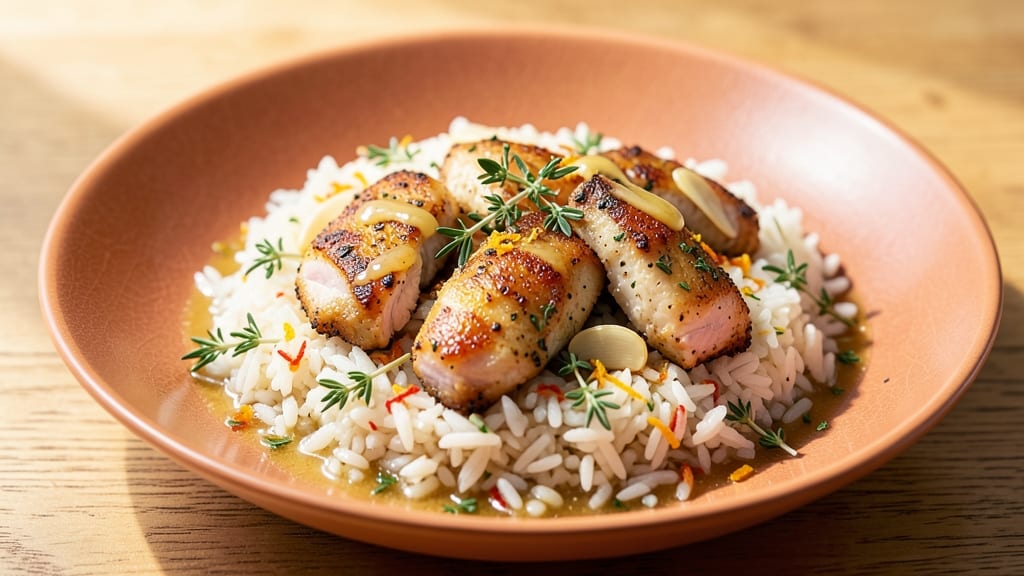
This chicken flavored rice pilaf delivers tender, golden-brown grains topped with crispy herb crust and succulent chicken bites that stay juicy every time. The secret lies in cooking the rice and chicken together in a single pot, letting the savory broth infuse both perfectly.
I developed this recipe after years of testing—it’s the one that finally earned me compliments instead of complaints at dinner parties.
What sets this pilaf apart is the herb crust on top, which adds texture and flavor without extra effort. You’ll start with chicken thighs (they stay juicier than breasts) and long-grain rice, then build layers of aromatic herbs, garlic, and lemon zest.
By the time it’s done, you’ll have a complete meal with minimal cleanup—just one pot to wash. The result? A restaurant-worthy dish that’s ready in under 45 minutes.
Ingredients for chicken flavored rice pilaf
Juicy chicken thighs, fragrant rice, and golden crust—this pilaf delivers restaurant-quality flavor with minimal effort.
| Ingredient | Amount | Notes |
|---|---|---|
| Chicken Thighs 🍗 | 1 ½ lb | Bone-in, skin-on for juiciness |
| Long-Grain White Rice 🍚 | 1 ½ cups | Uncooked, like jasmine or basmati |
| Chicken Broth 💧 | 2 cups | Low-sodium preferred |
| Garlic Cloves 🧄 | 4 cloves | Minced for aroma |
| Fresh Lemon Zest 🍋 | 1 tbsp | Brightens the dish |
| Dried Thyme 🌿 | 1 tsp | Or 1 tbsp fresh thyme |
| Dried Parsley 🌿 | 1 tsp | For fresh finish |
| Dried Rosemary 🌿 | ½ tsp | Crushed for flavor |
| Olive Oil 🫒 | ¼ cup | Extra-virgin preferred |
| Panko Breadcrumbs 🍞 | ½ cup | For crispy herb crust |
| Salt 🧂 | 1 ½ tsp | Kosher or sea salt |
| Black Pepper 🌶️ | ½ tsp | Freshly ground |
| Butter 🧈 | 2 tbsp | Unsalted for balancing |
The chicken thighs are the star—bone-in and skin-on keeps them juicy (no dry bites here). Grab them from the butcher counter if you can, or the packaged section at any grocery store works fine. For the rice, jasmine or basmati are ideal—they stay separate and fluffy. The broth? Low-sodium is key—you don’t want to overpower the dish. I always make a double batch of broth and freeze it in ice cube trays for future use. Fresh herbs make all the difference, but dried works in a pinch—just double the amount.
No chicken thighs? Boneless, skinless breasts work too, but they’ll dry out faster. Swap the dried herbs for fresh if you’ve got them—thyme, parsley, and rosemary all play well together. Running low on panko? Toasted breadcrumbs or crushed cornflakes give a similar crunch. The lemon zest can be skipped if you’re in a hurry, but trust me, it’s worth the extra minute—it brightens everything. For the butter, unsalted is a must so you control the seasoning.
This pilaf reheats beautifully—just add a splash of broth and cover. Keeps for 4 days in the fridge, or 3 months frozen. I always make extra because it’s perfect for meal prep. Store the herb crust separately if you’re freezing—just sprinkle it on top when reheating. The rice stays fluffy for days if you let it cool completely before sealing.
Why You'll Love This Recipe
- One-Pot Magic: I swear by this recipe—just toss everything in one pot, and the chicken thighs melt into the rice while the broth infuses every grain. No fancy layers, no stress, just hands-off flavor that feels like a hug after a long day.
- Bright & Savory: That lemon zest? It’s the secret weapon—cuts through the richness of the chicken thighs and makes the rice taste fresh, not heavy. The garlic cloves toast in the broth until they’re fragrant and golden, adding depth without overpowering.
- Lunchbox Hero: Between us, this is my go-to for meal prep. Cook a big batch on Sunday, and you’ve got lunch for the week—pack it cold or reheat it, and the rice stays fluffy. My kids grab it without complaint (yes, even on a Tuesday night).
- Budget-Friendly Feast: Chicken thighs are forgiving and cheap, and long-grain rice stretches forever. A single batch feeds four for dinner and leaves enough for leftovers that taste just as good the next day. No wasted ingredients, no guilt—just solid, reliable comfort food.
Step-by-step instructions for chicken flavored rice pilaf
Here's how to create perfectly juicy chicken thighs and aromatic rice with a crispy herb crust.
Season and Sear the Chicken Thighs
Pat the 1.5 lb chicken thighs dry with paper towels to remove any moisture. This step is crucial for achieving that crispy skin we want. In a small bowl, mix together 1.5 tsp salt, 0.5 tsp black pepper, 1 tsp dried thyme, 1 tsp dried parsley, and 0.5 tsp dried rosemary. Rub this mixture all over the chicken thighs, pressing the seasoning into the meat.
Heat 0.25 cup olive oil in a large oven-safe skillet over medium-high heat. Once the oil shimmers, add the seasoned chicken thighs skin-side down. Let them cook undisturbed for 5-6 minutes until the skin is golden brown and crispy. Flip the thighs and cook for another 4-5 minutes until the internal temperature reaches 160°F. You'll know they're done when the juices run clear and the meat is no longer pink in the center. Remove the chicken from the skillet and set it aside on a plate, tented loosely with foil to keep warm.
Toast the Rice and Build the Herb Crust
In the same skillet (no need to clean it—the browned bits add flavor), reduce the heat to medium and add 2 tbsp butter. Allow the butter to melt and foam, then add the 1.5 cups long-grain white rice, stirring to coat each grain with the butter. Toast the rice for 2-3 minutes, stirring frequently, until it becomes slightly translucent at the edges. This step enhances the rice's nutty flavor and prevents it from becoming mushy.
Next, sprinkle the 0.5 cup panko breadcrumbs evenly over the toasted rice. Stir gently to distribute the breadcrumbs and coat the rice grains. Add the 4 cloves minced garlic and 1 tbsp fresh lemon zest, stirring for 30 seconds until the garlic becomes fragrant. The lemon zest will brighten the dish and balance the richness of the chicken and butter.
Layer and Cook the Pilaf
Pour the 2 cups chicken broth evenly over the rice mixture, stirring gently to combine. The liquid should just cover the rice—if it looks too dry, add a splash of water. Return the chicken thighs to the skillet, skin-side up, and arrange them on top of the rice. This ensures the chicken stays warm and continues to render flavor into the rice as it cooks.
Bring the mixture to a gentle simmer over medium-low heat, then cover the skillet tightly with a lid. Reduce the heat to low and let the pilaf cook for 20-25 minutes. Avoid peeking or stirring during this time—this allows the rice to absorb the broth evenly and develop its full flavor. You'll know it's done when the rice is tender and the liquid has been absorbed, with just a few grains of rice clinging together when pressed between your fingers.
Rest and Serve with Crispy Top
Once the rice is tender and the chicken has reached 175°F internally, remove the skillet from the heat and let it rest for 5 minutes. This resting period allows the juices to redistribute throughout the chicken and rice, ensuring every bite is moist and flavorful. During this time, preheat your broiler to high for the final crisping step.
Transfer the skillet to a baking sheet (for safety) and place it under the preheated broiler. Broil for 2-3 minutes, watching closely, until the top of the rice and breadcrumb crust turn golden brown and crispy. The lemon zest will release its aroma, and the herbs will deepen in flavor. Serve immediately, garnished with extra fresh parsley if desired. The combination of juicy chicken, aromatic rice, and crispy herb crust makes this pilaf a standout dish.
Pro Tips For Making Chicken Flavored Rice Pilaf
- Brown the Thighs First: Don’t skip this step—sear those chicken thighs over medium-high heat until they’re golden and release from the pan with a little resistance. I used to rush this, and the pilaf ended up tasting like broth instead of chicken. Two minutes per side, no crowding, and you’ll get deep flavor that carries through the rice.
- Toast the Garlic Right: Sauté those minced garlic cloves in the chicken fat until they’re just turning golden, not burnt. I learned this the hard way—charred garlic ruins the whole dish. Keep an eye on them; they’ll darken fast, and you want that nutty aroma without bitterness.
- Use Cold Broth: Pour cold chicken broth over the rice, not hot. This guarantees even cooking and prevents gummy rice. I was skeptical until I tried it—now it’s non-negotiable. The rice absorbs the liquid steadily, and you won’t end up with a mushy pile.
- Zest Early, Squeeze Late: Add the lemon zest before the rice cooks but only a splash of juice at the end. The zest brightens the broth early, while the acidity at the finish keeps the rice from getting dull. I used to add both together, and the rice tasted flat—this makes a real difference.
Storing and reheating this recipe
Fridge Storage Tips
Let your pilaf cool completely before storing it in an airtight container—I use glass Pyrex with snap-on lids—to maintain freshness. Store in the fridge for up to 4 days, but I recommend eating it within 2-3 days for peak texture.
The herb crust stays crispier when stored separately on top of the rice if you want to recreate it fresh when reheating. 💛
Freezer Prep
For longer storage, freeze your pilaf in quart-sized freezer bags or glass containers, leaving 1 inch of headspace for expansion. I always freeze the herb crust separately—just sprinkle it back on top when reheating.
This pilaf keeps for 3 months in the freezer without losing flavor, though the texture may soften slightly. Label your bags with the date to track freshness.
Reheating on Stovetop
My preferred method is stovetop reheating—it preserves the best texture. Add 2 tablespoons of chicken broth per serving to a skillet over medium-low heat, then cover and warm for 5-7 minutes.
Stir gently and add more broth if needed. The rice should be hot but not soggy—this keeps those grains separate and fluffy. 🔥
Microwave Method
For quick reheating, cover your pilaf with a damp paper towel and microwave on 50% power for 2-3 minutes. Stir halfway through, then add 1 tablespoon of broth and microwave another 30 seconds.
This prevents drying out—just be careful not to overheat or the crust will lose its crunch.
Broiler Crisp Finish
If you want that crispy herb crust back after reheating, transfer the pilaf to an oven-safe dish and broil for 2-3 minutes on high. Watch closely—it burns fast!
The broiler revives that golden texture and adds fresh aroma. Perfect for when you're serving guests and want that restaurant-quality finish. ✨
Meal Prep Pro Tips
Double the recipe and store half for easy lunches. I pack the pilaf in bento-style containers with the herb crust on top—it stays fresh for 3 days in the fridge.
For extra flavor, add a squeeze of lemon juice when reheating. The chicken stays juicy even after reheating, thanks to the bone-in thighs we started with. 💡
Nutrition facts
Frequently asked questions
Can I use chicken breast instead of thighs for this pilaf?
Yes, but you'll need to adjust the cooking time and method to prevent dryness. Use boneless, skinless breasts and cook them separately in the skillet for 4-5 minutes per side until they reach 165°F. Then add them to the rice mixture during the final 10 minutes of cooking so they stay moist. Bone-in thighs are ideal for this recipe because they stay juicier longer.
What's the secret to keeping the rice grains separate?
The key is toasting the rice first and using the right liquid ratio. Start by toasting the rice in butter until translucent, then use 2 cups broth for 1.5 cups dry rice. Avoid stirring while cooking—just let it simmer gently under the lid. The rice should be tender but still slightly firm when done.
How do I make this vegetarian?
Swap the chicken for 1.5 cups of chickpeas or mushrooms and use vegetable broth instead. For extra protein, add 1 cup of cooked lentils to the rice mixture. Keep all other ingredients the same—just omit the chicken seasoning and adjust the herbs to 1.5 tsp thyme, 1.5 tsp parsley, and 1 tsp rosemary for the vegetarian version.
Can I make this in a rice cooker?
Cook the chicken separately first, then add it to the rice cooker with the rice, broth, and all other ingredients. Use the "white rice" setting and let it cook normally. For the crispy crust, transfer the finished pilaf to an oven-safe dish and broil for 2-3 minutes after cooking.
What if my rice turns out mushy?
Mushy rice usually means too much liquid or stirring too much. Next time, use 1.5 cups broth for 1.5 cups dry rice and avoid peeking under the lid while cooking. If it happens, spread the rice on a baking sheet and bake at 350°F for 10-15 minutes to dry it out slightly. The texture will improve but won't be perfect.