
Main Courses
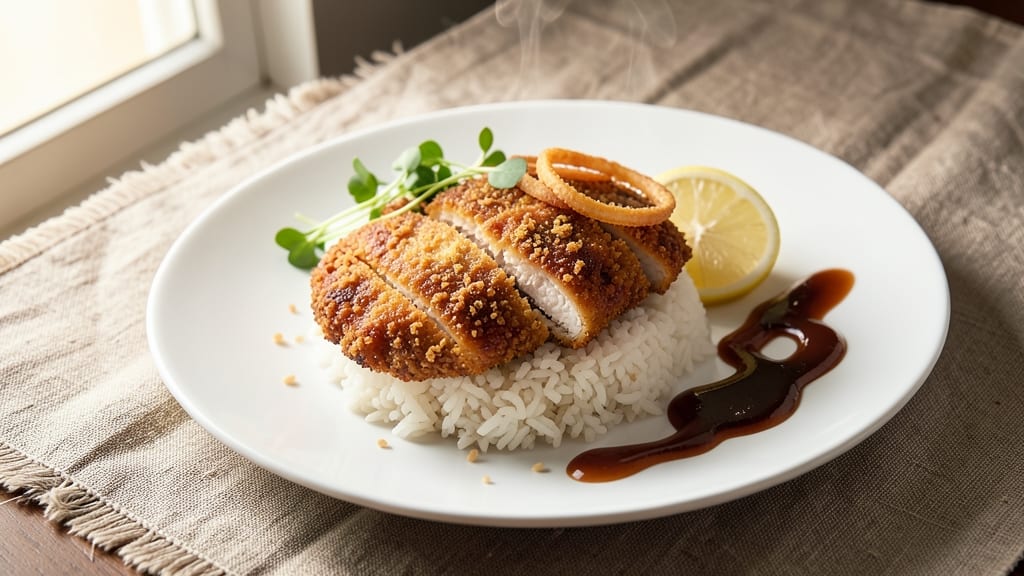
This crispy chicken katsu rice recipe delivers restaurant-quality results with golden, shatteringly crisp cutlets and perfectly steamed Japanese short-grain rice. 🔥 I've perfected the breading technique over years of testing—no soggy centers here, just that satisfying crunch you crave.
The secret lies in a precise panko-to-flour ratio and double-dredging for maximum crispiness.
What makes this recipe special is the balance of textures and flavors—crispy chicken over fluffy rice, topped with tangy tonkatsu sauce and fresh shredded cabbage. I use boneless chicken cutlets for ease, but the technique works for thighs too.
The rice should be sticky yet distinct, not mushy, and the sauce should cut through the richness without overpowering it.
By the time you plate this dish, you'll have a meal that looks as impressive as it tastes: golden-brown cutlets stacked over vibrant rice, drizzled with sauce and garnished with pickles for acidity.
The aroma alone will draw everyone to the table, and the first bite delivers that perfect harmony of textures—crispy, tender, creamy, and fresh all at once.
Serve with steamed greens or miso soup for a complete Japanese-inspired meal. The leftovers reheat beautifully, making this a perfect weeknight dinner that feels like a special occasion. Let's get started with the step-by-step method that guarantees crispy, golden perfection every time.
Ingredients for chicken katsu rice
Pantry staples and a few specialty items create this restaurant-style crispy chicken katsu rice.
| Ingredient | Amount | Notes |
|---|---|---|
| Boneless Chicken Cutlets 🍗 | 1 ½ lb | Pounded to even thickness |
| All-Purpose Flour 🌾 | 1 cup | For dredging, sifted |
| Japanese Panko Breadcrumbs 🍞 | 2 cups | Light and crispy |
| Large Eggs 🥚 | 2 whole | Beaten for egg wash |
| Japanese Short-Grain Rice 🍚 | 1 ½ cups | Uncooked weight |
| Water 💧 | 2 cups | For rice cooking |
| Tonkatsu Sauce 🍅 | ½ cup | Store-bought or homemade |
| Green Cabbage 🥬 | 4 cups | Shredded, thinly sliced |
| Vegetable Oil 🫒 | 2 cups | For deep frying |
| Salt 🧂 | 1 tsp | Kosher or sea salt |
| Black Pepper 🌶️ | ½ tsp | Freshly ground |
| Soy Sauce 🥢 | 1 tbsp | For rice seasoning |
| Pickled Red Ginger 🍈 | ¼ cup | For garnish, optional |
The chicken cutlets are the star, so buy boneless, skinless breasts—they cook faster and more evenly. Pound them to ¼-inch thickness for consistent crispiness. Japanese panko is non-negotiable here; regular breadcrumbs won't give you that shatteringly crisp crust. Look for it in the Asian aisle at Walmart or Trader Joe's—the Kikkoman brand is reliable. For the rice, Japanese short-grain (like Koshihikari) is ideal, but sushi rice works too. If you can't find it, jasmine rice is the next best option, though the texture won't be identical.
No panko? Toasted white breadcrumbs work in a pinch, but expect less crispiness. Short on tonkatsu sauce? Worcestershire sauce plus a splash of ketchup mimics the tangy-sweet flavor. The cabbage should be green and crisp—avoid wilted heads. For the oil, vegetable or canola oil works, but peanut oil gives the best flavor. If you're feeling fancy, add a pinch of sugar to the flour for extra caramelization. The rice ratio is critical: 1.5 cups uncooked rice to 2 cups water gives you perfectly sticky grains. Don't skip rinsing the rice first—removes excess starch for fluffier results.
Store leftover chicken in the fridge for 3 days—reheat in a skillet with a splash of water to restore crispiness. The rice keeps 4 days in the fridge, but it's best eaten fresh. For longer storage, freeze the chicken separately for up to 3 months. The cabbage stays crisp in the fridge for 1 week if wrapped in a damp towel. I always double the sauce recipe—it's perfect for drizzling over ramen or noodles later. Garnish with pickled red ginger or sesame seeds for that authentic restaurant touch.
Why You'll Love This Recipe
- Here’s what sold me: fried chicken stays crispy for days if you reheat it right (air fryer, 350°F for 3 minutes). Pair with store-bought tonkatsu sauce, and suddenly you’ve got a 5-minute lunch for a week. My kids call it “fancy takeout.”
- Crispy in Minutes: I swear, the panko crust turns golden in just 6 minutes—no flipping, no stress. The secret? Pat the chicken dry first, and don’t skip the double-dip in egg. That’s all it takes for shatteringly crisp edges every time.
- Comfort Food Magic: The first bite of that buttery panko, the juicy chicken underneath, and that fluffy short-grain rice? It’s like a hug in a bowl. Honestly, I’ve made this on lazy Sundays and 8 PM weeknights—it hits different every time.
- Leftover Goldmine: Here’s what sold me: fried chicken stays crispy for days if you reheat it right (air fryer, 350°F for 3 minutes). Pair with store-bought tonkatsu sauce, and suddenly you’ve got a 5-minute lunch for a week. My kids call it “fancy takeout.”
Step-by-step instructions for chicken katsu rice
Here's how to achieve that signature crispy texture and perfect balance of flavors.
🍳 Step 1: Prepare the Chicken Cutlets
Place the 1.5 lb boneless chicken cutlets between two sheets of plastic wrap and pound them to an even ½-inch thickness using a meat mallet. This ensures even cooking and prevents uneven crispiness. Season both sides generously with ½ tsp salt and ¼ tsp black pepper—this seasoning will penetrate while the chicken rests.
Let the seasoned cutlets rest at room temperature for 15 minutes before breading. This step is crucial as cold chicken won't develop that perfect golden crust. While they rest, sift the 1 cup all-purpose flour into a shallow bowl and place it near your workstation.
👨🍳 Step 2: Create the Breading Station
Set up three separate bowls: one with the sifted 1 cup flour, one with the 2 whole beaten eggs, and one with the 2 cups Japanese panko breadcrumbs. The panko should be light and airy—don't press it down in the bowl as this will compact it and reduce crispiness. I like to add ¼ tsp salt to the panko mixture for extra flavor.
Work quickly but methodically: dip each cutlet into the flour, shaking off any excess, then into the egg wash, letting any excess drip off, and finally into the panko, pressing gently to adhere. The breading should be even and about ¼-inch thick on all sides. Rest the breaded cutlets on a wire rack for 5 minutes before frying—this helps the breading adhere better and prevents a soggy crust.
🔥 Step 3: Fry to Crispy Perfection
Heat 2 cups vegetable oil in a deep skillet or Dutch oven to 350°F—this is the sweet spot for achieving that golden-brown crust without burning the outside before the inside cooks through. Use a thermometer to monitor the temperature carefully; if it drops below 340°F, the cutlets will absorb oil and become greasy rather than crispy.
Fry the cutlets in batches, being careful not to overcrowd the pan. Cook for 3-4 minutes per side until they reach 165°F internally and develop a deep golden-brown color. Transfer them to a paper towel-lined plate to drain excess oil. The cutlets should stay crispy for several minutes after frying, but serve them immediately for the best texture.
🍚 Step 4: Cook the Japanese Short-Grain Rice
Rinse the 1.5 cups Japanese short-grain rice under cold water until the water runs clear, then combine it with the 2 cups water in a rice cooker or pot. If using a pot, bring to a boil, then reduce to a simmer, cover, and cook for 15 minutes off the heat. For a rice cooker, follow the manufacturer's instructions—typically 20-25 minutes on the standard setting.
While the rice cooks, prepare the tonkatsu sauce by warming the ½ cup tonkatsu sauce in a small saucepan over low heat for 2-3 minutes until it's ready to serve. The sauce should be smooth and slightly thickened but still pourable. Stir in 1 tbsp soy sauce at the end for a perfect balance of sweet and savory flavors.
🥘 Step 5: Assemble and Garnish
Divide the cooked rice evenly among 4 bowls. Place one crispy chicken cutlet on top of each serving, fanning the cabbage leaves slightly to create a bed for the cutlet. Drizzle each serving with 2 tablespoons of the warmed tonkatsu sauce, allowing it to pool slightly around the chicken.
Garnish with the 4 cups shredded green cabbage and top with 1 tablespoon pickled red ginger for a bright, tangy contrast. The cabbage adds freshness and crunch, while the ginger's sweet-spicy flavor cuts through the richness of the fried chicken. Serve immediately while the chicken is still crispy and the rice is hot.
Pro Tips For Making Chicken Katsu Rice
- Pound Chicken Thin: The thinner the cutlet, the faster it cooks and the crispier the crust—no one wants a soggy middle. Use a meat mallet and aim for about ½-inch thickness, then pat dry again with paper towels after pounding. Wet spots turn to steam, and steam kills your crisp.
- Egg Dip, Don’t Pour: Dipping chicken in a shallow pool of beaten egg (not drowning it) keeps the flour and panko from sliding off. I used to pour egg over the top like a lazy painter, and half the crumbs ended up in the pan. A quick dip—front and back—does the job.
- Preheat Oil to 350°F: Too hot and the outside burns before the inside cooks; too cool and you get greasy, uncrispy mess. Test with a wooden chopstick: it should sizzle and float. If it smokes immediately, let the oil cool 30 seconds—patience here means perfect golden crust.
- Double-Crust with Panko: Skip the breadcrumbs on the first dip—just flour and egg. The second layer of panko sticks better and creates that iconic shatter. I learned this after a batch fell apart like a house of cards. Two thin layers beat one thick one every time.
Storing and reheating this recipe
Fridge Storage Tips
Store your crispy chicken katsu in an airtight container with parchment paper between layers to prevent sticking. I keep mine in the fridge for up to 3 days—the breading stays crispy surprisingly well when stored properly.
The rice, however, is best eaten within 2 days to maintain its sticky texture. Place a damp paper towel over the rice before sealing to retain moisture. 🥬
Freezer-Friendly Techniques
For longer storage, freeze the chicken cutlets separately in a single layer on a tray before transferring to a freezer bag—this prevents them from sticking together. They'll keep for up to 3 months.
When reheating, I use the skillet method: place frozen cutlets in a cold skillet, add 1 tablespoon oil, and cook over medium heat for 5-6 minutes per side until crispy again.
The rice doesn't freeze well, but you can reheat day-old rice in a steamer for 5 minutes to restore its texture.
Reheating Crispiness
To revive crispiness in leftover chicken, I recommend the oven method: place cutlets on a wire rack over a baking sheet and bake at 400°F for 8-10 minutes. This creates steam underneath while crisping the breading.
For the rice, spread it on a plate and microwave it covered for 1-2 minutes, then fluff with a fork. A quick spray of water before microwaving helps restore moisture. 🔥
Sauce and Sides
The tonkatsu sauce reheats beautifully—simply warm it in a small saucepan over low heat for 2-3 minutes. The shredded cabbage stays fresh in the fridge for 5 days if stored in a sealed container with a damp paper towel.
I like to keep extra sauce on hand because it's perfect for drizzling over other dishes like ramen or noodles. The pickled ginger, however, is best used fresh—its bright flavor pairs best with freshly fried chicken.
Meal Prep Strategy
My go-to meal prep approach: cook the chicken and rice separately, then assemble when ready to eat. Store components in individual containers—this way, you can reheat just what you need. I also make extra sauce because it's so versatile.
For lunch the next day, I'll reheat one cutlet and a portion of rice, then add fresh cabbage and a drizzle of sauce. The key is keeping everything separate until the last minute to maintain texture. ✨
Nutrition facts
Frequently asked questions
Can I use chicken thighs instead of breasts for katsu?
Chicken thighs work beautifully—they stay juicier and more flavorful when fried. Just pound them to ½-inch thickness and increase cooking time by 1-2 minutes per side to reach 165°F internally. The skin-on version adds extra crispiness, but boneless thighs are easiest for beginners.
What if my panko breading isn't crispy?
Soggy breading usually means one of two things: either the oil wasn't hot enough (350°F is critical) or the cutlets were overcrowded in the pan. Try frying in smaller batches and using a thermometer to monitor oil temperature precisely. Also, let breaded cutlets rest on a wire rack for 5 minutes before frying to help the coating set.
How do I make tonkatsu sauce from scratch?
Simmer ½ cup ketchup, 2 tbsp Worcestershire sauce, 1 tbsp soy sauce, 1 tbsp honey, and ½ tsp garlic powder in a saucepan for 5-7 minutes until thickened. For extra depth, add 1 tsp vinegar and a pinch of smoked paprika. This homemade version has more complex flavor than store-bought!
Can I bake the chicken katsu instead of frying?
Yes, but texture will differ. Brush breaded cutlets with 1 tbsp oil and bake at 425°F for 12-15 minutes on a wire rack. The result will be lighter and less crispy than fried, but still delicious. For extra crunch, broil for 1-2 minutes at the end. Air fryers work too at 375°F for 8-10 minutes.
What's the best way to serve this as a meal?
Pair your katsu rice with steamed bok choy or miso soup for a complete Japanese meal. For extra flair, add quick-pickled cucumbers or sesame seeds** on top. The cabbage in the recipe already provides freshness, but adding a side salad balances the richness. Serve with chopsticks for that authentic experience!