
Main Courses
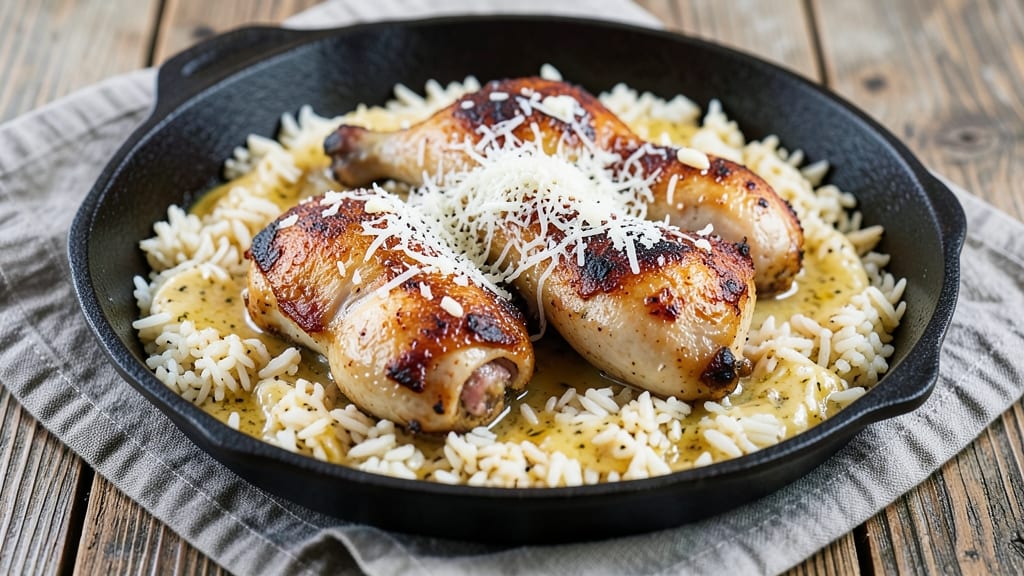
This chicken thigh rice bake recipe delivers restaurant-quality comfort in one dish—juicy, golden-brown chicken thighs nestled in a crispy rice crust that locks in flavor. The secret lies in searing the thighs first for depth, then baking them low and slow with aromatic rice until tender and caramelized.
Every bite combines savory, herby notes with perfectly cooked grains, making it a weeknight hero that feels like a celebration.
What sets this recipe apart is the technique: chicken thighs develop rich, crispy edges while staying impossibly tender inside, and the rice absorbs all the juices for a cohesive, flavorful bite. No fancy equipment needed—just a baking dish, high heat for the sear, and patience for the finish.
The result? A one-pan meal that’s hearty enough for a family dinner but simple enough for a solo night in.
Ingredients for chicken thigh rice bake
Juicy chicken thighs and aromatic rice create a comforting, restaurant-style bake with minimal effort.
| Ingredient | Amount | Notes |
|---|---|---|
| Bone-In Chicken Thighs 🍗 | 1 ½ lb | Skin-on for crispy edges |
| Long-Grain White Rice 🍚 | 2 cups | Uncooked, like jasmine or basmati |
| Chicken Broth 💧 | 2 cups | Low-sodium preferred |
| Heavy Cream 🥛 | ½ cup | Full-fat for richness |
| Parmesan Cheese 🧀 | ½ cup | Freshly grated from block |
| Garlic Cloves 🧄 | 4 cloves | Minced for aromatic depth |
| Yellow Onion 🧅 | 1 whole | Diced into small pieces |
| Fresh Thyme Leaves 🌿 | ¼ cup | Or 1 tbsp dried thyme |
| Butter 🧈 | 3 tbsp | Unsalted, cubed for searing |
| Olive Oil 🫒 | 2 tbsp | For crispy sear |
| Salt 🧂 | 1 ½ tsp | Kosher or sea salt |
| Black Pepper 🌶️ | ½ tsp | Freshly ground preferred |
| Dijon Mustard 🍯 | 1 tsp | For subtle tang |
| All-Purpose Flour 🌾 | 2 tbsp | For crispy rice crust |
The chicken thighs are the star—bone-in, skin-on cuts stay juicy while developing crispy edges. Look for thighs with good marbling at the grocery store's butcher counter or pre-cut section. Costco or Whole Foods often carry high-quality bone-in thighs in bulk. Avoid pre-breaded or frozen thighs—they won't crisp as well. For the rice, jasmine or basmati are ideal—they stay separate and soak up all the flavor without getting mushy. If you can only find long-grain white rice, it'll work just fine, but avoid instant or pre-cooked varieties.
No chicken broth? Substitute vegetable broth with a splash of soy sauce for umami depth. Fresh thyme is ideal, but dried works at one-third the amount. Want extra richness? Swap the heavy cream for half-and-half or coconut milk. The Dijon mustard adds subtle tang—if you're avoiding it, lemon juice at half the amount works too. For the rice crust, panko breadcrumbs can replace flour if you prefer extra crunch. Just make sure to toast them lightly in the oven first for better flavor.
This bake reheats beautifully—just cover with foil and warm in the oven for 15-20 minutes at 350°F. The rice and chicken actually taste better the next day as flavors meld. Store leftovers in an airtight container for up to 4 days in the fridge. For meal prep, portion into individual containers before baking—this way, you can reheat just one serving without defrosting the whole dish. The crust stays crispy if you reheat it covered, then uncover for the last few minutes.
Why You'll Love This Recipe
- One-Pan Magic: Honestly, this recipe is my lazy-day hero. You brown the thighs, dump in rice and broth, then let the oven do the rest—no stirring, no stress, just hands-off perfection.
- Creamy Crispy Contrast: That crispy skin on the thighs paired with the silky cream and melted Parmesan? It’s the kind of texture combo that makes you take a second bite before even swallowing the first.
- Budget Feast: Bone-in thighs stretch for miles, and rice fills plates without breaking the bank. I’ve fed six people for under $12 with this—leftovers for days, no guilt.
- Weeknight Workhorse: Between us, this is my go-to when I’m too tired to think. Reheats like a dream, tastes fresh even cold, and? Yes, even on a Tuesday night, it still gets applause.
Step-by-step instructions for chicken thigh rice bake
Here's how to create a restaurant-quality bake with crispy chicken and perfectly seasoned rice.
Sear the Chicken Thighs for Maximum Flavor
Preheat your oven to 425°F and position a rack in the middle position. Heat 2 tablespoons olive oil and 3 tablespoons butter in a large oven-safe skillet over medium-high heat until the butter foams. Pat the 1.5 lb bone-in chicken thighs completely dry with paper towels—this is crucial for crispy skin.
Place the chicken thighs skin-side down in the skillet and cook undisturbed for 6-8 minutes until the skin is deep golden brown and crispy. Flip the thighs and cook for another 4-5 minutes until the internal temperature reaches 160°F. Remove the chicken and set aside on a plate, leaving the rendered fat in the skillet. This fat will form the flavor base for your rice.
Sauté Aromatics and Prepare the Rice Mixture
In the same skillet (with the chicken fat still in it), add 1 whole yellow onion and 4 cloves garlic cloves that have been minced. Cook over medium heat for 3-4 minutes until the onions are soft and translucent and the garlic is fragrant. Stir in 2 tablespoons all-purpose flour and cook for 1 minute to remove the raw flour taste.
Gradually pour in 2 cups chicken broth while stirring to create a smooth sauce. Bring to a gentle simmer, then add 2 cups long-grain white rice, 1.5 teaspoons salt, 0.5 teaspoon black pepper, and 1 teaspoon Dijon mustard. Stir well to coat the rice evenly with the broth mixture. The rice should absorb the liquid gradually as it cooks.
Layer and Assemble the Bake
Return the seared chicken thighs to the skillet, skin-side up, and arrange them on top of the rice mixture. Sprinkle evenly with 0.25 cup fresh thyme leaves and 0.5 cup freshly grated Parmesan cheese. The thyme will infuse the dish with aromatic depth, while the Parmesan adds a rich, savory element.
Cover the skillet tightly with aluminum foil and transfer it to the preheated oven. Bake for 25 minutes to allow the rice to absorb the liquid and the chicken to cook through. After 25 minutes, remove the foil and increase the oven temperature to 450°F to create a golden crust.
Finish with Creamy Richness and Crispy Top
In a small saucepan, warm 0.5 cup heavy cream over low heat until it's just hot but not boiling. Stir in 1 tablespoon butter to create a silky sauce. Once the rice bake has been in the oven at 450°F for 10 minutes, carefully pour the cream mixture evenly over the top of the dish.
Return the skillet to the oven for another 10-12 minutes until the top is deep golden brown and the rice is tender. The internal temperature of the chicken should reach 175°F at its thickest part. Let the bake rest for 5 minutes before serving to allow the juices to redistribute and the layers to set.
Serve with Confidence
Use a spatula to carefully transfer the chicken thigh rice bake to a serving platter. The rice should be creamy and fluffy, while the chicken thighs should be juicy and tender with crispy, golden-brown skin. Garnish with additional fresh thyme leaves and a sprinkle of Parmesan cheese for a professional finish.
Serve immediately, as the creamy sauce and crispy top are best enjoyed while hot. Each bite should deliver a harmonious balance of juicy chicken, flavorful rice, and rich, creamy sauce. The golden crust gives way to tender rice and succulent meat, making this a satisfying one-pan meal.
Pro Tips For Making Chicken Thigh Rice Bake
- SEAR THIGHS FIRST: Skip the slow start—pat those bone-in thighs very dry, then sear them skin-side down in a hot pan for 8-10 minutes until the skin’s deep golden and crisp. I used to bake them straight from the fridge, and the skin stayed sad and pale. High heat upfront means richer flavor and a texture that’ll make your rice bake shine.
- USE STARCHY BROTH: Don’t just grab any chicken broth—look for one with at least 2 grams of starch per serving (or make your own by simmering a cornstarch slurry). The starch thickens the sauce as it bakes, so your rice ends up creamy instead of watery. I learned this the hard way after serving a dish where the rice tasted like it was swimming in soup.
- LAYER RICE DRY: Spread uncooked rice in the baking dish before adding any liquid, then pour the broth-heavy cream mix over it. This lets the rice soak up liquid evenly instead of forming a soggy bottom. Yes, it looks weird at first, but your rice will be fluffy and not gummy—trust me, I’ve done both.
- SAVE TIME WITH PARM: Skip grating your own Parmesan—buy pre-shredded and pulse it in a food processor for 10 seconds to break up clumps. Freshly grated is great, but this hack saves 15 minutes and still melts beautifully into the cream. (Your future self will thank you when you’re staring at a timer for a dinner party.)
Common mistakes when making great chicken thigh rice bake
Skipping the Sear
One of the biggest mistakes is skipping the sear on the chicken thighs. That crispy skin is what makes this dish special, and it happens during the initial high-heat sear. If you skip it, you'll end up with bland, rubbery chicken instead of the juicy, flavorful centerpiece.
I always pat the thighs completely dry before searing—this step is non-negotiable for crispiness. 🔥
Undercooking the Rice
Rice is the foundation of this dish, and undercooking it turns it into a mushy, flavorless mess. The key is patience: let the rice absorb the liquid gradually. If you peek too early or don't cover it properly, you'll end up with dry, separate grains instead of creamy, cohesive rice.
I recommend checking the rice's texture after 25 minutes—it should be tender but still slightly firm.
Overmixing the Rice
Once you add the rice to the broth, resist the urge to stir constantly. Overmixing can break up the rice grains and turn them into a gluey paste. Stir just once to distribute everything evenly, then let it cook undisturbed.
This ensures fluffy, individual grains that soak up all the flavor. I promise, the rice will cook perfectly without your constant attention. 💫
Ignoring the Resting Time
After baking, it's tempting to dig in immediately, but resting the dish for 5 minutes is crucial. This allows the juices to redistribute throughout the chicken and rice, preventing dryness.
If you skip this step, you'll end up with a less flavorful, more uneven bite. Trust me, those extra minutes make all the difference in the final result.
Using Low-Quality Chicken
Not all chicken thighs are created equal. Using pre-breaded or frozen thighs will ruin the crispy skin and tender meat you're aiming for. Look for bone-in, skin-on thighs with good marbling—these stay juicy and develop the best flavor.
I always buy mine from the butcher counter at Whole Foods or Costco for the best quality. The extra effort pays off in every bite.
Skipping the Cream Mixture
The creamy sauce is what ties everything together, adding richness and moisture to the dish. If you skip warming the heavy cream with butter before pouring it over, you'll miss out on that silky, luxurious finish.
I recommend heating the cream gently—just until it's hot, not boiling—to maintain its texture. This step is what elevates a good bake into a restaurant-quality dish. ✨
Nutrition facts
Frequently asked questions
Can I use boneless chicken thighs instead of bone-in?
Yes, but the cooking time may differ slightly. Boneless thighs will cook faster—check for 165°F internal temperature rather than relying on the 25-minute bake time. The flavor and texture will still be excellent, though bone-in thighs add extra richness and stay juicier longer.
What rice works best for this recipe?
Long-grain white rice like jasmine or basmati is ideal—it stays separate and absorbs flavors beautifully. Avoid instant rice or pre-cooked varieties, as they won't create the same creamy texture. For extra fluffiness, try arborio rice, which absorbs liquid well while staying tender.
How do I adjust this for a larger group?
Double all ingredients and use a larger oven-safe skillet or baking dish. For 8 servings, increase the chicken to 3 lbs and rice to 4 cups. Bake in two batches if needed, or use a 9x13-inch dish instead of a skillet. The same techniques apply—just scale up evenly.
Can I make this ahead of time?
Bake it a day ahead and refrigerate in an airtight container. Reheat covered at 350°F for 20 minutes, then uncover for the last 5 minutes to crisp the top. The flavors actually improve overnight as everything melds. Perfect for meal prep!
Why is my rice mushy instead of creamy?
Mushy rice usually means either overcooking or too much liquid. Always check the rice after 25 minutes—it should be tender but still slightly firm. If using a different rice variety, adjust cooking times (e.g., brown rice needs 10-15 minutes longer1 tablespoon butter after baking.