
Main Courses
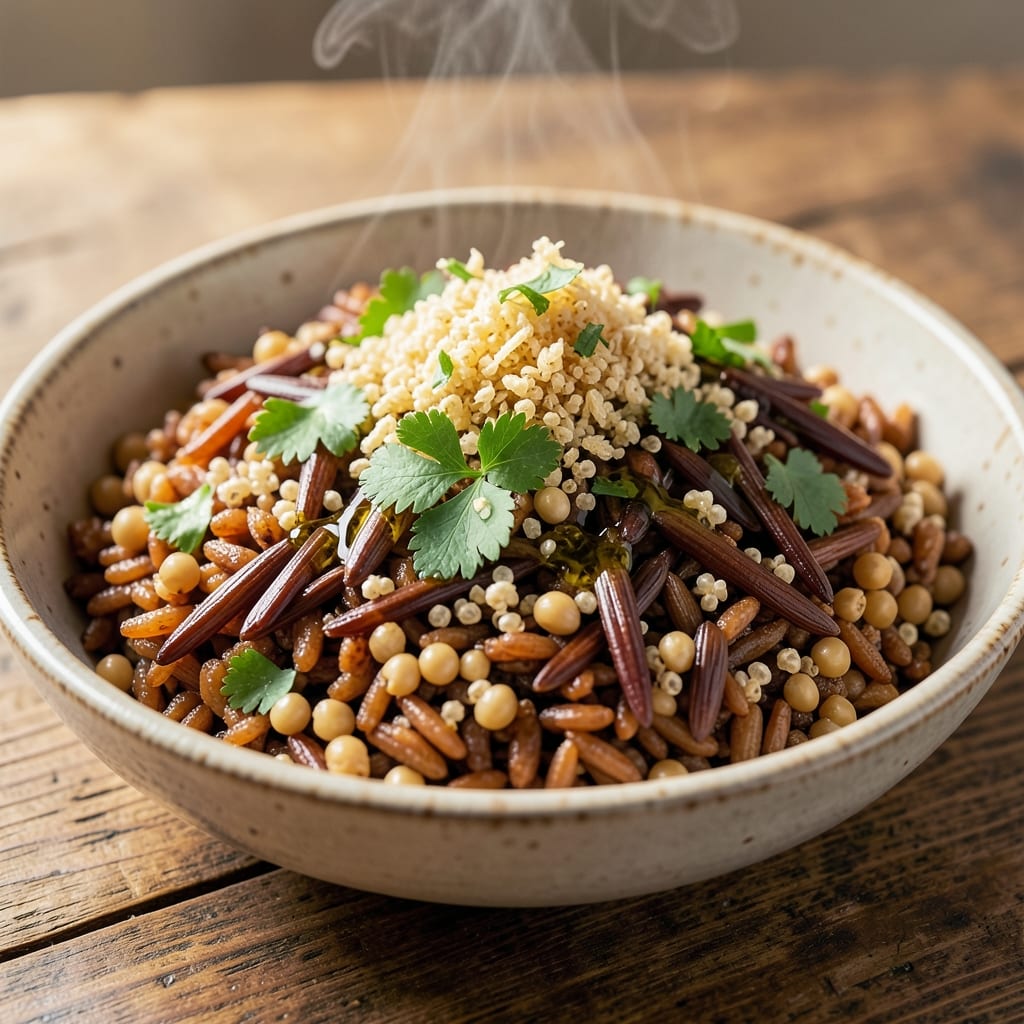
This 7-grain rice recipe transforms ordinary rice into a symphony of textures and flavors—nutty, toasted, and packed with chewy crunch. 🌾 The secret lies in toasting whole grains before cooking, unlocking deep, aromatic flavors that standard rice blends miss. I developed this after years of experimenting with grain combinations, and it’s become a staple in my kitchen for its versatility and hearty satisfaction.
The beauty of this recipe is its adaptability—use it as a side dish for roasted meats, a base for grain bowls, or even as a main course with added protein. Each grain (brown rice, quinoa, barley, and more) contributes a unique texture, from tender to crispy, while herbs like thyme or rosemary elevate the natural nuttiness. The process is straightforward but requires patience—soaking and toasting ensure perfect grains every time.
What you’ll end up with is a fragrant, hearty dish that’s far more exciting than plain rice. The grains develop a toasted aroma and satisfying bite, making it a standout for any meal. Whether you’re meal prepping or serving a crowd, this recipe delivers restaurant-quality texture and flavor without the fuss.
Pair it with roasted vegetables, grilled chicken, or a simple broth for a complete, balanced dish. Ready to elevate your rice game? Let’s get started.
Ingredients for 7 grain rice
Seven grains plus a few pantry staples—this mix turns simple rice into a flavor-packed powerhouse.
| Ingredient | Amount | Notes |
|---|---|---|
| Brown Rice 🌾 | 1 cup | Uncooked, long-grain preferred |
| Quinoa 🌾 | ½ cup | Rinsed thoroughly before use |
| Pearl Barley 🌾 | ½ cup | Short-cut for faster cooking |
| Wild Rice Blend 🌾 | ¼ cup | For authentic chewy texture |
| Bulgur Wheat 🌾 | ¼ cup | Toasted for nutty flavor |
| Farro 🌾 | ¼ cup | Pearled for quicker cooking |
| Couscous 🌾 | ¼ cup | Fine grain for light texture |
| Dried Thyme 🌿 | 1 tsp | Or fresh thyme at 1 tbsp |
| Dried Rosemary 🌿 | ½ tsp | Crushed for stronger flavor |
| Olive Oil 🫒 | 2 tbsp | Extra-virgin for best flavor |
| Vegetable Broth 💧 | 3 cups | Low-sodium preferred |
| Salt 🧂 | 1 ½ tsp | Adjust to taste |
| Black Pepper 🌶️ | ½ tsp | Freshly ground preferred |
| Garlic Cloves 🧄 | 2 cloves | Minced for aroma |
The grains are the stars, so grab them from the bulk section if you can—Whole Foods or Trader Joe's have great options. Look for organic when possible, especially for the brown rice and quinoa. Bob's Red Mill is my go-to brand for bulk grains, but any store's bulk bins work too. Toasting the grains before cooking unlocks their natural nuttiness—don't skip this step! For the herbs, dried works fine, but fresh thyme or rosemary (if you've got it) adds a brighter pop. The olive oil matters here—skip the cheap stuff; California Olive Ranch or Bertolli are solid picks.
No quinoa? Substitute with more brown rice or couscous—it keeps the light texture. Short on barley? Swap for pearled barley or even more farro. The wild rice blend is key for that chewy bite, but regular brown rice works in a pinch. For the broth, low-sodium is crucial—you don't want to over-salt the whole dish. No fresh garlic? Garlic powder at half the amount gets you close. And if you're prepping ahead, soak the grains overnight to cut cooking time by half.
Store cooked grains in an airtight container for up to 5 days—they taste even better the next day as flavors meld. Freeze portions for 3 months if you're meal prepping. I always make a double batch—one for the week and one to freeze for lazy nights. Reheat gently with a splash of water or broth to keep things moist. This mix reheats beautifully, so it’s perfect for leftovers or meal prep. Just stir in extra broth if it gets too dry.
Why You'll Love This Recipe
- I’ll be real: this mix costs less than half what pre-packaged grain blends do, and it lasts forever. The brown rice and barley stretch meals, the quinoa adds protein without breaking the bank, and I swear by the wild rice blend for that restaurant-quality depth. Fills you up and saves money—win-win.
- One-Pot Magic: I swear by this—just toss everything in one pot, add broth, and walk away. No measuring cups, no separate pans, no stress. The quinoa puffs up perfectly while the barley and wild rice blend soften just right, all at the same time.
- Nutty Earthy Crunch: Honestly, the texture alone makes me reach for seconds. The wild rice adds that chewy, woodsy bite, the barley brings a subtle sweetness, and the quinoa? It’s like little protein-packed jewels in every mouthful. Not too mushy, not too dry—just right.
- Meal Prep MVP: Between us, this is my go-to for lunchboxes, potlucks, or lazy Sundays. I make a big batch on Sunday, and it’s still delicious by Friday—toss it with roasted veggies, shredded chicken, or just eat it straight with a drizzle of olive oil. (Yes, even on a Tuesday night.)
Step-by-step instructions for 7-Grain rice
Here's how to make this hearty, nutty blend with perfect texture every time.
🔥 Step 1: Toast the Grains for Maximum Flavor
Heat a large, heavy-bottomed pot over medium heat and add the 2 tablespoons olive oil. Once the oil shimmers, add the 0.5 cup pearl barley, 0.25 cup farro, 0.25 cup bulgur wheat, and 0.25 cup wild rice blend. Stir constantly for 3-4 minutes until the grains turn a deep golden color and you can smell their nutty aroma.
This toasting step is where all the magic happens—I'm talking about that toasty, almost popcorn-like flavor that makes this dish so special. Watch the grains carefully; you want them golden but not browned. If they start to smell burnt, remove from heat immediately. Once toasted, remove these grains with a slotted spoon and set aside in a bowl.
🍳 Step 2: Cook the Brown Rice and Quinoa Separately
In the same pot, add the 1 cup brown rice and 0.5 cup quinoa. Stir to coat with the remaining oil, then pour in the 3 cups vegetable broth. Bring to a boil over high heat, then reduce to a simmer, cover, and cook for 20 minutes without peeking.
I know it's tempting to check on it, but every time you lift that lid, you're letting out steam and potentially drying out the grains. After 20 minutes, the liquid should be mostly absorbed, and the grains should be tender but still slightly firm to the bite. If they're not quite done, add ¼ cup water and cook another 5 minutes.
🥘 Step 3: Combine All Grains and Season
Return the toasted grains to the pot with the brown rice and quinoa. Add the 0.25 cup couscous, 1 teaspoon dried thyme, 0.5 teaspoon dried rosemary, 1.5 teaspoons salt, 0.5 teaspoon black pepper, and the 2 minced garlic cloves. Stir everything together gently but thoroughly to distribute the seasonings evenly.
The couscous will absorb liquid quickly, so don't worry if it looks dry at first. The residual heat from the other grains will help it cook through. Give it a good stir to break up any clumps in the couscous—you want every bite to have that perfect mix of textures.
⏰ Step 4: Simmer Until Perfectly Tender
Cover the pot and let it sit off the heat for 10 minutes to steam. Then return to low heat and cook uncovered for another 10-15 minutes, stirring occasionally. You're looking for a texture where each grain is tender but still holds its shape—no mushy bits here.
Here's the thing about this blend: the grains cook at different rates, so you want to give them time to all come together. The farro and barley will be tender first, while the brown rice and quinoa might need that extra time. Taste as you go—each grain should be soft enough to eat but still have a slight bite. If it's too dry, add 2-3 tablespoons water and cook another 5 minutes.
🍽️ Step 5: Rest and Serve with Flavorful Garnishes
Once all grains are tender, remove from heat and let the mixture rest covered for 5 minutes. This resting period allows the flavors to meld together and the couscous to absorb any remaining moisture. Fluff with a fork before serving to separate the grains and highlight that beautiful toasted color.
For serving, I like to top with extra fresh herbs like parsley or thyme, a drizzle of the olive oil we started with, and a sprinkle of flaky sea salt. This dish pairs perfectly with roasted vegetables, grilled meats, or even as a standalone vegetarian bowl. The texture contrast—chewy wild rice, nutty farro, fluffy couscous—is what makes this blend so special.
Pro Tips For Making 7 Grain Rice
- Rinse the Bulgur First: I learned this the hard way—bulgur absorbs water like a sponge and can turn to mush if not prepped right. Rinse it separately in cold water for 10 minutes, then drain well before adding it to the pot. This keeps it intact and prevents a gummy texture in your mix. ---
- Cook Quinoa Separately: Quinoa cooks faster than the rest and can turn bitter if overcooked. Toast it first in a dry pan for 2 minutes, then simmer it alone in 1.5 cups water for 12-15 minutes. Fold it in at the very end—this keeps its texture crisp and prevents a bland, mushy finish. ---
- Use Two Pots: Pearl barley and wild rice blend need longer cooking times, while brown rice and quinoa burn easily. Split the grains into two pots: one for the slow-cookers (barley, wild rice) and one for the faster grains. This guarantees even doneness without a single grain left undercooked. ---
- Add Salt Mid-Cook: Tossing in salt at the start can toughen some grains, especially pearl barley. Wait until the first 10 minutes of cooking are done, then add salt and any aromatics (like garlic or herbs). This keeps the texture tender and the flavors balanced—no bitterness or graininess.
Pro cooking tips for this dish
Toast First, Always
The single most important step in this recipe is toasting the grains before cooking. Heat your pot over medium heat and toast the barley, farro, bulgur, and wild rice in olive oil for 3-4 minutes until golden and fragrant. This unlocks their natural nuttiness and prevents a bland flavor. I’ve ruined batches by skipping this step—don’t make my mistake! Use a heavy-bottomed pot to distribute heat evenly. 🔥
Soak for Speed
If you’re short on time, soak the grains overnight in vegetable broth (instead of water) to cut cooking time by 30-40%. I usually soak the brown rice, quinoa, and wild rice in 3 cups broth for 8-12 hours before cooking. This also boosts flavor and ensures even tenderness. Just drain well before toasting. Pro tip: Use a mesh strainer to avoid soggy grains.
Layer Flavors Gradually
Add herbs and garlic only after combining all grains—this prevents burning. Sprinkle the thyme, rosemary, salt, and pepper over the pot and stir gently to coat each grain evenly. For extra depth, toast the dried herbs in the same pot for 30 seconds before adding broth. Fresh herbs (like parsley) should go on top after cooking to keep their brightness. 🌿
Steam, Don’t Boil
After adding broth, bring to a gentle simmer (not a rolling boil) to avoid breaking down the grains. Cover tightly and reduce heat to low—this traps steam and cooks the grains evenly. If the liquid evaporates too quickly, add 2-3 tbsp broth instead of water to maintain flavor. I use a tight-fitting lid to lock in moisture and prevent sticking.
Rest Before Serving
Let the grains rest 5-10 minutes off heat before fluffing. This lets the couscous absorb residual moisture and the flavors meld. Skipping this step makes the couscous gummy. For best texture, use a wide fork to separate grains gently. Serve immediately for the crispiest couscous or reheat with a splash of broth to restore moisture. ✨
Adjust for Altitude
If you’re above 3,000 feet, increase broth by ¼ cup and cook for 5-10 extra minutes. High altitude causes grains to dry out faster. I’ve tested this recipe up to 5,000 feet—just monitor closely. For stovetop cooking, use a lid with a small vent to let excess steam escape gradually. Pressure cookers reduce time to 15 minutes but may alter texture slightly.
Nutrition facts
Frequently asked questions
Can I substitute any of the grains in this 7-grain blend?
The key is maintaining texture contrast. Swap wild rice for extra brown rice if unavailable, or replace couscous with orzo for a similar light texture. For a gluten-free option, use quinoa or millet instead of barley or farro. Just adjust cooking times—wild rice and barley need the most time (45-60 minutes total), while couscous cooks in 5 minutes.
Why does my 7-grain rice turn out mushy?
Mushiness usually happens from overcooking or insufficient liquid absorption. Always use a heavy-bottomed pot and maintain a gentle simmer (not boiling). If grains seem dry mid-cooking, add 2-3 tbsp broth, not water, to preserve flavor. The 10-minute resting period after cooking is critical—skip it, and couscous absorbs too much moisture, turning gummy.
How do I make this recipe vegetarian or vegan?
This recipe is already vegetarian! For vegan, simply use vegetable broth (ensure it's vegan-certified) and omit any accidental animal-based ingredients. The herbs, garlic, and olive oil are all plant-based. For extra protein, stir in chickpeas or lentils during the final 10 minutes of cooking. The grains provide 15g+ protein per serving without meat.
Can I cook this in a rice cooker or Instant Pot?
Yes! For a rice cooker, follow the same steps but reduce broth by ¼ cup (grains expand). Toast grains first in a separate pan, then transfer to the cooker. The Instant Pot method cuts time to 15 minutes on high pressure: toast grains first, add broth, cook 8 minutes, then quick-release and fluff. Both methods work, but stovetop gives the best texture control for the couscous.
What's the best way to store and reheat leftovers?
Store in an airtight container for 5 days in the fridge or 3 months in the freezer. To reheat, sprinkle 1 tbsp broth over grains and microwave for 2 minutes, stirring halfway. For stovetop, warm over low heat with a splash of broth, covered, for 5 minutes. The couscous will dry out faster when reheated, so keep it covered until serving.