
Main Courses
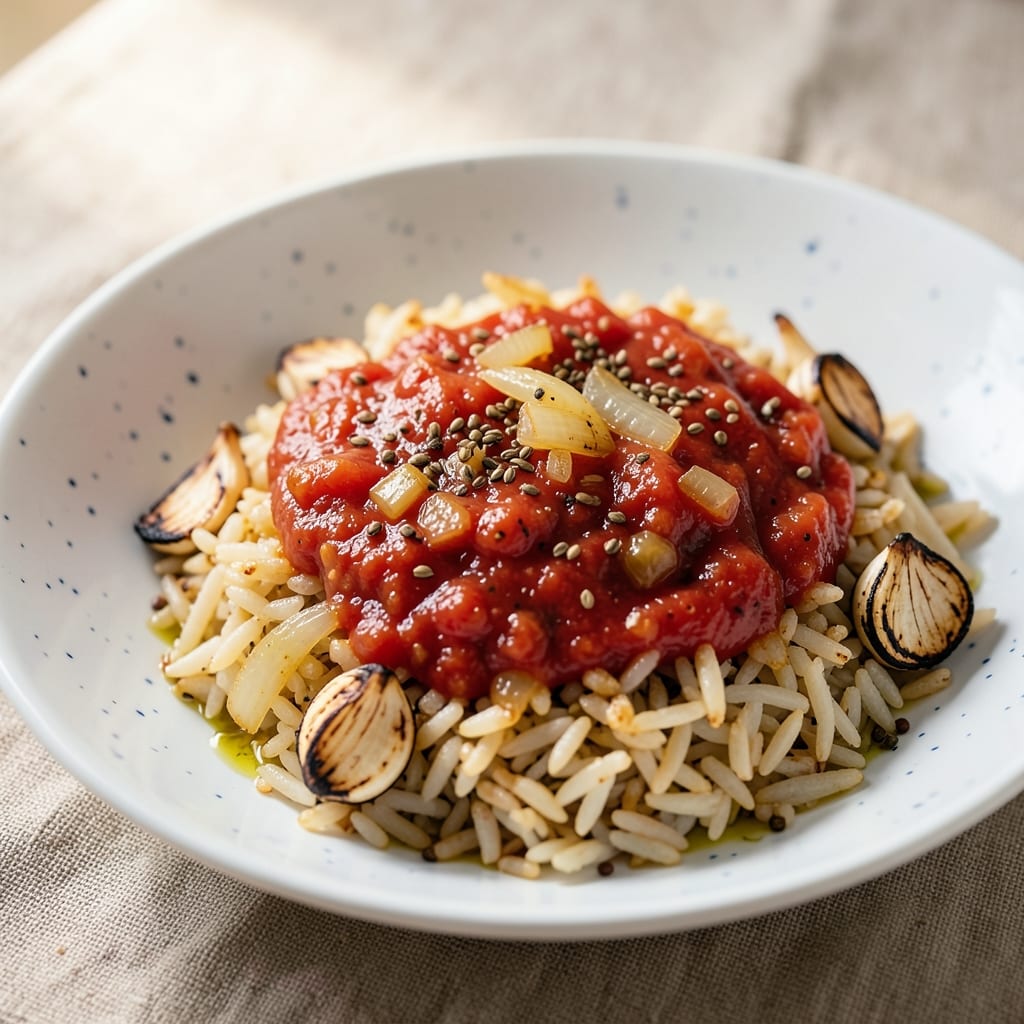
Aaron Sanchez's Mexican rice recipe delivers that signature tomato-chile crust that clings to every grain, transforming a simple side into a flavor-packed centerpiece. The secret lies in building layers of smoky, spicy depth through proper sautéing and spice blooming—techniques that elevate this dish beyond basic seasoned rice. I've adapted his approach to create a version that's both authentic and foolproof for home cooks, ensuring that crust sticks perfectly every time.
What sets this recipe apart is the methodical approach to flavor development: first toasting the spices until fragrant, then building the tomato-chile base with proper cooking time to develop depth. The rice absorbs this rich, slightly caramelized mixture while maintaining its ideal texture—neither mushy nor undercooked. This is the kind of dish that makes you want to double the batch, because it disappears faster than you can say "arroz rojo."
The result is Mexican rice with that coveted crust on every bite, where each grain carries the smoky heat of chiles and the bright acidity of tomatoes. The aroma alone will have everyone at the table asking what's for dinner. Perfect for serving alongside grilled meats or as a satisfying vegetarian main with black beans and avocado.
With just a few key techniques and simple ingredients, you'll achieve restaurant-quality results that taste like they've been simmering all day. The process is straightforward but requires attention to timing—especially when developing that crucial crust. Let's get started on creating this flavorful staple that belongs in every Mexican feast.
Ingredients for aaron sanchez mexican rice
Pantry staples plus a few key ingredients that build that signature smoky crust.
| Ingredient | Amount | Notes |
|---|---|---|
| Long-Grain White Rice 🍚 | 1 ½ cups | Uncooked, medium or long grain |
| Olive Oil 🫒 | ¼ cup | Extra-virgin for richness |
| Yellow Onion 🧅 | 1 whole | Diced into small pieces |
| Garlic Cloves 🧄 | 4 cloves | Minced for depth |
| Canned Tomato Sauce 🍅 | 1 ½ cups | San Marzano preferred |
| Ground Cumin 🌿 | 1 tbsp | Toasted for aroma |
| Smoked Paprika 🌶️ | 1 tbsp | For smoky depth |
| Dried Oregano 🍃 | 1 tsp | Mexican oregano if available |
| Salt 🧂 | 1 tsp | Diamond Crystal preferred |
| Black Pepper 🌶️ | ½ tsp | Freshly ground |
| Chicken Broth 💧 | 1 cup | Low-sodium preferred |
| Fresh Cilantro 🌿 | ¼ cup | Chopped for garnish |
| Lime Wedges 🍋 | 1 whole | For serving |
The rice is the foundation, so don't skimp on quality—long-grain white rice gives that perfect texture. For the tomato sauce, San Marzano cans are worth the splurge—they're sweeter and less acidic, which keeps the crust from getting bitter. I grab mine from Trader Joe's or any Latin market. The spices? Toast them in the oil until fragrant—that's where the magic happens. Smoked paprika is non-negotiable for that authentic flavor, and Mexican oregano (if you can find it) adds a different depth than regular oregano. Look for it in the Latin foods aisle or online.
No San Marzano tomatoes? Any good-quality canned tomatoes will work, but drain them well to avoid a watery crust. Running short on cumin? Ground coriander at half the amount adds a nice citrusy note. Fresh cilantro not available? Dried cilantro works in a pinch—just use half the amount. The chicken broth can be swapped for vegetable broth if you're vegetarian, but add a pinch of MSG or soy sauce for that umami depth. And if you're making this ahead, double the lime juice before storing to keep the rice bright and vibrant.
This tastes even better the next day—honestly, the crust gets more intense as it sits. Store leftovers in an airtight container for up to 5 days in the fridge, or freeze for 3 months. I always make a double batch because it disappears fast. For reheating, just add a splash of water or broth and cover it tightly—microwave or stovetop both work. The lime wedges should be added fresh right before serving, so they stay zesty. Garnish with extra cilantro if you're feeling fancy.
Why You'll Love This Recipe
- One-Pot Magic: I swear by this recipe because it’s actually one-pot—no extra bowls, no sticky rice clinging to the burner. Just toss everything in, stir, and let it simmer while you chop veggies for the rest of your meal. That garlic-onion base? It’s the secret—deep, toasty, and impossible to resist.
- Tomato-Garlic Bomb: The canned tomato sauce here isn’t just filler; it’s the star. When you sauté that onion and garlic until golden, then let them mingle with the tomatoes, it turns into this rich, slightly sweet sauce that coats every grain. Honestly, I’ve made this with store-brand sauce, and it still hits.
- Taco Night Hero: Between us, this rice is my go-to for any Mexican meal—tacos, burritos, or just a bowl with sour cream. It’s got that perfect texture (not mushy, not crunchy) and absorbs flavors like a sponge. My kids even ask for it when we’re not even eating Mexican food.
- Budget Leftovers Win: A bag of rice and a can of tomatoes stretch this recipe for days—I’ve fed my family for lunch three times from one batch. And because it reheats like a dream (just add a splash of water), it’s my weeknight lifesaver. No sad, dry rice here.
Step-by-step instructions for aaron Sanchez's signature Mexican rice
Here's how to make that iconic tomato-chile crust that clings to every grain like a pro.
Toast the Rice for Nuttier Flavor
Heat the 0.25 cup olive oil in a heavy-bottomed pot over medium heat. Add the 1.5 cups long-grain white rice and stir constantly for 2-3 minutes until the grains turn opaque and smell nutty. This step develops flavor and prevents mushy rice.
I like to press the rice against the sides of the pot occasionally—this ensures even toasting. Watch carefully so it doesn't burn. When the rice is golden and fragrant (you'll smell it), it's ready for the next step. Don't skip this—it's what makes the crust special.
Sauté Onions and Garlic Until Soft
Add the diced yellow onion to the pot and cook for 5 minutes until translucent and slightly caramelized. Then add the 4 minced garlic cloves and cook for another 30 seconds until fragrant. You want the garlic to just start turning golden—not brown.
Here's the thing—I usually turn the heat down slightly when adding garlic because it burns fast. The onions should be soft but not falling apart. If they're still crunchy, give them another minute. This aromatic base forms the flavor foundation for the whole dish.
Build the Tomato-Chile Crust
Stir in the 1.5 cups canned tomato sauce, 1 tbsp ground cumin, 1 tbsp smoked paprika, 1 tsp dried oregano, 1 tsp salt, and 0.5 tsp black pepper. Bring everything to a boil over medium-high heat, then immediately reduce to low heat.
This is where the magic happens. Let the mixture simmer uncovered for 5 minutes while you stir constantly. You're looking for that thick, sticky tomato-chile paste to form on the bottom of the pot—that's what creates the crust. If it starts sticking too much, add 1-2 tablespoons of water to loosen it.
Add Broth and Simmer to Perfection
Pour in the 1 cup chicken broth and stir well to combine. Bring to a gentle boil, then immediately reduce heat to low. Cover the pot with a tight-fitting lid and cook for 15 minutes without peeking. This steaming time lets the rice absorb the liquid perfectly.
After 15 minutes, turn off the heat and let the rice sit covered for another 5 minutes. This resting period is crucial—it lets the steam finish cooking the rice evenly. I know it's tempting to check early, but resist! The rice will continue cooking off the heat.
Fluff and Finish with Fresh Herbs
Remove the lid and gently fluff the rice with a fork, being careful not to mash the grains. The crust should be sticking to the bottom—this is what makes Sanchez's version special. If there's any liquid left, cover and let it steam for another 2 minutes to absorb completely.
Stir in the 0.25 cup chopped fresh cilantro and serve immediately with the lime wedges on the side. The rice should be tender with a slightly crispy crust on the bottom. Each bite should deliver that perfect balance of smoky, spicy, and tangy flavors that make this rice legendary.
Pro Tips For Making Aaron Sanchez Mexican Rice
- TOAST THE ONIONS FIRST: Aaron’s recipe relies on deep, caramelized onion flavor—don’t skip this. Slice the onion thinly (1/8-inch or less) and cook them in olive oil over medium-low heat for 8-10 minutes, stirring often, until they’re golden and sweet. I used to rush this, and the rice tasted flat. Patience here makes all the difference.
- RINSE THE RICE UNTIL CLEAR: Long-grain rice absorbs water like a sponge, and unrinsed rice turns mushy. Place the rice in a fine-mesh strainer and run cold water over it until the water runs nearly clear. Swirl it around with your hand—this removes excess starch and guarantees fluffy, separate grains. (Yes, it’s a pain, but trust me.)
- USE A 1:2 RATIO FOR RICE TO LIQUID: The recipe likely calls for 1 cup rice to 2 cups broth/sauce, but measure carefully. Too much liquid = soggy rice; too little = dried-out rice. If your pot isn’t heavy-bottomed, add an extra ¼ cup liquid—it evaporates faster than you think, especially when simmering.
- STIR ONCE, THEN LET IT SIT: After adding the rice to the sauce, give it one gentle stir to distribute everything, then stop touching it. Cover the pot and simmer on low heat for 15 minutes. Peeking or stirring breaks the steam, which is how you get that perfect, even texture. (I learned this after three batches of uneven rice.)
Storing and reheating your leftovers
Fridge Storage Tips
Store your Mexican rice in an airtight container for up to 5 days—I always use glass Pyrex with snap-on lids. Let it cool completely before refrigerating to prevent condensation, which can make the rice soggy. The flavors actually deepen overnight, so leftovers taste even better the next day! 💛
Freezer Prep Guide
For longer storage, freeze in quart-sized freezer bags with 1 inch of headspace to prevent expansion cracks. I like to portion it into individual servings for easy reheating. This rice keeps well for 3 months in the freezer—just label with the date and a note about the crust (so you
Stovetop Reheating
My preferred method is stovetop because it preserves that coveted crust. Transfer rice to a pot, add 2 tablespoons of water or broth, cover tightly, and heat on low for 10 minutes. Stir gently, then uncover and let any remaining moisture evaporate. The crust should re-form beautifully—just like fresh from the pot! 🔥
Microwave Method
For quick reheating, cover the rice with a damp paper towel and microwave on 50% power for 2 minutes. Stir, then continue in 30-second intervals until heated through. Add a splash of water if it looks dry—this prevents the crust from becoming tough. The lime wedges should be added fresh after reheating for maximum brightness.
Crust Preservation
The key to maintaining that signature crust is gentle handling. Avoid stirring aggressively when reheating—just enough to distribute heat evenly. If the crust starts breaking up, cover and steam for an extra 1-2 minutes to restore its integrity. The rice should be hot but still hold its shape when fluffed with a fork.
Make-Ahead Pro Tip
Double the batch and freeze half immediately—this is my secret for always having restaurant-quality rice on hand. When reheating frozen rice, add 1 extra tablespoon of broth and increase cooking time by 3-5 minutes. The crust might take a little more patience to revive, but it's worth the effort for that authentic flavor. ✨
Nutrition facts
Frequently asked questions
Why does Aaron Sanchez's Mexican rice have that signature crust?
The crust forms from properly developing the tomato-chile base before adding rice. The key is simmering the sauce uncovered for 5 minutes on low heat while stirring constantly—this creates a thick, sticky paste that clings to every grain. Toasting the spices in oil first also adds depth that makes the crust more flavorful.
Can I make this rice without canned tomatoes?
Yes! Use 1.5 cups tomato sauce made from fresh tomatoes (blend and strain) or even high-quality crushed tomatoes. Just reduce the simmering time to 3-4 minutes since fresh tomatoes have more water. The crust will still form, though it might be slightly less intense.
What's the best rice for this recipe?
Long-grain white rice is ideal—it stays separate and absorbs flavors perfectly. Avoid instant rice or short-grain varieties (like sushi rice), as they'll make the dish mushy. For extra authenticity, try Mexican-style long-grain rice (like Calrose) if available in Latin markets.
How do I fix rice that's too dry or too mushy?
For dry rice: Add 2 tablespoons of hot broth, cover, and steam for 2 minutes. For mushy rice: Spread it on a baking sheet and bake at 350°F for 10 minutes to dry out. The crust may break up slightly, but the flavor stays intact. Prevention is key—follow the 15-minute simmer and 5-minute rest times precisely.
Can I make this vegetarian?
Swap the chicken broth for vegetable broth and add 1 tsp soy sauce or ½ tsp MSG for umami depth. The crust will still form beautifully. For extra protein, stir in ½ cup black beans during the final 5 minutes of cooking.