
Main Courses
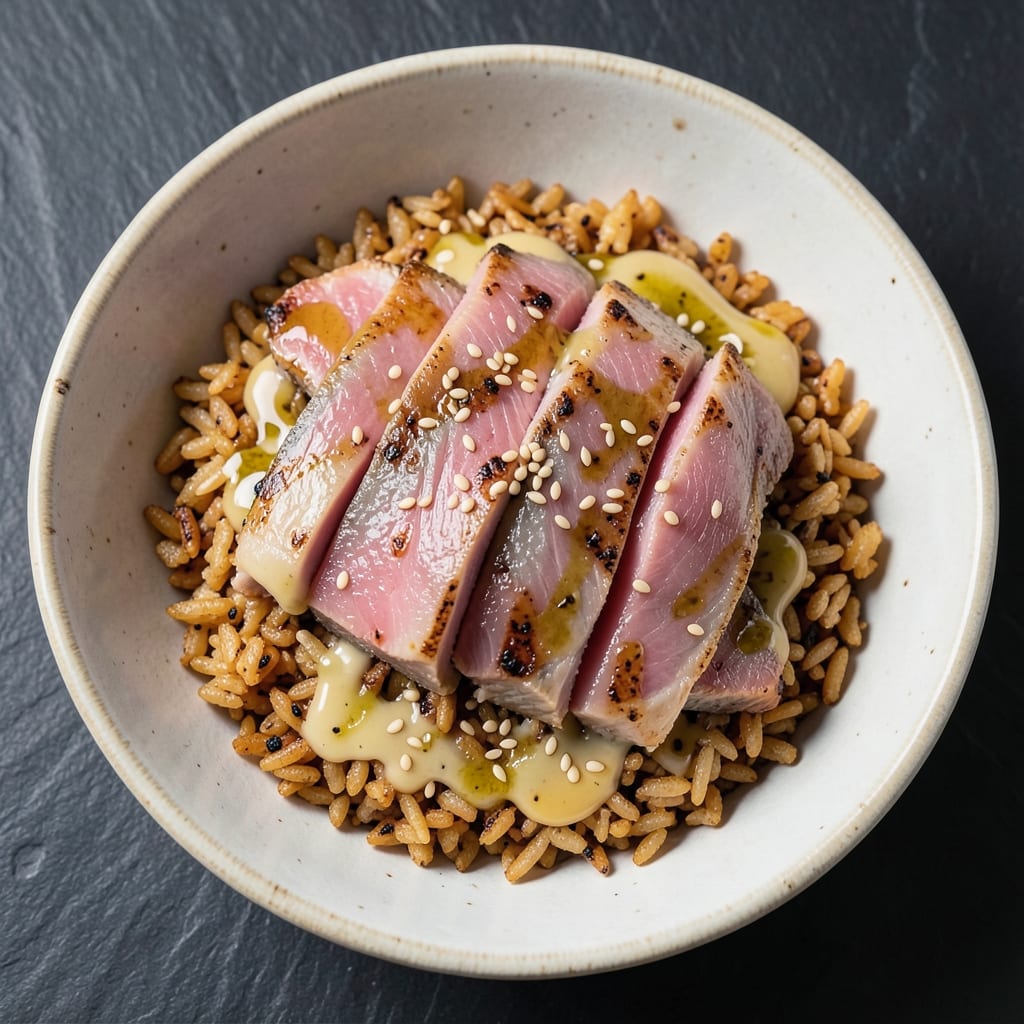
This ahi tuna crispy rice recipe delivers the perfect balance of silky tuna and perfectly toasted grains in every bite. The secret lies in searing the tuna to medium-rare perfection—just enough to create a warm center while locking in that ocean-fresh flavor—paired with crispy rice infused with toasted sesame oil and a touch of soy. It's a dish that feels both elegant and effortless, making it ideal for weeknight dinners or special occasions alike.
The foundation of this recipe starts with leftover rice, which you'll stir-fry in a hot pan with sesame oil until golden and fragrant. Meanwhile, the ahi tuna is coated in a light sesame crust and seared to achieve that beautiful mahogany crust while keeping the inside tender. What you end up with is a dish where every component shines—crispy rice that adds satisfying texture, delicate tuna with a subtle crunch, and a harmonious blend of savory and nutty flavors.
What makes this recipe truly special is how it transforms simple ingredients into something restaurant-worthy. The sesame crust on the tuna adds an extra layer of depth, while the crispy rice soaks up just enough soy sauce to enhance its natural flavor without overpowering it. This dish is not only visually stunning with its golden-brown hues but also packed with protein and umami, making it a standout for pescatarians and seafood lovers.
Serve this dish with a side of steamed greens or a light citrus salad to balance the richness. The combination of textures and flavors makes it a complete meal that's sure to impress. Let's get started on creating this crispy, flavorful masterpiece.
Ingredients for ahi tuna crispy rice
Leftover rice, premium tuna, and a sesame crust—simple ingredients for a restaurant-worthy dish.
| Ingredient | Amount | Notes |
|---|---|---|
| Ahi Tuna Steak 🐟 | 1 lb | Sushi-grade, 1-inch thick slices |
| Cooked White Rice 🍚 | 3 cups | Day-old or chilled preferred |
| Toasted Sesame Oil 🫒 | 2 tbsp | For stir-frying rice |
| Light Soy Sauce 🥢 | 2 tbsp | Kikkoman preferred |
| Sesame Seeds 🌾 | 2 tbsp | Toasted lightly |
| Ground Sesame Seeds 🌾 | ½ cup | For tuna crust |
| All-Purpose Flour 🌾 | ¼ cup | For tuna coating |
| Eggs 🥚 | 2 whole | Beaten for dredge |
| Vegetable Oil 🫒 | ½ cup | For frying |
| Garlic Cloves 🧄 | 2 cloves | Minced for rice |
| Fresh Ginger 🌿 | 1 tbsp | Grated finely |
| Green Onions 🧅 | 3 whole | Sliced thin for garnish |
| Sesame Seeds 🌾 | 1 tbsp | Extra for garnish |
| Salt 🧂 | ½ tsp | Kosher preferred |
| Black Pepper 🌶️ | ¼ tsp | Freshly ground |
The tuna is non-negotiable here—sushi-grade is a must for that silky texture. Whole Foods or high-end seafood markets carry the best cuts, but most grocery stores stock pre-sliced ahi. Look for vibrant red color and a clean ocean scent. For the rice, day-old works best—it's drier and crisps up perfectly. If you're short on time, chill freshly cooked rice for 1 hour before using. The sesame oil should be toasted, not raw—Kadoya or La Tourangelle brands are my go-to. Never cook with untoasted sesame oil, or you'll miss that nutty depth.
No sesame seeds? Toasted sunflower seeds at double the amount work in a pinch, though the flavor won't be identical. Short on flour? Cornstarch or rice flour creates a lighter crust. The beaten eggs should be room temperature—crack them into a bowl first, then whisk. For extra crunch, add 1 tbsp panko to the flour mixture. The garlic and ginger can be swapped for 1 tsp garlic powder and 1 tsp grated ginger if fresh isn't available, but fresh is always better. If your soy sauce isn't light, dilute regular soy sauce with water until it's pale.
Rice stays crispy for 2-3 days in the fridge if stored in an airtight container. The tuna crust loses crunch after 1 day, so assemble the dish just before serving. For make-ahead convenience, prep the tuna coating and rice separately, then combine when ready to cook. Garnishes like green onions and sesame seeds can be added fresh at serving time. This dish reheats poorly—always serve immediately after crisping the rice and searing the tuna for best results.
Why You'll Love This Recipe
- One-Pan Magic: I swear by this—just toss the rice, sear the tuna, and drizzle. No chopping, no fuss, and that sesame oil smell alone makes the kitchen feel like a little Japanese bistro.
- Umami Bomb: That crispy rice soaking up the soy and sesame oil? Chef’s kiss. The tuna stays juicy while the edges get this addictive crunch—like a bite of sushi meets comfort food.
- Lunchbox Hero: Pack it cold or reheat it hot—this holds up perfectly. I make a big batch on Sundays, and by Wednesday, I’m still raiding the container. (Yes, even my picky kid grabs seconds.)
- Budget Luxe: Fresh ahi can feel splurgy, but a single steak stretches across two meals. The rice and pantry staples keep costs low, and honestly? It feels way fancier than takeout.
Step-by-step instructions for sesame-crusted ahi tuna crispy rice
This method delivers perfectly seared tuna with a crunchy sesame crust and toasted rice every time.
Prepare the Crispy Rice Foundation
Heat the 0.5 cup vegetable oil in a large skillet over medium-high heat until shimmering. Add the 3 cups cooked white rice and stir gently to separate the grains. Cook for 5-6 minutes until the rice begins to sizzle and turn golden in spots.
Add the 2 tbsp toasted sesame oil, 2 tbsp light soy sauce, 1 tbsp fresh ginger, and 2 cloves minced garlic. Stir constantly for 3-4 minutes until the rice is evenly coated and slightly crispy around the edges. Remove from heat and set aside, keeping it warm.
Here's the thing—using day-old rice prevents mushiness. The grains will crisp beautifully while maintaining their structure. If your rice is too moist, spread it on a baking sheet and toast in a 350°F oven for 5 minutes before proceeding.
Create the Tuna Crust Mixture
In a shallow bowl, combine the 0.5 cup ground sesame seeds, 0.25 cup all-purpose flour, 0.5 tsp salt, and 0.25 tsp black pepper. In another bowl, beat the 2 whole eggs until just combined. The crust mixture should be fine and dry, while the egg should coat the back of a spoon.
I like to press the tuna slices gently into the crust mixture first, then dip into the egg wash. This double coating ensures maximum adhesion. The ground sesame seeds are crucial—they create that signature nutty crunch while keeping the tuna tender inside.
Sear the Tuna to Perfection
Heat 2 tablespoons vegetable oil in a clean skillet over medium-high heat until smoking. Working in batches if needed, add the tuna slices and cook for 2-3 minutes per side until golden brown and crispy. The crust should be deep golden with slight char marks—this indicates proper searing.
Don't press down on the tuna while cooking. The crust needs to form naturally through contact with the hot oil. If you notice the crust breaking apart, reduce heat slightly and cook more slowly. The internal temperature should reach 125-130°F when done—just warm enough to be safe without overcooking.
Assemble and Garnish
Divide the crispy rice among four plates, creating a base for the tuna. Top each portion with a seared tuna slice. Drizzle lightly with any remaining pan juices from the rice or tuna cooking process. Sprinkle with 2 tbsp toasted sesame seeds and 3 whole sliced green onions for freshness.
The contrast between the warm, toasted rice and the crispy tuna crust is what makes this dish special. Serve immediately while the tuna is still hot and the rice maintains its perfect texture. Each bite should deliver that satisfying crunch followed by the silky tuna and nutty rice.
Optional Garnish for Extra Flavor
For an elevated presentation, add a final touch of 1 tbsp sesame seeds toasted in a dry skillet for 1 minute until fragrant. The aroma alone will make your dish more appealing. You can also drizzle with a quick sauce made by mixing 1 tbsp light soy sauce with 1 tsp toasted sesame oil if you prefer additional moisture.
This final garnish isn't just decorative—it enhances the overall flavor profile. The toasted sesame seeds add another layer of nuttiness that complements the umami from the tuna and rice. Don't skip this step if you want that restaurant-quality finish.
Pro Tips For Making Ahi Tuna Crispy Rice
- CRISP THE TUNA FIRST: Sear the ahi tuna steak to medium-rare (120-125°F internal) before slicing—it’s the only way to keep it tender when mixed with rice. I used to overcook it thinking it’d be crispier later, but that just turns it tough. A quick 2-3 minute sear in a screaming-hot pan with sesame oil does the trick.
- USE DAY-OLD RICE: Cold, dry rice clings better and absorbs flavors without turning mushy. Spread your cooked rice on a tray, let it cool completely, then refrigerate for 2+ hours—yes, even if you’re hungry now. Fresh rice? Skip it. Your texture will suffer.
- SAVE THE SESAME OIL: Toast the sesame oil in the pan before cooking the rice—just heat it until it shimmers (30 seconds max). Overheating burns the oil, making it taste bitter. Use a splash (1 tsp) to coat the rice later, not all at once.
- SALT THE TUNA AFTER SEARING: Season the ahi tuna with salt right after removing it from the pan—this locks in moisture while the residual heat crisps the surface. I learned this the hard way when my first batch turned out dry. A pinch of flaky salt on each slice before mixing with rice makes all the difference.
Essential equipment for great ahi tuna crispy rice
Skillet Essentials
Your 12-inch cast iron skillet is non-negotiable for this recipe—I use my well-seasoned Lodge Pre-Seasoned Cast Iron for even heat distribution. The heavy material maintains consistent temperatures while frying the rice and searing the tuna. For budget-friendly alternatives, a non-stick stainless steel skillet like All-Clad Stainless works well, though you'll need to monitor heat more carefully. 🔥
Oil Control Tools
Invest in a thermometer with a clip-on probe (I recommend Thermoworks Thermapen One) to monitor oil temperatures between 350-375°F—this ensures your rice crisps perfectly without burning. A wire whisk (like OXO Good Grips) helps prevent rice clumping while stir-frying, while a fine-mesh strainer (such as OXO Good Grips) drains excess oil after cooking. These tools make all the difference in texture.
Sesame Prep Kit
Toast your sesame seeds in a small stainless steel skillet (like Mauviel M'Cook) over medium-low heat for 2-3 minutes until fragrant. A mortar and pestle (I use Kensington Mortar and Pestle) is ideal for grinding seeds to a fine powder for the tuna crust. For convenience, pre-grind seeds in a high-powered blender (such as Vitamix) if you're short on time. 🌾
Tuna Handling Gear
Use tongs with silicone tips (like Nordic Ware Silicone Tongs) to flip the tuna without breaking the crust—regular tongs leave marks. A meat thermometer (such as Thermoworks Smoke) ensures the tuna reaches 125-130°F safely. For slicing, a sharp 8-inch chef's knife (I prefer Wüsthof Classic) cuts cleanly through the tuna without tearing the crust.
Garnish Station
Keep your garnishes fresh with a small ceramic bowl (like Le Creuset Stoneware) for sesame seeds and a glass cutting board (such as OXO Good Grips) for slicing green onions. A microplane zester (I use Microplane Classic) grates fresh ginger finely without watering it down. These tools keep your garnishes ready and organized for quick plating.
Nutrition facts
Frequently asked questions
Can I use frozen ahi tuna for this recipe?
Fresh or previously frozen sushi-grade ahi tuna works best for this dish. If using frozen, thaw it overnight in the refrigerator and pat completely dry before coating. Never thaw at room temperature—this can promote bacterial growth. The moisture affects how the sesame crust adheres, so thorough drying is critical.
How do I make the rice extra crispy?
Use day-old rice (or spread freshly cooked rice on a tray and chill for 1 hour) to remove excess moisture. Stir-fry over medium-high heat in a dry skillet until golden brown, about 5-6 minutes. Add a splash of 1 tsp dry sherry or 1 tsp rice vinegar at the end to enhance crispiness. For extra crunch, toast the rice in a 400°F oven for 5 minutes before stir-frying.
What if I don't have sesame seeds?
Substitute with toasted sunflower seeds (use double the amount) or crushed cornflakes for crunch. For flavor, add 1 tsp furikake seasoning or 1/2 tsp smoked paprika to the rice. The crust will lack nuttiness but still provide texture. The sesame oil can be replaced with toasted peanut oil if needed.
Can I prep this dish ahead of time?
Prepare the crispy rice and tuna coating separately up to 1 day ahead, storing in airtight containers. The rice stays crispy for 2-3 days in the fridge. Sear the tuna fresh to maintain texture—it loses crispiness when reheated. Assemble just before serving for the best experience. For make-ahead convenience, cook the rice and store it separately from the tuna components.
Why did my tuna crust fall off?
This usually happens from one of three issues: the tuna wasn't patted dry enough, the crust mixture was too wet, or the oil wasn't hot enough. Ensure your tuna slices are completely dry before coating, and press them gently into the crust mixture. Use a thermometer to maintain oil at 350-375°F—if it's too cool, the crust won't set properly. For extra adhesion, chill the coated tuna for 15 minutes before searing.