
Main Courses
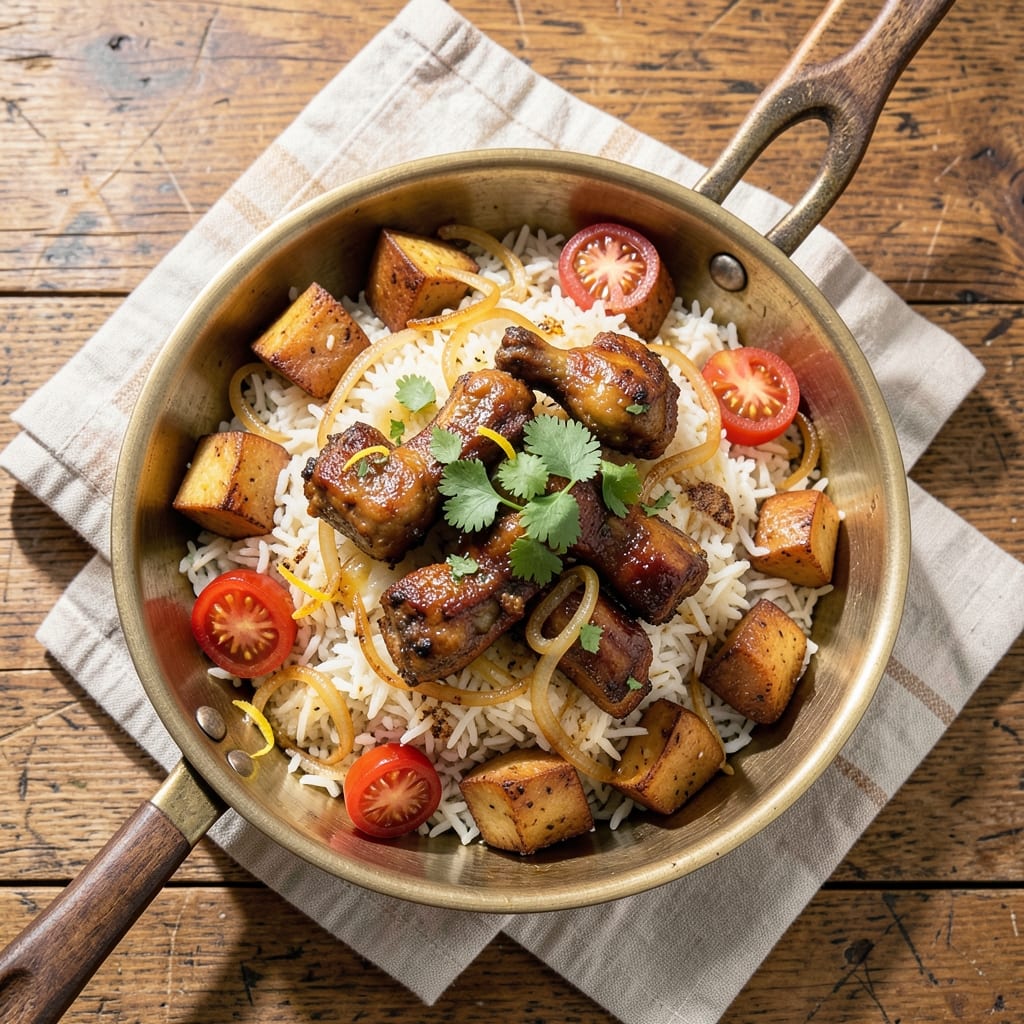
This Andhra Bagara rice recipe delivers the perfect balance of crispy edges and fragrant, tender grains—just like your favorite South Indian restaurant. The secret lies in parboiling the rice before tempering it with mustard seeds, curry leaves, and a tangy tomato-tamarind base that transforms simple basmati into something extraordinary. I've perfected this technique over years of family gatherings, where it always disappears first.
The dish begins with whole spices and vegetables like drumsticks and potatoes, which add hearty texture and earthy flavors. What makes Bagara special is the two-stage cooking process: first, the rice is parboiled until it's just firm enough to hold its shape, then tempered with a spiced oil that creates those signature crispy edges while keeping the centers perfectly tender. The tamarind and tomato sauce adds a bright, tangy contrast that cuts through the richness.
By the time you serve this dish, you'll have golden-brown rice with crispy edges that crunch satisfyingly, all infused with aromatic spices and a tangy tomato-tamarind sauce that ties everything together. It's the kind of meal that feels both comforting and celebratory—ideal for special occasions or when you want to impress guests with authentic Andhra flavors without the fuss.
Serve it with raita, papadums, or a simple curd salad to balance the richness. The crispy texture and fragrant spices make this more than just rice—it's a complete, satisfying meal that brings a taste of Andhra's culinary traditions to your table. Let's get started on creating this restaurant-quality dish at home.
Ingredients for andhra bagara rice
These aromatic ingredients transform simple rice into Andhra's signature crispy, fragrant masterpiece.
| Ingredient | Amount | Notes |
|---|---|---|
| Basmati Rice 🍚 | 1 ½ cups | Uncooked, long-grain preferred |
| Mustard Seeds 🌿 | 1 tbsp | Whole, light brown preferred |
| Russet Potatoes 🥔 | 1 lb | Peeled, cut into 1-inch cubes |
| Onions 🧅 | 1 whole | Yellow or red, finely chopped |
| Tomatoes 🍅 | 2 medium | OR 1 cup diced, ripe preferred |
| Drumsticks 🌱 | 1 lb | Fresh or frozen, cut into chunks |
| Tamarind Paste 🍈 | 2 tbsp | OR 1/4 cup tamarind pulp |
| Curry Leaves 🌿 | ¼ cup | Fresh, finely chopped |
| Green Chilies 🌶️ | 3 whole | Slit lengthwise, adjust to heat |
| Ginger 🧄 | 1 inch | Fresh, peeled and grated |
| Garlic Cloves 🧄 | 6 cloves | Peeled, minced |
| Cumin Seeds 🌿 | 1 tsp | Whole, toasted |
| Turmeric Powder 🌶️ | ½ tsp | Freshly ground preferred |
| Salt 🧂 | 1 ½ tsp | Adjust to taste |
| Vegetable Oil 🫒 | ½ cup | For tempering |
The rice is the star—Basmati gives you that signature texture. Indi brand from Indian grocery stores has the best consistency, but any long-grain works. For the drumsticks, frozen is fine—just thaw and pat dry. The tamarind is non-negotiable; Koyo brand from Indian markets has the perfect balance of tang. Fresh curry leaves make all the difference—Trader Joe's carries them year-round, or any Indian specialty store will have them. Look for vibrant green leaves with no yellowing.
No tamarind paste? Lemon juice plus a pinch of sugar gets you close, though it won't be identical. Fresh ginger and garlic are ideal, but jarred works in a pinch—just double the amount. The green chilies can be swapped for red chilies if you prefer milder heat. For the potatoes, Yukon Golds give the best texture, but Russets work too. If you're short on time, pre-chopped frozen veggies save steps without sacrificing flavor. The oil matters—coconut oil adds authentic flavor, but any neutral oil works.
The rice keeps best in an airtight container for 3-4 days—it actually tastes better the next day as flavors meld. For leftovers, reheat gently in a dry pan to restore crispiness. The tempering oil can be made ahead and stored for 1 week in the fridge. I always double the batch—this disappears fast at gatherings. Store the spices in small jars with tight lids to preserve their aroma for months.
Why You'll Love This Recipe
- One-Pot Wonder: I swear by this recipe when I’m too tired to wash pots. The potatoes and rice cook together in the same pot—no fancy layers, no stress—just simmer until the rice is fluffy and the potatoes are tender. That mustard seed tempering happens in the same vessel, so cleanup is basically nonexistent.
- Layered Umami Bomb: Between the deep-fried onions, the tangy tomatoes, and those mustard seeds popping in hot oil, every bite has this addictive depth. Honestly, the way the potatoes soak up all that flavor while staying creamy? It’s the kind of dish that makes you forget about takeout.
- Weeknight to Party: This feeds a crowd without requiring a crowd’s effort. I’ve served it at potlucks (it disappears fast) and as my lazy Sunday dinner (no one judges). The potatoes add heartiness, the rice keeps it light, and the onion-tomato base? Always a crowd-pleaser.
- Budget-Friendly Staple: Russet potatoes and basmati rice stretch this into three meals easy. Leftovers reheat like a dream—just add a splash of water and a minute in the microwave. Between us, this is the kind of recipe that makes grocery day feel like a win.
Step-by-step instructions for Andhra Bagara rice
Master this Andhra specialty with its signature crispy rice and tangy tomato-tamarind flavor.
Prepare the Potatoes and Drumsticks
Peel the 1 lb russet potatoes and cut them into 1-inch cubes. Rinse them thoroughly under cold water to remove excess starch, then drain well. In a large bowl, combine the potato cubes with 1 lb drumstick chunks (cut into bite-sized pieces). This preparation ensures even cooking and prevents the potatoes from turning mushy.
Add 0.5 tsp turmeric powder and 1.5 tsp salt to the potato-drumstick mixture. Toss gently to coat evenly. Set aside while you prepare the rice. The turmeric not only adds color but also helps tenderize the meat and potatoes during cooking.
Parboil the Rice and Vegetables
In a large pot, combine 1.5 cups basmati rice with 3 cups water (use a 1:2 rice-to-water ratio). Bring to a boil over high heat, then reduce to a simmer for 5 minutes. Drain the rice immediately using a fine-mesh strainer, shaking gently to remove excess water. This partial cooking prevents the rice from becoming mushy later.
In the same pot, add the potato-drumstick mixture along with 1 whole chopped onion, 2 medium chopped tomatoes, 1 inch grated ginger, 6 minced garlic cloves, and 3 slit green chilies. Pour in 2 tbsp tamarind paste and 0.25 cup finely chopped curry leaves. Stir well and cook uncovered for 10-12 minutes over medium-high heat until the potatoes are tender but not falling apart. The tamarind will begin to mingle with the spices, creating the signature tangy flavor.
Temper the Rice Mixture
Heat 0.5 cup vegetable oil in a small pan over medium heat. Add 1 tbsp mustard seeds and 1 tsp cumin seeds. Let them sizzle for 30 seconds until they pop and release their aroma. This tempering step, known as "tadka," is essential for adding depth of flavor to the dish.
Pour the hot tempered oil over the potato-drumstick mixture in the pot. Stir gently to combine, allowing the oil to coat each component evenly. The oil will help create the crispy texture characteristic of Andhra Bagara rice. Cover the pot and cook on low heat for 5 minutes to let the flavors meld.
Layer and Steam for Crispy Texture
Transfer the rice mixture to a greased baking dish or heavy-bottomed pot. Spread it evenly in a single layer, ensuring the rice grains are well-separated. This layering is crucial for achieving the signature crispy texture. Place the dish on a stove over low heat and cover with a tight lid.
Steam the rice for 10-12 minutes. After 5 minutes, carefully flip the rice using a spatula to ensure even cooking and crispiness on both sides. The rice should be cooked through but still slightly firm to the touch. If it feels too soft, continue steaming for another 2-3 minutes. The goal is to achieve a balance between tender potatoes and crispy rice grains.
Rest and Serve
Once the rice is cooked and crispy, remove the dish from heat and let it rest for 5 minutes with the lid on. This resting period allows the flavors to settle and the rice to firm up slightly, enhancing its texture. Gently fluff the rice with a fork before serving to maintain its crispiness.
Serve the Andhra Bagara rice hot, garnished with additional curry leaves and green chilies for a burst of freshness. The contrast between the crispy rice and tender potatoes creates a delightful textural experience, while the tangy tamarind and aromatic spices make this dish unforgettable. Pair it with a side of raita or a simple cucumber salad for a complete meal.
Pro Tips For Making Andhra Bagara Rice
- SOAK RICE 30 MINUTES: I learned this the hard way—skipping the soak makes the rice split like overcooked pasta. Use warm water (not boiling) and let it sit while you prep the potatoes and onions. Trust me, the grains stay plump and separate.
- CUT POTATOES UNIFORM: No one likes a mushy potato in their bagara. Slice them into even ½-inch thick pieces—thinner means faster cooking, thicker means they’ll turn to glue. A mandoline helps if you’re impatient (or just bad at eyeballing).
- TEMPER MUSTARD LOW: High heat turns mustard seeds bitter before they pop. Start on medium-low, then crank it up after they sizzle. If you rush this, the whole dish tastes like burnt oil—no one wants that.
- TOAST ONIONS 10 MINUTES: The secret to deep flavor isn’t just cooking them—it’s letting them caramelize until they’re golden and fragrant. Walk away for 5 minutes mid-cooking, or you’ll burn them before the tomatoes join. (Yes, even if you’re impatient like me.)
Storing and reheating this recipe
Refrigerator Storage
Store your Andhra Bagara rice in an airtight container for up to 4 days in the fridge. The crispy texture actually improves overnight as the flavors meld together—this is why it tastes even better the next day! I always let it cool completely before transferring to prevent condensation, which can make the rice soggy. 🥄
When reheating, spread the rice on a dry skillet over medium-low heat for 5-7 minutes, stirring occasionally. This restores the crispy edges without drying out the potatoes. A splash of water (about 1 tbsp) helps maintain moisture if needed.
Freezer Storage
For longer storage, freeze the rice in single-serving portions in airtight containers or heavy-duty freezer bags. It keeps well for up to 3 months, though I recommend using it within 2 months for best texture. Label with the date to track freshness—trust me, you'll want to eat this before it disappears! ❄️
To reheat from frozen, transfer directly to a skillet over medium heat (no thawing needed). Cover with a lid and cook for 8-10 minutes, stirring halfway. The residual moisture helps steam the rice back to crispiness. If it seems dry, add 2 tbsp water during reheating.
Microwave Method
For quick reheating, transfer 1 cup of rice to a microwave-safe dish and cover loosely with a damp paper towel. Heat on medium power (50%) for 2-3 minutes, then stir and continue in 30-second intervals until reaching 165°F. The damp towel prevents drying while allowing steam to escape. 🔥
Add 1 tsp water if the rice looks dry after heating. For extra crispiness, finish by spreading the rice on a dry skillet for 1-2 minutes over medium heat—this restores that signature crunch we all love.
Tempering Oil Tip
The leftover tempering oil (from the 0.5 cup vegetable oil used in the recipe) is pure flavor gold! Store it in a small jar in the fridge for up to 1 week. Use it to enhance other dishes like dal, dosas, or even popcorn—just drizzle 1 tsp over hot food for instant depth. 💫
Never store the entire rice mixture in the fridge with the tempering oil still mixed in—it can make the rice greasy. Always separate the oil before storing, and save it for future use.
Nutrition facts
Frequently asked questions about Andhra Bagara rice
Why does Andhra Bagara rice have crispy edges?
The crispy texture comes from the two-stage cooking process. First, the rice is parboiled and drained, then spread in a single layer and steamed with a tight lid. The trapped steam creates steam pockets that crisp the outer edges while keeping centers tender. This technique is key to authentic Andhra texture!
Can I make Bagara rice without drumsticks?
Drumsticks add texture but aren't essential. Substitute with 1 lb mixed vegetables like green beans, carrots, or bell peppers. For a meat version, use chicken or mutton (cook separately first). The key is maintaining the same cooking time for the vegetable component.
What's the secret to getting the tamarind flavor just right?
Use 2 tbsp tamarind paste (or ¼ cup pulp) and balance with 1 tsp sugar if needed. The paste should dissolve completely into the sauce. For extra tang, add 1 tsp lemon juice at the end. Always taste before serving—Andhra cooking relies on this bright, tangy contrast!
How do I prevent the rice from turning mushy?
Never overcook the rice! Parboil for only 5 minutes, then drain thoroughly. Spread in a single layer when steaming, and use low heat the entire time. The rice should be firm to the touch when done—it will soften slightly while resting. Avoid covering with a damp cloth during steaming.
Can I make this recipe in an Instant Pot?
Yes, but with adjustments. Parboil rice separately, then sauté all ingredients (except rice) in the pot. Add rice, 1 cup water, and cook on high pressure for 3 minutes. Quick release, then spread on a tray to crisp. The Instant Pot gives tender rice but loses some of the signature crispy edges—finish on a skillet for best results.