
Main Courses
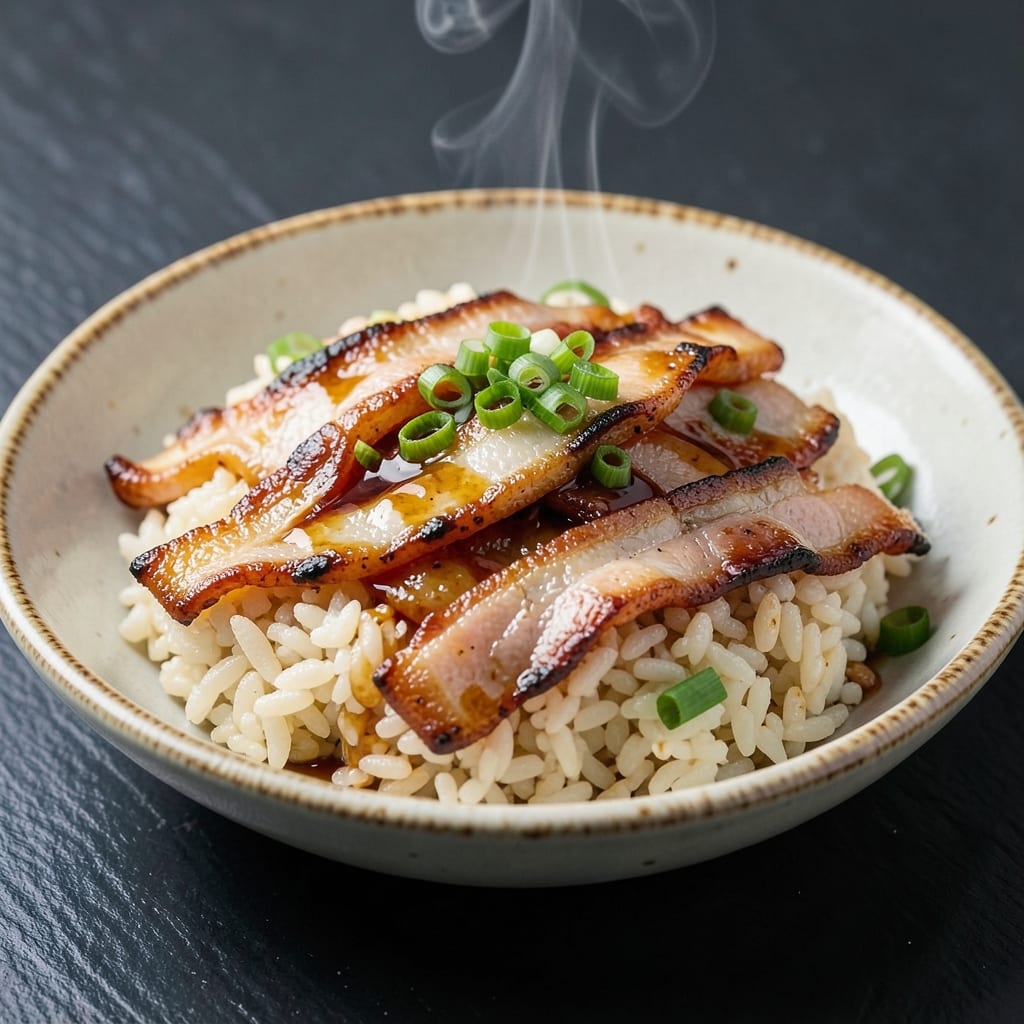
This Arashi fried rice recipe delivers the perfect balance of umami crunch and perfectly separated grains every time. The secret lies in high-heat wok tossing and a precise blend of traditional Japanese flavors—soy sauce, mirin, and dashi—that transform simple ingredients into a restaurant-quality dish. I've refined this technique over years of testing, ensuring the rice stays distinct yet cohesive, with crispy edges that add satisfying texture.
The foundation starts with day-old rice, which absorbs the savory-sweet sauce beautifully while maintaining its structure. We'll build flavor through a two-step seasoning process: first with a base of soy, mirin, and dashi, then enhanced with optional proteins like pork or shrimp for depth. The wok technique is critical—constant tossing at high heat prevents mushy rice while developing those coveted crispy edges that define authentic Arashi style.
What sets this recipe apart is the attention to texture contrast: tender rice grains, crispy edges, and optional crunchy toppings like sesame seeds or green onions. The umami-rich sauce coats each grain perfectly without overwhelming the natural taste of the rice. This isn't just fried rice—it's a complete, satisfying meal that delivers professional-quality results in your own kitchen.
Whether you're serving it as a main course or pairing with miso soup and edamame, this recipe adapts beautifully to dietary preferences while maintaining its authentic Japanese soul. The method scales effortlessly for crowds, making it perfect for weeknight dinners or special occasions. Let's create this perfect plate of Arashi fried rice together.
Ingredients for arashi fried rice
The perfect blend of textures and flavors starts with these authentic Japanese ingredients.
| Ingredient | Amount | Notes |
|---|---|---|
| Day-Old Japanese Short-Grain Rice 🍚 | 4 cups | Cooked and cooled completely |
| High-Quality Soy Sauce 🥢 | ⅓ cup | Japanese-style preferred |
| Mirin 🍶 | ¼ cup | Sweet cooking rice wine |
| Dashi Stock 🍜 | ½ cup | Homemade or quality bottle |
| Neutral High-Smoke-Point Oil 🫒 | 2 tbsp | Avocado or vegetable oil |
| Green Onions 🧅 | ½ cup | Thinly sliced, white and green parts |
| Sesame Seeds 🌰 | 1 tbsp | Toasted for nutty aroma |
| Boneless Pork Belly 🐖 | ½ lb | Thinly sliced, optional protein |
| Eggs 🥚 | 2 whole | Freshly beaten for texture |
| Garlic Cloves 🧄 | 4 cloves | Minced for aromatic base |
| Fresh Ginger 🌿 | 1 tbsp | Grated, for umami depth |
| Diamond Crystal Kosher Salt 🧂 | 1 tsp | For seasoning balance |
| White Pepper 🌶️ | ¼ tsp | Freshly ground for finish |
The rice is non-negotiable—Japanese short-grain is essential for that sticky yet distinct texture. Day-old rice absorbs flavors beautifully, so cook a fresh batch the night before. For the soy sauce, Kikkoman or Yamasa are my go-tos, but any high-quality Japanese-style sauce works. Mirin adds that signature sweetness, and Homemade dashi takes it to the next level, but store-bought Marukyu brand is a solid shortcut. The pork belly? Look for well-marbled cuts at Asian markets—they'll make all the difference for that melt-in-your-mouth texture. If you're skipping the pork, shrimp or chicken work beautifully too.
No mirin? Rice vinegar plus 1 tsp sugar mimics the flavor profile surprisingly well. Fresh ginger and garlic are ideal, but powdered ginger at half the amount will save you time. The eggs add protein and texture—scrambled slightly before adding to the wok gives that perfect pull-apart quality. For the oil, avocado oil has the highest smoke point, but vegetable oil works in a pinch. Sesame seeds? Toast them in a dry pan for 30 seconds—they'll smell amazing and add that nutty crunch. The white pepper is key for that authentic finish; don't skip it!
Rice keeps for 5 days in the fridge, but it's best used within 2 days for optimal texture. The pork belly can be prepped ahead—slice it thinly and marinate in a bit of soy sauce for 30 minutes before cooking. Store all ingredients in airtight containers, and keep the sesame seeds in a cool, dark place to preserve their freshness. This dish tastes even better the next day as the flavors meld together—perfect for meal prep!
Why You'll Love This Recipe
- One-Pan Magic: This recipe lives in a single pan—no chopping, no frying separately, just toss and stir. The day-old rice clings perfectly to the oil, so it’s crispy on the outside while staying tender inside. (Yes, even on a Tuesday night.)
- Umami Bomb: That combo of dashi, mirin, and high-quality soy sauce? It’s the secret weapon—deep, savory, and just sweet enough. The rice absorbs the flavors like a sponge, making every bite taste like a little comfort hug.
- Leftover Hero: Make a big batch on Sunday, and you’ve got lunch for the week. The rice reheats beautifully—no soggy texture, no dry crunch. Honestly, I’ve had it cold the next day, and it’s still solid.
- Budget Flex: Japanese short-grain rice and dashi might sound fancy, but they stretch so far. A few tablespoons of soy sauce and mirin go a long way, and you can bulk it up with whatever veggies or protein you have. My wallet (and my family) thank me.
Step-by-step instructions for wok-tossed umami crunch fried rice
Here's how to transform day-old rice into restaurant-quality Arashi fried rice with crispy pork belly and perfectly separated grains.
Prepare the Pork Belly and Aromatics
Slice the 0.5 lb boneless pork belly into thin, even strips—about ¼-inch thick. The thinner the slices, the faster they'll crisp up in the wok. Pat them dry with paper towels to remove any excess moisture that would prevent proper browning.
In a small bowl, combine the 4 cloves minced garlic cloves and 1 tbsp freshly grated ginger. This aromatic blend forms the flavor foundation of your fried rice. Keep it nearby—you'll need it in the next step. For the pork belly, season both sides generously with 1 tsp Diamond Crystal kosher salt and 0.25 tsp freshly ground white pepper, then set aside.
Create the Umami Sauce Base
In a small saucepan, combine the 0.33 cup high-quality soy sauce, 0.25 cup mirin, and 0.5 cup dashi stock. Bring to a gentle simmer over medium heat and reduce by half—this should take about 3-4 minutes. The sauce should thicken slightly and develop a rich, glossy consistency.
Remove from heat and let cool for 2 minutes. This pre-reduced sauce prevents your fried rice from becoming soggy when you add it later. The balance of soy sauce, mirin, and dashi creates that signature umami depth that makes Arashi fried rice so addictive.
Cook the Pork Belly to Crispy Perfection
Heat a wok or large skillet over high heat until smoking, then add the 2 tbsp neutral high-smoke-point oil. Once the oil shimmers, add the pork belly slices in a single layer. Let them sear undisturbed for 2-3 minutes until the edges turn deep golden brown and crispy.
Flip the pork belly and cook another 1-2 minutes until both sides are crispy. Remove with tongs and set aside on a paper towel-lined plate. The rendered fat in the wok will become the flavor base for your fried rice—don't wipe it out! This is where all the magic happens.
Scramble the Eggs and Build the Fried Rice
Return the wok to medium-high heat and add the garlic-ginger mixture. Stir for 30 seconds until fragrant—you should smell that bright, zesty aroma. Immediately push the aromatics to one side and pour in the 2 whole eggs. Scramble vigorously for 20-30 seconds until just set but still slightly runny.
Add the 4 cups day-old Japanese short-grain rice, breaking up any clumps with your spatula. The rice should sizzle and start to separate immediately. If it sticks, add 1-2 tablespoons of water to help release it from the wok. Work quickly—this is where you achieve those perfectly separated grains.
Finish with Sauce and Garnishes
Pour the reduced umami sauce over the rice and toss vigorously for 1-2 minutes until everything is evenly coated and heated through. The rice should be hot and slightly sticky but not wet. If it looks dry, add another 1 tablespoon of water and toss again.
Remove from heat and immediately stir in the 0.5 cup thinly sliced green onions and 1 tbsp toasted sesame seeds. The green onions add freshness to cut through the richness, while the sesame seeds provide that nutty crunch. Serve immediately while the pork belly is still crispy and the rice maintains its perfect texture.
Pro Tips For Making Arashi Fried Rice
- STIR FAST, STOP OFTEN: I learned this the hard way—arashi fried rice needs constant movement, but not frantic stirring. Work in batches if needed, and pause every 10 seconds to let the rice crisp on the bottom. That’s how you get the signature caramelized bits without burning the mirin.
- USE COLD RICE: Skip the "warm it up first" step—cold day-old rice releases moisture slower, so it actually fries instead of steaming into a mushy pile. Toss it straight from the fridge into the wok; the temperature shock helps too.
- SALT THE DAISHI: The dashi stock is where flavor hides. Add a pinch of salt (about ¼ teaspoon) directly to the dashi before mixing it with mirin and soy sauce. It balances the umami without overpowering the rice’s natural taste.
- TOAST THE SOY SAUCE: Heat 1 teaspoon of soy sauce in the wok before adding oil—just until it darkens slightly (30 seconds max). Pour the rest in later. This deepens the color and aroma, making the final dish look and taste like a restaurant version. (Yes, it’s extra work, but it’s worth it.)
Wine and beer pairings for this arashi fried rice
Light Japanese Sake
For Arashi fried rice, I recommend a dry, crisp sake like Hakkaisan Junmai Ginjo—its clean, slightly nutty profile complements the umami depth without overpowering. Serve it chilled (45-50°F) to balance the richness of the pork belly and soy sauce. The acidity helps cut through the fried rice's stickiness, refreshing your palate between bites. 🍶
Hoppy Japanese Lager
A Sapporo Premium Beer or Asahi Super Dry pairs beautifully with the dish's savory-sweet flavors. The hoppy bitterness (4.5-5.5 IBU) contrasts the fried rice's richness, while the light body prevents it from feeling heavy. For extra fun, try a Yebisu Lager—its subtle citrus notes echo the green onions in the recipe.
Rice Wine Pairings
If you prefer something lighter, Huadiao Jiu (a Chinese rice wine) offers a fruity, floral alternative to sake. Its 15% ABV adds a warming touch without overwhelming the dish. Serve it slightly chilled (50-55°F) to enhance its aromatic qualities. For a non-alcoholic option, Yakult (fermented milk drink) provides a tangy contrast that cleanses your palate.
Umami-Enhanced Wine
For wine lovers, a dry Riesling like Dr. Loosen Blue Slate brings bright acidity and subtle honeyed notes that mirror the mirin in the fried rice. Alternatively, a Pinot Noir with earthy undertones (like Meiomi Pinot Noir) enhances the pork belly's depth. Both wines elevate the dish's umami profile without competing for attention. 🍷
Spicy Variations
If you add chili oil or sriracha to your fried rice, pair it with a Sapporo Black Label (a dark lager with roasted malt notes) or a Japanese shochu like Imo Shochu—both handle the heat beautifully. The caramel malts in the beer or the sweetness of shochu balance the spice while complementing the fried rice's savory base.
Nutrition facts
Frequently asked questions
Why does Arashi fried rice need day-old rice?
Day-old rice is essential because its slightly dried surface creates that perfect crispy texture when stir-fried. Freshly cooked rice releases too much moisture, making it mushy. The starches have also retrograded, giving each grain better structure to hold up to the high-heat wok tossing. Pro tip: Spread cooked rice on a tray and refrigerate uncovered for 30 minutes to speed up drying.
Can I make Arashi fried rice without pork belly?
Swap pork belly for shrimp (tossed in soy sauce), chicken (thinly sliced and marinated), or tofu (pressed and cubed) for a vegetarian version. For extra umami, add dried shiitake mushrooms rehydrated and sliced. The key is maintaining the same crispy texture—cook proteins until golden before adding to the wok.
What's the secret to crispy edges on the rice?
High heat and constant tossing are your best friends! Use a wok or large skillet at maximum heat until smoking. Work in batches if needed, and keep the rice moving vigorously for 2-3 minutes after adding it to the wok. The edges will develop crispy pockets while the center stays tender. A splash of water (1 tbsp) helps create steam for even cooking.
How do I prevent my fried rice from being soggy?
Sogginess happens from too much moisture. Use day-old rice (never fresh), avoid overcrowding the wok, and reduce your sauce beforehand. The pork belly should be removed before adding rice to prevent grease buildup. If needed, add just 1 tbsp water during cooking—not more. Also, serve immediately—the longer it sits, the more it absorbs its own juices.
Can I make this in a regular skillet instead of a wok?
Yes, but with adjustments! Use a 12-inch nonstick skillet on high heat and work in smaller batches. The key is maintaining high heat and tossing constantly. You'll need to stir more frequently to prevent sticking. For extra crispiness, press the rice against the sides of the skillet for 10 seconds before tossing. A well-seasoned cast iron skillet works beautifully too!