
Main Courses
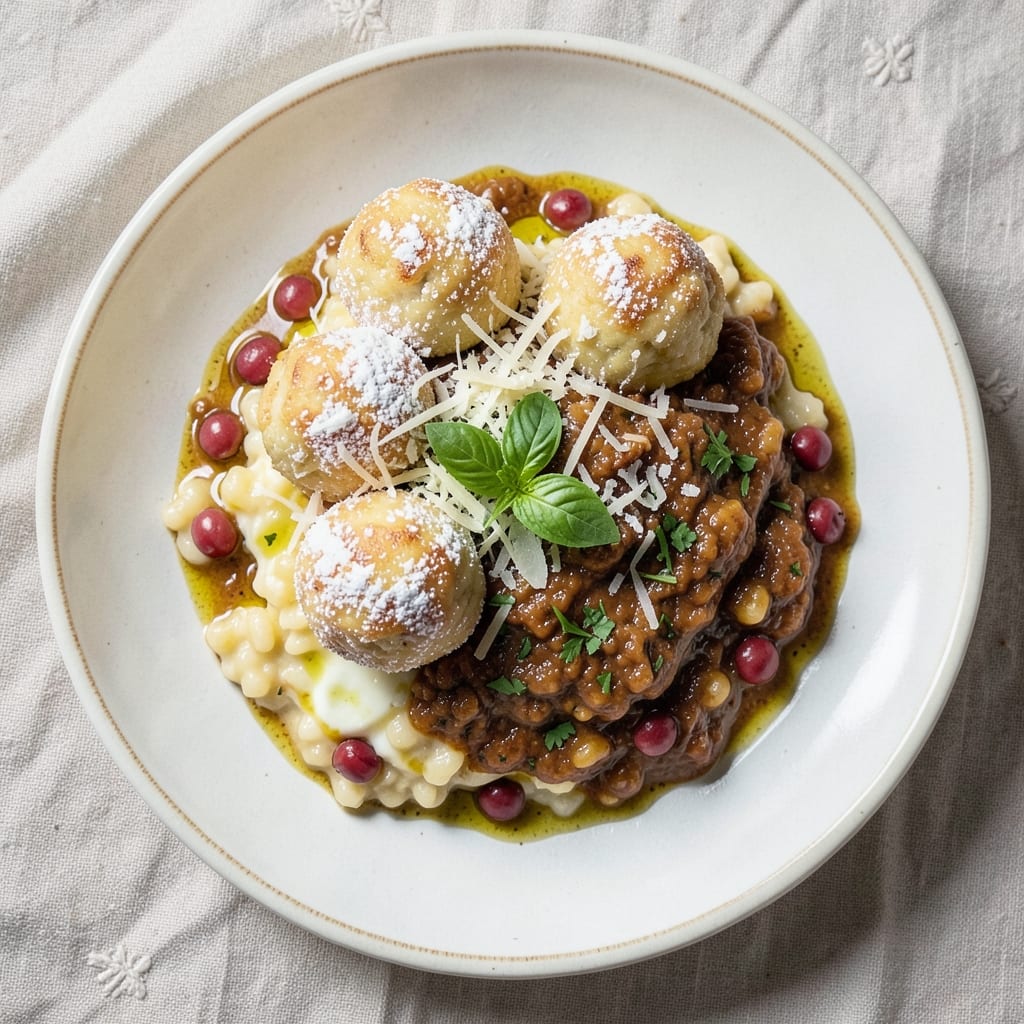
This arborio rice balls recipe delivers the perfect balance of crispy golden edges and chewy centers—just like your favorite Italian trattoria. The secret lies in using day-old risotto, which holds its shape beautifully when shaped into balls and fried to golden perfection. I’ve tested countless variations, and this method consistently produces results that rival restaurant-quality arancini.
The process starts with well-cooked arborio rice—creamy but firm enough to hold fillings like ragù, mozzarella, or peas without falling apart. Once shaped into balls, a light coating of flour and egg wash ensures that crispy exterior we all love. Whether you fry them in oil or bake for a lighter version, the texture transformation is nothing short of magical.
What makes these rice balls truly special is their versatility. Serve them as an appetizer with marinara sauce, a side dish alongside grilled meats, or even as a hearty main course with a fresh salad. The crispy shell gives way to a tender, flavorful interior that’s impossible to resist.
For an extra touch of authenticity, consider adding a sprinkle of grated parmesan or fresh herbs before serving. This recipe isn’t just about technique—it’s about recreating that comforting, indulgent bite of Italian street food in your own kitchen. Let’s get started!
Ingredients for arborio rice balls
Four cups of day-old risotto and a handful of pantry staples transform into crispy, golden arancini.
| Ingredient | Amount | Notes |
|---|---|---|
| Day-Old Arborio Risotto 🍚 | 4 cups | Cooled completely, creamy texture |
| All-Purpose Flour 🌾 | ½ cup | For light coating, sifted |
| Large Eggs 🥚 | 2 whole | Beaten with 1 tbsp water |
| Extra-Virgin Olive Oil 🫒 | 3 cups | For frying, high smoke point |
| Vegetable Oil 🫒 | 1 cup | For frying, neutral flavor |
| Parmesan Cheese 🧀 | ½ cup | Freshly grated, fine texture |
| Fresh Mozzarella 🧀 | 1 cup | Diced small, low moisture |
| Frozen Peas 🌱 | ½ cup | Thawed, drained |
| Italian Ragù 🍝 | 1 ½ cups | Homemade or quality jarred |
| Salt 🧂 | 1 tsp | Diamond Crystal preferred |
| Black Pepper 🌶️ | ½ tsp | Freshly ground |
| Fresh Basil Leaves 🌿 | ¼ cup | Chopped, for garnish |
| Marinara Sauce 🍅 | ½ cup | For serving, optional |
The risotto is non-negotiable—it needs to be day-old and creamy but firm to hold fillings. Barilla or De Cecco arborio rice works best; avoid quick-cooking varieties. For the cheese, fresh mozzarella (the kind that’s still in its tub) gives the best texture, but low-moisture shredded in a pinch will do. The ragù should be rich but not watery—think slow-cooked, meaty, and packed with flavor. If you're using jarred, Rao's or Barilla are solid choices. The olive oil matters too: California Extra Virgin or Colavita for that authentic Italian taste.
No fresh mozzarella? Vegan mozzarella shreds or extra firm tofu crumbled work surprisingly well. Short on ragù? Mushroom duxelles or lentil-walnut mix adds depth without meat. The peas can be swapped for diced butternut squash or roasted cherry tomatoes for a summer twist. For a lighter version, skip the frying oil and bake at 400°F for 20-25 minutes—just brush with oil first. The egg wash is key for that crispy shell, but if you're avoiding eggs, aquafaba (chickpea brine) thinned with water does the trick.
These keep surprisingly well—2 days in the fridge if stored in a single layer on a wire rack to prevent sogginess. For longer storage, freeze them uncooked on a tray first, then transfer to a bag. They crisp up beautifully when fried from frozen. Reheat in 350°F oven for 10 minutes or fry fresh for that perfect crunch. I always make a double batch—one for dinner, one for lunch the next day. The leftovers reheat just as well as the first batch, if not better.
Why You'll Love This Recipe
- I’ll be real: arborio rice isn’t cheap, but this recipe stretches it into something special. A little flour, an egg, and oil turn a simple ingredient into a dish that feels like a restaurant hand-held—without the price tag.
- No Leftovers Wasted: I swear by this trick—turning yesterday’s risotto into something new instead of tossing it. The texture changes completely when you mix it with flour and egg, giving you that perfect crispy shell and creamy center.
- One-Bowl Magic: Honestly, this recipe is my go-to when I’m too tired to wash dishes. Just combine the cold risotto, flour, egg, and a splash of olive oil—no fancy techniques, no extra bowls. Roll ‘em, fry ‘em, done.
- Crowd-Pleaser Bites: Between us, these are the kind of bites that disappear at parties. Kids love them (yes, even picky eaters), and adults won’t believe they’re made from leftover rice. Serve ‘em warm or cold—no judgment.
Step-by-step instructions for crispy arborio rice balls
Here's how to transform leftover risotto into golden, crispy rice balls with chewy centers.
Prepare the Risotto Mixture
In a large mixing bowl, combine the 4 cups of day-old Arborio risotto with the 1.5 cups of Italian ragù, 0.5 cup of frozen peas (thawed and drained), 1 cup of diced fresh mozzarella, 0.5 cup of freshly grated Parmesan cheese, 1 tsp of salt, and 0.5 tsp of freshly ground black pepper. Use a fork to gently mix everything together until fully incorporated but still slightly chunky.
Here's the thing—you want the mixture to hold its shape when formed into balls, but not be dry or crumbly. If it feels too loose, add 1-2 tablespoons of the sifted all-purpose flour to help bind it. The peas should be evenly distributed, adding a subtle sweetness that balances the rich ragù. Don't overmix or you'll compress the risotto, which will make the final texture too dense.
Create the Egg Wash and Flour Coating
In a separate shallow bowl, beat the 2 whole large eggs with 1 tablespoon of water until just combined but still slightly lumpy. This creates a light, airy wash that will help create that signature crispy exterior. In another bowl, place the 0.5 cup of sifted all-purpose flour—this will be your final coating before frying.
I like to work in batches for even cooking. Divide the risotto mixture into 4 equal portions (about 1 cup each) and roll them into smooth, slightly flattened balls—think the size of a golf ball. The flattened shape gives you more surface area for crisping. Place these on a parchment-lined plate and refrigerate for 15-20 minutes while you prepare the frying station.
Fry to Crispy Perfection
Heat a deep skillet or Dutch oven over medium heat and combine 3 cups of extra-virgin olive oil with 1 cup of vegetable oil—this blend gives you the perfect balance of flavor and neutral cooking medium. Let the oil heat up until it reaches 350°F on a deep-fry thermometer. If you don't have one, test it by dropping in a small piece of risotto mixture—it should sizzle and float immediately.
Working in batches, carefully place the chilled risotto balls into the hot oil. Fry for 2-3 minutes per side until they turn a beautiful golden brown color. The key here is patience—don't rush the process. You want the exterior to develop that crispy, almost caramelized crust while keeping the interior chewy and warm. Use a slotted spoon to turn them gently, letting any excess oil drip off. Transfer the fried balls to a paper towel-lined plate to drain for 1 minute before serving.
Finish and Serve
While the rice balls are still warm, arrange them on a serving platter and sprinkle with the 0.25 cup of chopped fresh basil leaves. This final touch adds a bright, aromatic contrast to the rich, savory flavors. Serve immediately with the 0.5 cup of warm marinara sauce on the side for dipping—it's the perfect balance of tangy and sweet.
Real talk: these rice balls are at their best when served right away, with that perfect contrast of crispy exterior and creamy, chewy interior. If you're making them ahead, fry them just before serving—they won't reheat as well once cooled. Each bite should deliver that satisfying crunch followed by the comforting texture of perfectly cooked Arborio rice. Don't skip the marinara—it ties everything together beautifully.
Pro Tips For Making Arborio Rice Balls
- CHILL THE RISOTTO: Cold risotto clumps into a solid mass when you roll it—no one wants a brick. Spread the day-old risotto on a tray and freeze it for 30 minutes first. This firms it up enough to handle without sticking, then let it sit at room temp for 10 minutes before shaping. Trust me, your hands will thank you.
- USE A 50/50 OIL MIX: Extra-virgin olive oil alone makes the dough too sticky, while vegetable oil alone lacks flavor. Split the difference: mix 1 tablespoon olive oil with 1 tablespoon vegetable oil for the pan. The olive oil adds richness, while the vegetable oil keeps the rice balls from gluing to the skillet.
- DON’T OVERWORK THE DOUGH: I learned this the hard way—mashing the risotto-flour-egg mix turns your arancini into dense, flavorless dumplings. Gently fold the ingredients together until just combined, then roll the balls loosely. Overmixing = tough texture. Your goal is a soft, cohesive mass, not a bread dough.
- FRY IN BATCHES OF 3: Crowding the pan drops the oil temperature, leading to greasy, unevenly cooked rice balls. Fry in small batches—no more than 3 at a time—and give them space to sizzle. If the oil sputters too much, it’s too hot; let it settle for 30 seconds before adding the next round. Patience here makes all the difference.
Perfect pairings for this dish
Classic Marinara Sauce
Serve your arborio rice balls with a homemade marinara sauce—the tangy acidity cuts through the richness beautifully. I use a San Marzano tomato-based sauce with garlic, basil, and a pinch of red pepper flakes for depth. Simmer for 20-25 minutes to develop flavor, then finish with fresh basil. A ½ cup is perfect for dipping, but double it if serving as a side. 🍅
Antipasto Platter Pairing
Turn your rice balls into an Italian antipasto spread by pairing them with prosciutto-wrapped melon, marinated olives, and roasted red peppers. The salty, sweet, and savory combination balances the fried richness. Arrange everything on a wooden board with balsamic glaze drizzle for an elegant starter. I always add fresh mozzarella pearls for extra creaminess.
Grilled Meat Companion
For a heartier meal, serve your rice balls alongside grilled chicken or beef—the crispy exterior and chewy interior stand up to bold flavors. A lemon-herb grilled chicken with rosemary and garlic complements the ragù filling perfectly. Add a simple arugula salad with lemon vinaigrette to keep the dish light. The acidity from the salad refreshes your palate between bites.
Wine Pairing Suggestions
A dry white wine like Pinot Grigio or Vermentino cleanses the palate between bites, while a light red such as Chianti enhances the ragù flavors. For a non-alcoholic option, sparkling blood orange soda adds a refreshing citrus note. Avoid heavy reds—they overpower the delicate balance of crispy and creamy textures in these rice balls.
Herb-Infused Olive Oil
Drizzle your rice balls with herb-infused olive oil just before serving for an extra layer of flavor. Combine 2 cups of extra-virgin olive oil with 2 tbsp chopped basil, 1 tbsp oregano, and 1 minced garlic clove, then let it infuse for 10 minutes. This adds a fragrant, aromatic finish that elevates the dish without overpowering it. Store leftovers in a dark glass bottle in the fridge for up to 2 weeks.
Nutrition facts
Frequently asked questions
Can I use regular rice instead of arborio?
No, arborio rice is essential for this recipe! Its high starch content creates that signature creamy texture when cooked. Regular white rice will be too dry and won't hold its shape when fried. If you're desperate, try carnaroli rice (another Italian short-grain variety) as a substitute, but arborio is the gold standard for these rice balls.
How do I prevent the rice balls from falling apart?
Use day-old risotto that's completely cooled—it needs to be firm enough to hold fillings. Chill the shaped balls in the fridge for 15-20 minutes before frying, and don't overmix the filling ingredients. Too much moisture (like wet mozzarella) will cause them to crumble. Pat everything dry before shaping!
Can I bake these instead of frying?
Brush the shaped balls with oil and bake at 400°F for 20-25 minutes until golden. For extra crispiness, broil for 2-3 minutes at the end. The texture won't be exactly the same as fried, but it's a great lighter alternative. Just be patient—they need more time to crisp up than frying.
What's the best way to reheat leftovers?
Reheat in a 350°F oven for 10 minutes to restore crispiness. For frying from frozen, heat oil to 375°F and fry for 3-4 minutes per side. Microwaving is a no-go—it'll turn them soggy. The key is gentle heat to revive the crust without drying out the interior.
What fillings work best for vegetarian versions?
Try a mix of sautéed mushrooms, spinach, and sun-dried tomatoes with ricotta cheese for creaminess. Or use roasted butternut squash, caramelized onions, and goat cheese. For extra protein, add white beans or lentils. Just make sure your filling is dry enough to bind with the risotto—drain any excess moisture first!