
Side Dishes
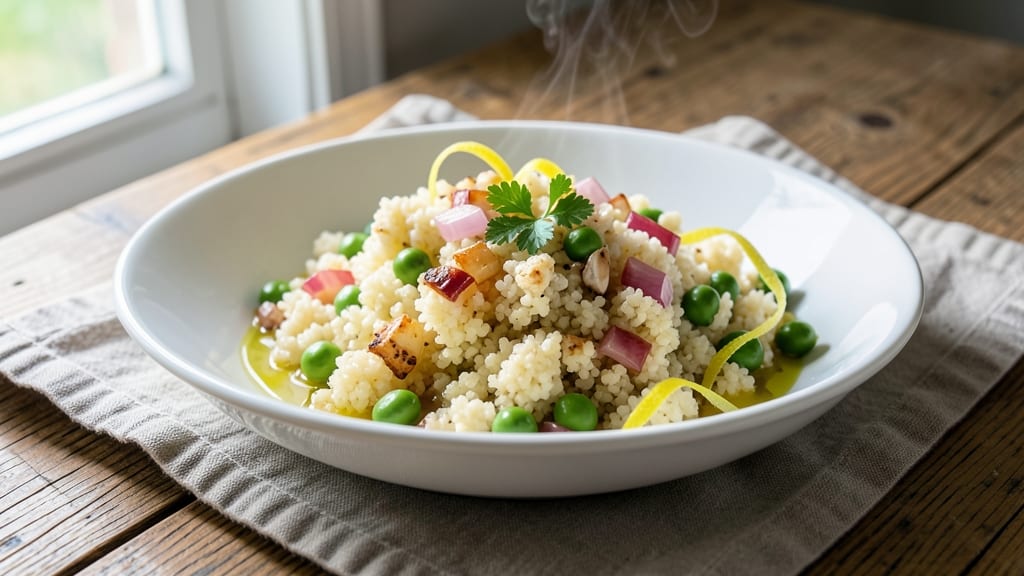
This cauliflower rice and peas recipe delivers a vibrant, nutrient-packed side dish that’s ready in just 15 minutes—perfect for pairing with grilled proteins or as a standalone vegetarian meal.
The secret lies in balancing the natural sweetness of peas with the mild, slightly nutty flavor of cauliflower rice, all while keeping the texture bright and fresh.
Whether you're meal prepping for the week or whipping up a quick weeknight dinner, this dish is a game-changer for anyone looking to boost their vegetable intake without sacrificing flavor.
What sets this recipe apart is its versatility—it works with fresh, frozen, or canned peas, and you can easily customize it to fit dietary needs, including vegan or gluten-free preferences.
The combination of garlic, lemon zest, and fresh herbs infuses the dish with bright, aromatic notes that elevate even the simplest meal. By the time you’re done, you’ll have a side that’s not only packed with nutrients but also visually stunning and irresistibly flavorful. Ready to transform your table?
Ingredients for cauliflower rice and peas
Bright, nutrient-packed ingredients that come together in minutes for a vibrant side dish.
| Ingredient | Amount | Notes |
|---|---|---|
| Fresh Cauliflower 🥬 | 4 cups | Riced, fresh or frozen |
| Fresh or Frozen Peas 🌱 | 1 ½ cups | Thawed if frozen |
| Garlic Cloves 🧄 | 3 cloves | Minced for aromatic depth |
| Lemon Zest 🍋 | 1 tbsp | Freshly grated for brightness |
| Fresh Parsley 🌿 | ¼ cup | Chopped, for freshness |
| Extra-Virgin Olive Oil 🫒 | 2 tbsp | High quality, fruity |
| Diamond Crystal Kosher Salt 🧂 | ½ tsp | Fine grain preferred |
| Freshly Ground Black Pepper 🌶️ | ¼ tsp | For subtle heat |
| Fresh Dill 🌿 | 2 tbsp | Chopped, optional but recommended |
| Vegetable Broth 💧 | ½ cup | Low-sodium preferred |
| Red Bell Pepper 🌶️ | ½ cup | Diced, for color and crunch |
| Red Onion 🧅 | ¼ cup | Finely diced for sweetness |
| Fresh Lemon Juice 🍋 | 1 tbsp | Balances flavors |
Start with fresh cauliflower—the key here is to rice it finely for that perfect texture. I grab mine from the produce section at Whole Foods or use pre-riced frozen cauliflower from Trader Joe's for convenience. Fresh peas are ideal, but frozen work just as well—no need to thaw them first. The garlic should be freshly minced (not jarred) for that bold, aromatic punch. For the herbs, I always double-check the parsley and dill are bright green with no wilted leaves—Trader Joe's has the freshest selection. The red bell pepper adds a pop of color and sweetness that balances the earthy cauliflower perfectly.
No fresh peas? Frozen or canned work just fine—just drain well. Skip the garlic? Garlic powder at half the amount is a decent swap, though fresh is always better. The lemon zest and juice can be substituted with bottled lemon juice if you're in a pinch, but fresh zest makes a world of difference. Want extra crunch? Add shredded carrots or snap peas. For a richer flavor, stir in 1 tbsp nutritional yeast—it adds a cheesy note without dairy. The vegetable broth can be swapped for water, but the broth adds depth that water can't match.
This dish keeps beautifully in the fridge for 4-5 days—perfect for meal prep. Store it in an airtight container with a splash of water to maintain moisture. For longer storage, freeze portions in ice cube trays and transfer to a bag for up to 3 months. Reheat gently in a skillet or microwave until warmed through. The flavors actually deepen after the first night, so leftovers often taste even better. I always make a double batch—one for dinner, one for lunches the next week.
Why You'll Love This Recipe
- No-Rice Nightmare: I swear by this when I forget rice—just pulse the cauliflower, toss it in a pan, and boom. The texture mimics rice perfectly, but with half the carbs and all the satisfaction. (Yes, even my picky husband doesn’t complain.)
- Zesty Garlic Magic: That lemon zest and minced garlic? It’s the secret weapon. The bright, herby finish cuts through the peas’ sweetness while the garlic adds this warm, almost buttery depth—like a hug in a bowl. I’ll be real: I’ve eaten it straight from the pan.
- Lunchbox Hero: Pack this cold or at room temp—it holds up beautifully. Sprinkle extra parsley on top for color, and suddenly you’ve got a meal that’s fancy enough for a potluck but simple enough for a school lunch. My kids actually finish their veggies now.
- Budget Bright Spot: Fresh peas or frozen? Both work, and cauliflower stays cheap. One head and a bag of peas stretch this into three meals—plus, the leftovers reheat like a dream. Honestly, it’s my go-to when groceries feel tight but I still want something that tastes like I tried.
Step-by-step instructions for bright green cauliflower rice and peas
This vibrant side comes together faster than you can say "fresh herbs"—just 15 minutes of hands-on time.
Prep and Sauté the Aromatics
Heat the 2 tablespoons extra-virgin olive oil in a large skillet over medium-high heat until shimmering. Add the 0.25 cup finely diced red onion and cook for 2-3 minutes until softened and just beginning to turn translucent. This is where the sweetness develops—don't rush it.
Add the 3 cloves minced garlic and 0.5 cup diced red bell pepper to the pan. Cook for another 2 minutes until the garlic is fragrant (about 30 seconds) and the bell pepper begins to soften. Here's the thing—if you smell burning, your heat is too high. Reduce to medium heat immediately to preserve those delicate flavors.
Add Cauliflower Rice and Cook Until Tender
Push the aromatics to one side of the skillet and add the 4 cups riced cauliflower to the empty space. Stir gently to coat the cauliflower with the oil, then let it sit undisturbed for 1-2 minutes to develop a light golden color. This step prevents mushy cauliflower rice—don't skip it.
After the initial sear, stir the cauliflower and cook for 4-5 minutes until it's tender but still holds its shape. You'll know it's ready when the edges begin to soften slightly and the texture resembles rice. If you're using frozen cauliflower rice, start with this step directly—no need to thaw first.
Incorporate Peas and Seasonings
Add the 1.5 cups fresh or thawed peas to the skillet and stir to combine with the cauliflower. Pour in the 0.5 cup vegetable broth and let it simmer for 2 minutes until mostly absorbed. This step keeps everything moist while allowing the peas to soften just enough to release their natural sweetness.
Season generously with 0.5 teaspoon Diamond Crystal kosher salt and 0.25 teaspoon freshly ground black pepper, then sprinkle in the 1 tablespoon lemon zest. Stir everything together and cook for another 1 minute to let the lemon brighten the dish. The zest should infuse the cauliflower with a subtle citrus aroma—this is what makes it taste fresh, not just lemony.
Finish with Herbs and Lemon Juice
Remove the skillet from heat and stir in the 0.25 cup chopped fresh parsley and 2 tablespoons chopped fresh dill. The herbs should look vibrant and fresh—if they're wilted, they'll make the dish taste dull. Add the 1 tablespoon fresh lemon juice and toss everything together one final time.
Taste and adjust seasoning if needed—this is your chance to balance the flavors. The dish should be bright, slightly tangy, and seasoned to taste. If it needs more salt, add it now. If it needs more acidity, squeeze in another ½ teaspoon lemon juice. Serve immediately while the cauliflower rice is still warm and the herbs are at their peak freshness.
Pro Tips For Making Cauliflower Rice And Peas
- Sear the Cauliflower First: Toss the raw cauliflower rice in a hot, dry pan for 2-3 minutes before adding anything else—this builds flavor and prevents mushiness. I learned this the hard way when my first batch turned into a sad, watery pile.
- Thaw Peas Properly: If using frozen peas, don’t just dump them in—thaw them in cold water for 5 minutes first, then drain well. This keeps them bright and prevents a soupy mess in your pan.
- Smash the Garlic: Mince the garlic finely (almost like a paste) so it blends smoothly into the dish instead of sitting as chunks. I was skeptical until I tried it—now it’s non-negotiable.
- Zest Before Juicing: Use a microplane for the lemon zest (not a grater) and save the juice for later—just a splash at the end. Fresh zest brightens the dish, while juice can make the cauliflower soggy.
Dietary considerations for this dish
Vegetarian-Friendly Base
This dish is naturally vegetarian, packed with plant-based protein from peas and fiber-rich cauliflower. The garlic, lemon, and herbs add vibrant flavors without any animal products. For extra protein, stir in ½ cup cooked chickpeas or ¼ cup crumbled tofu at the end. 🌱
Vegan Adaptations
Already vegan-friendly, but watch for hidden dairy in vegetable broth—opt for a low-sodium, vegan-certified broth like Pacific Foods or Annie's. Skip any cheese garnishes and use nutritional yeast for a cheesy flavor without dairy. The dish remains completely plant-based while keeping all its bright, fresh qualities.
Gluten-Free Assurance
All ingredients in this recipe are naturally gluten-free, but always double-check labels on vegetable broth and seasoning blends. I recommend Glutino or Primal Kitchen broths for certified gluten-free options. The cauliflower rice and peas provide a safe, flavorful base for anyone with gluten sensitivities or celiac disease.
Low-Carb Considerations
This dish is inherently low-carb, with only 8 grams of net carbs per serving (without additional ingredients). The cauliflower rice replaces traditional rice while keeping the dish satisfying. For even fewer carbs, skip the red bell pepper and red onion, or use cauliflower rice exclusively as the base.
Allergen Awareness
Common allergens here include garlic and herbs—always check for sensitivities. For a nut-free version, avoid any garnishes like pine nuts. The dish is also soy-free and dairy-free in its base form, making it safe for most common food allergies when prepared carefully.
Nutrition facts
Frequently asked questions
Can I use frozen cauliflower rice instead of fresh?
Frozen cauliflower rice works perfectly—just skip thawing and add it directly to the pan with the other ingredients. The texture will be just as tender when cooked properly. For best results, use pre-riced frozen cauliflower to save time.
What if I don't have fresh peas?
Frozen or canned peas work beautifully—just drain them well before adding. For canned peas, rinse under cold water to remove excess sodium. If using frozen, there's no need to thaw first. The dish will still be bright and flavorful with either option.
Can I make this dish ahead of time?
Yes! Store it in an airtight container in the fridge for 4-5 days or freeze for up to 3 months. The flavors actually deepen overnight. Reheat gently in a skillet or microwave until warmed through. For freezing, portion into ice cube trays for easy single-serving use.
How can I make this dish more flavorful?
Boost the flavor with 1 teaspoon smoked paprika or a pinch of red pepper flakes for warmth. For extra richness, stir in 1 tablespoon toasted pine nuts or top with crumbled feta cheese (if not vegan). Fresh herbs like cilantro or basil also add a lovely twist.
Is this recipe suitable for meal prep?
Perfect for meal prep! Double the recipe and store in glass containers with a splash of water to maintain moisture. Reheat portions in a skillet with a little olive oil for 2-3 minutes to restore crispness. The dish keeps well for 5 days in the fridge and reheats beautifully.