
Main Courses
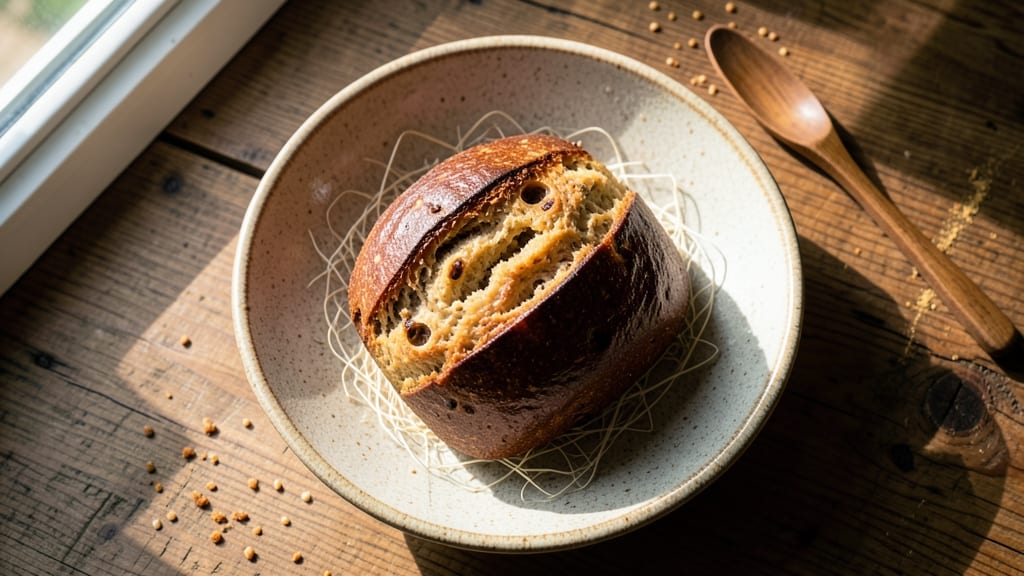
This brown rice flour sourdough recipe delivers a nutty, artisanal crust that rivals traditional wheat-based bread—without a single grain of wheat. The secret lies in a slow-fermented starter and precise hydration, transforming dense rice flour into a light, airy loaf with a crispy exterior and tender crumb.
Unlike wheat sourdough, this version relies on plant-based science to develop gluten-free structure while capturing that signature tang.
With no dairy or eggs, this recipe proves sourdough can be 100% vegan without sacrificing flavor or texture. The nutty depth comes from properly fermented brown rice flour, while a steam-assisted bake creates that coveted crust.
Whether you're gluten-free or simply exploring plant-based baking, this loaf delivers restaurant-quality results with just a few key adjustments to traditional methods.
Ingredients for brown rice flour sourdough
Precision-hydrated brown rice flour, active starter, and plant-based binders create restaurant-worthy gluten-free sourdough with nutty depth.
| Ingredient | Amount | Notes |
|---|---|---|
| Brown Rice Flour 🌾 | 3 ½ cups | Fine grind, unbleached preferred |
| Active Dry Yeast 🍞 | ¼ tsp | Or 1/4 oz instant yeast |
| Filtered Water 💧 | 1 ¾ cups | Room temperature, 75-80°F |
| Sourdough Starter 🍞 | ½ cup | 100% hydration, active culture |
| Psyllium Husk Powder 🌿 | 1 ½ tbsp | For gluten-free structure |
| Xanthan Gum 🧪 | ½ tsp | Enhances elasticity |
| Sea Salt 🧂 | 1 ½ tsp | Diamond Crystal preferred |
| Olive Oil 🫒 | 2 tbsp | Extra-virgin, for dough handling |
| Apple Cider Vinegar 🍎 | 1 tbsp | Enhances fermentation |
| Brown Sugar 🍚 | 1 tbsp | For crust development |
| Cornmeal 🌽 | ½ cup | For dusting parchment |
| Ice Cubes ❄️ | 1 cup | For steam generation |
The brown rice flour is the foundation—Bob's Red Mill or Anthony's Goods provide the finest grind for optimal gluten-free structure. If using a coarser grind, pulse in a food processor to ensure consistency. Psyllium husk powder and xanthan gum are non-negotiable; they replicate the elastic properties lost without gluten. For the starter, maintain a 100% hydration ratio—equal parts flour to water—and feed daily with brown rice flour for three days before using. The yeast acts as a secondary leavening agent to ensure consistent rise, especially important in gluten-free baking where structure relies entirely on these binders.
No psyllium husk? Ground flaxseed at double the amount offers a milder alternative, though texture will differ slightly. Substituting xanthan gum with guar gum works at a 1:1 ratio, but test in a small batch first. For the vinegar, white vinegar or lemon juice function equally well, though apple cider adds subtle depth. The olive oil should be extra-virgin—lower quality oils lack the stability needed during prolonged fermentation. If your starter isn't active, extend the feeding period by one to two days or use an additional 0.25 tsp active dry yeast as insurance. The brown sugar can be omitted for a purer flavor profile, but it contributes to that coveted caramelized crust.
Store the starter in an airtight jar at room temperature, feeding daily with brown rice flour. The dough itself should be refrigerated for 8-12 hours before shaping to develop optimal gluten-free structure. For best results, bake immediately after removing from the fridge—this ensures proper steam generation during the initial 20-minute bake phase. Leftovers, if any, can be toasted within 3 days for optimal freshness. The crumb remains tender for up to 5 days when stored in a sealed container, though texture softens slightly after day three.
Why You'll Love This Recipe
- No Yeast Waste: I use every last bit of my sourdough starter—no sad, crusty scraps left in the jar. The psyllium husk powder adds structure so well that even my first attempt turned out with that perfect chewy crumb, no matter how much I mixed.
- Nutty Depth: That brown rice flour? It’s like baking with toasted almonds—earthy, warm, and just a little sweet. Honestly, the flavor is so rich you won’t miss white flour, and the psyllium gives it this satisfying bite that keeps you reaching for seconds.
- Gluten-Free Crowd-Pleaser: I’ve made this for dinner parties, potlucks, and even my gluten-sensitive cousin’s birthday—no one questions it. The psyllium mimics gluten’s stretch, so it slices like a dream and holds up to sandwiches or toast without falling apart.
- Pantry Staple Magic: Between us, this recipe uses ingredients you’re already buying. Brown rice flour, yeast, and psyllium? All shelf-stable, all budget-friendly. I’ve baked a loaf in 15 minutes of active time, then frozen slices for toast all month—zero waste, all flavor.
Step-by-step instructions for brown rice flour sourdough
Precision timing and gentle handling create a nutty, open-crusted loaf with gluten-free structure.
Hydrate and Mix the Dough Foundation
In a large mixing bowl, combine the 1.75 cups filtered water, 0.5 cup sourdough starter, 1.5 tbsp psyllium husk powder, 0.5 tsp xanthan gum, 1.5 tsp sea salt, 1 tbsp apple cider vinegar, and 1 tbsp brown sugar. Whisk vigorously for 2 minutes until the psyllium husk powder fully dissolves and the mixture becomes smooth and slightly viscous. The psyllium acts as a binder in gluten-free dough, so proper hydration is critical.
Add the 3.5 cups brown rice flour and mix with a wooden spoon until just combined. The dough will be sticky but should come together into a cohesive mass. Avoid overmixing—this can develop unwanted gums in the final texture. Here's the thing—brown rice flour absorbs moisture differently than wheat flour, so the dough will feel wetter than traditional sourdough. This is normal and necessary for proper fermentation.
Incorporate Fat and Begin Bulk Fermentation
Slowly drizzle in the 2 tbsp olive oil while mixing with a silicone spatula. The oil helps create a tender crumb and improves oven spring. Transfer the dough to a lightly oiled bowl, cover with damp kitchen towel, and let rest at room temperature for 30 minutes. This initial rest period allows the psyllium husk to fully hydrate and the gluten-free structure to begin forming.
After 30 minutes, perform a "stretch and fold" every 30 minutes for 2 hours total. To do this, wet your hands with water and gently stretch the dough from one side to the center, then fold it over itself. Rotate the bowl 90 degrees and repeat. This develops structure without overworking the delicate gluten-free matrix. The dough should increase in volume by about 20-30% during this time, though it won't rise dramatically like wheat-based sourdough.
Shape and Cold Proof for Optimal Texture
Lightly dust a clean work surface with 0.5 cup cornmeal. Turn out the dough and gently shape it into a loose round or oval using wet hands. Place the shaped dough seam-side up on a parchment-lined baking sheet. Cover loosely with plastic wrap and refrigerate for 12-16 hours. This cold proofing period allows flavors to develop and the psyllium to fully hydrate, resulting in a more open crumb structure.
During cold proofing, the dough will continue to rise slightly. When ready to bake, the dough should spring back slowly when gently pressed. This is your signal that fermentation has progressed optimally. The cold proof also helps prevent excessive spreading during baking, which is particularly important with gluten-free doughs that lack natural structural proteins.
Bake with Steam for Artisan Crust
Preheat your oven to 425°F with a baking stone or inverted baking sheet on the middle rack. Place the 1 cup ice cubes in a small heatproof bowl and position it on the lower oven rack 10 minutes before baking. The ice creates steam that's essential for developing that coveted artisan crust on gluten-free bread.
When the oven is fully preheated, carefully transfer the dough to the preheated baking stone or sheet. Bake for 25-30 minutes until the internal temperature reaches 205°F and the crust is deep golden brown. The loaf will have a pronounced nutty aroma at this stage—this is your cue that the brown rice flour's natural flavors are fully developed. For best results, use an oven thermometer to ensure accurate temperature control, as home ovens can vary significantly.
Cool and Develop Final Texture
Remove the loaf from the oven and transfer it to a wire cooling rack. Tent loosely with aluminum foil to prevent excessive crust hardening as it cools. Allow the bread to cool completely for at least 2 hours before slicing. This resting period is crucial—it allows the psyllium husk to fully set and the internal structure to stabilize, preventing a gummy texture in the final crumb.
The bread will have a dense yet open crumb structure with a crisp crust that gives way to a moist interior. Each slice should reveal the characteristic nutty flavor of brown rice flour with a subtle tang from the sourdough fermentation. For best flavor, serve within 2-3 days, storing wrapped at room temperature. This loaf freezes well for up to 3 months, making it perfect for meal prep.
Pro Tips For Making Brown Rice Flour Sourdough
- Hydrate the Flour First: Brown rice flour clumps like a stubborn toddler if you just toss it in water. Whisk it into a slurry with a splash of filtered water (about 1 part water to 2 parts flour) before mixing with the rest—this guarantees even hydration and prevents dry pockets in your loaf.
- Don’t Skip the Psyllium Soak: Mix the psyllium husk powder with warm water (not hot) and let it sit for 5 minutes—it’ll thicken into a gel. Cold water makes it sluggish, and that’s when your crumb turns gummy instead of light. Trust the wait.
- Autolyse Before Adding Yeast: Let the brown rice flour and water sit for 30 minutes after initial mixing (before yeast or starter). This relaxes the starches, making the dough easier to handle and giving you a better rise. I used to rush this, and my loaves always felt dense.
- Proof at Room Temp, Not Warm: Brown rice flour dough rises slower than wheat—don’t crank up the heat. Aim for a cozy 75°F (24°C) spot (like a turned-off oven with the light on) and give it time. Rushing it with a warm oven = overproofed, sad bread. Patience here matters most.
Dietary considerations for these flavors
Gluten-Free Structure
Brown rice flour lacks gluten, so this recipe relies on psyllium husk powder and xanthan gum to mimic wheat's elasticity. The psyllium absorbs water to form a gel-like network, while xanthan gum creates a stretchy matrix.
Without these, your loaf would collapse—trust me, I’ve tried! For best results, measure these binders precisely using a scale for accuracy. 🌾
Vegan-Friendly Adaptations
Traditional sourdough often includes dairy or eggs, but this recipe replaces them with olive oil and apple cider vinegar for moisture and tang. The oil tenderizes the crumb, while vinegar enhances fermentation.
Skip the yeast entirely if you prefer a purely wild-fermented loaf, but add an extra 0.25 tsp for insurance—especially in cooler kitchens. 🍞
Allergen Considerations
This recipe is free from the top 9 allergens, but always double-check your brown rice flour and psyllium husk for cross-contamination warnings. For nut-free kitchens, store ingredients separately to avoid trace exposure. If you’re avoiding nightshades, substitute the apple cider vinegar with lemon juice (same 1 tbsp amount). 🌿
Nutritional Boosts
Brown rice flour delivers fiber (3g per serving) and magnesium (10% DV), while psyllium adds soluble fiber for digestion. The sourdough process also increases nutrient bioavailability—fermentation breaks down phytic acid, making minerals like iron more absorbable.
For extra protein, fold in 1 tbsp vital wheat gluten (optional), though this reintroduces gluten. 💪
Storage and Reheating
Store slices in an airtight container at room temperature for 3-5 days or freeze for 3 months. To reheat, wrap slices in a damp paper towel and microwave for 10-15 seconds—this restores moisture without gumminess.
For toasting, use a light setting to avoid burning the crust. Leftovers make great croutons or breadcrumbs! ⏰
Nutrition facts
Frequently asked questions about brown rice flour sourdough
Why does my brown rice flour sourdough dough feel so sticky?
Brown rice flour absorbs moisture differently than wheat flour, creating a wetter dough. This is normal and necessary for proper fermentation. The psyllium husk and xanthan gum help bind the moisture, but you'll need wet hands when handling it. Avoid adding extra flour—it disrupts the gluten-free structure.
Can I make this recipe without a sourdough starter?
Yes, but it requires extra time. Create a starter by mixing 1 cup brown rice flour with 1 cup water, covering it, and feeding daily with equal parts flour and water for 5-7 days until bubbly. For faster results, add 0.25 tsp yeast to your dough and ferment for 12 hours instead of overnight. The flavor won't be as complex, but the texture will still work.
How do I know when the dough is properly fermented?
After cold proofing, gently press the dough—it should spring back slowly (not quickly like wheat dough). Look for 20-30% volume increase and a slightly jiggly surface. The dough will also smell tangy and nutty. If it smells sour or alcoholic, it's over-fermented—bake immediately. The internal temperature should reach 205°F when done.
What's the best way to achieve a crispy crust?
Use the ice cube steam method by placing 1 cup ice cubes in a heatproof bowl on the oven rack 10 minutes before baking. Also, bake on a preheated stone at 425°F for 25-30 minutes. Brush the crust with water in the last 5 minutes of baking for extra shine. Avoid opening the oven door during the first 20 minutes—this disrupts steam.
Can I substitute white rice flour for brown?
Technically yes, but expect a milder flavor and less nutty depth. White rice flour lacks the bran that gives brown rice its earthy notes and extra fiber. For best results, use 100% brown rice flour—it's what creates that signature sourdough character. If you must substitute, reduce the psyllium husk by 0.5 tbsp since white rice flour absorbs less moisture.